Simple Christmas Tour - New House

2015 Christmas House Tour - Classy Glam Living

I should thank the eager Christmas enthusiasts in our neighbourhood that started decking their exteriors in early November.  It got our little man all hyped up and on repeat...  "When are we putting up our Christmas decorations?  Mommy I'll help you!"  "Do we have (exterior) lights like those?"  And when he was told no, we don't, "Aw~~...  can we get them?"  Well, you know the drill...

Don't get me wrong.  Christmas is my favourite time of the year - who doesn't love all the sparkly festival decorations?  I love decorating for Christmas, with Christmas tunes playing in the background on the radio.  It's also a good opportunity to refresh decor around the house.  

With all the hussle and bustle leading up to the Holidays, I opted to keep our Christmas decor simple.

So with little man's help, while he also managed to flip through a Lego catalogue and announced his Christmas wishlist, we put up the Christmas tree.  That was several weekends ago!  After playing around with placements and such, I think I'm happy with our Christmas decor this year.  

Welcome to our new house (not so new anymore)!  This is our entryway console table, on which I placed two IKEA faux sheepskin to mimic fluffy snow for the grazing brass reindeers.  I like how the whiteness of the sheepskin tones down all the gold accents on the table.  

2015 Christmas Entryway New House | Classy Glam Living | IKEA faux sheepskin
2015 Christmas Entryway Vintage Brass Accents | Classy Glam Living

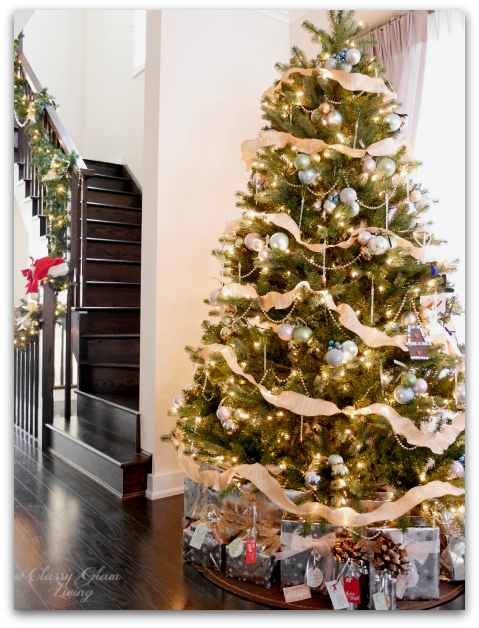
Coming in through the hallway, I kept the garland on the staircase simple this year.  I used to wrap these faux garlands around the banister, but I noticed how the metal parts would scratch the railings at our old house.  This time around, I just used floral wires to gather the garland at the swivels.

2015 Christmas Hallway | Classy glam Living | Stockings on Railing

We've placed our Christmas tree at the entrance of the sitting area, so that we can enjoy its twinkling lights from most of the ground floor.  And those are real presents underneath the tree!  Wrapping up fake presents is not for me.

2015 Christmas Tree New House | Classy glam Living

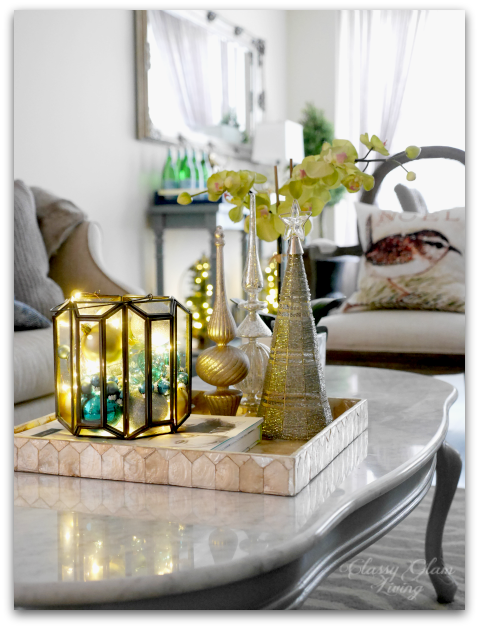
I've started to hoard a good supply of LED stringlights* this Christmas.  I've put them anywhere and everywhere I can!  Here in our sitting area, I placed a strand of the LED lights into the container of extra ornaments.  The lights add even more twinkling effect to the beaded cone tree and the mercury glass tabletop finials.

2015 Christmas Living Room | LED stringlights ornaments | Classy Glam Living
2015 Christmas Coffeetable Decor | Classy Glam Living

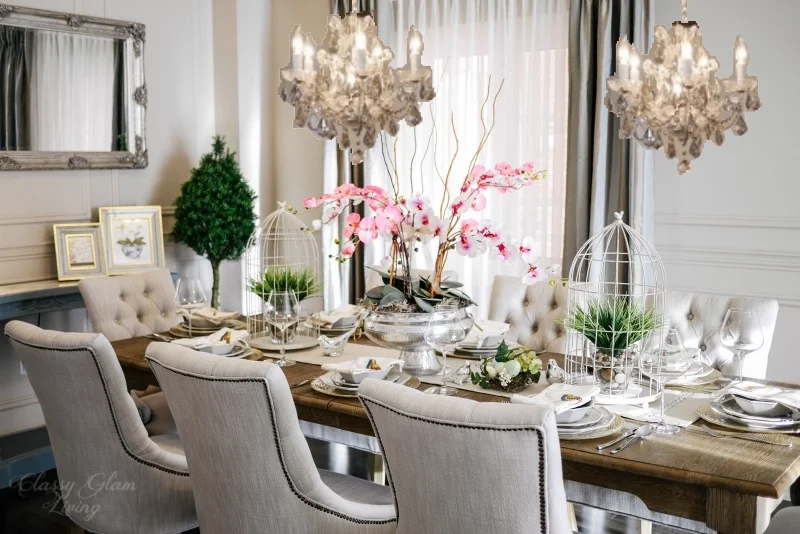
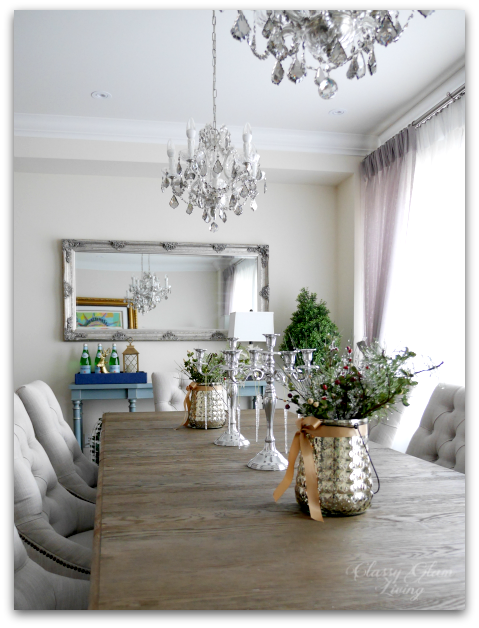
For everyday Christmas decor on the dining table, I added two pots of faux greeneries with some berries on either side of the candelebras.  I pulled apart 2 twigs of faux branch arrangements and fanned out the smaller branches into the mercury glass lanterns.  

2015 Christmas Simple Dining Room | Classy Glam Living

The Mr. commented that setting the table makes it more festive, but I'll save that for when my family comes over for Christmas dinner =)

2015 Christmas Dining Room Console Table | Classy Glam Living
2015 Christmas Dining Table Decor | Candelebra DIY faux greeneries | Classy Glam Living

The console table is another spot for me to use those beloved LED stringlights, which I wrapped around tiny Christmas trees placed in the birdcages.  Those are the same birdcages we used in the Spring Tablescape decor back in old house.

2015 Christmas Console Table Decor | Classy Glam Living

Aside from string lights, I've also added some gold accessories to our Christmas collection.  This gold resin deer from Target...

2015 Christmas Console Table Decor | Classy Glam Living

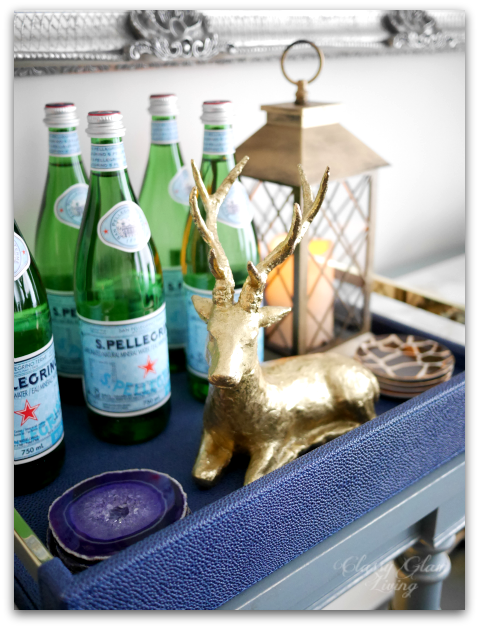
... and this pair of gold antlers were part of my recent haul.

2015 Christmas Console Table Decor | Ornaments in glass display box gold antlers | Classy Glam Living

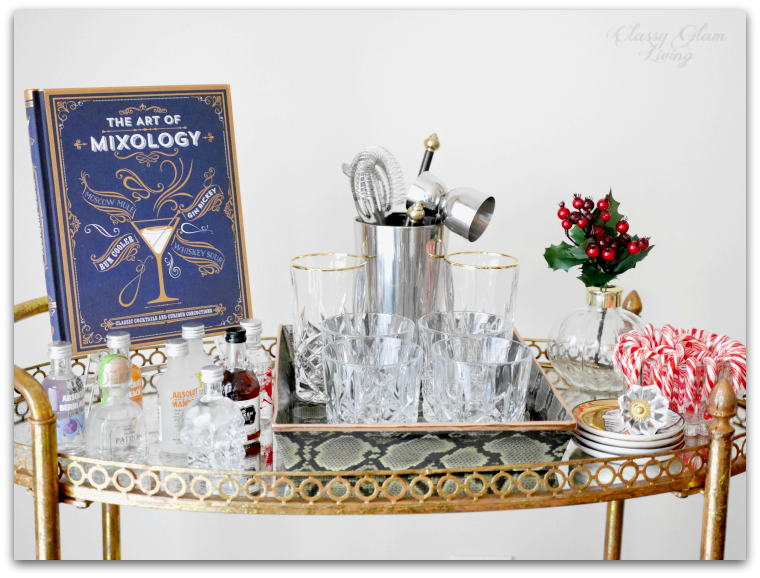
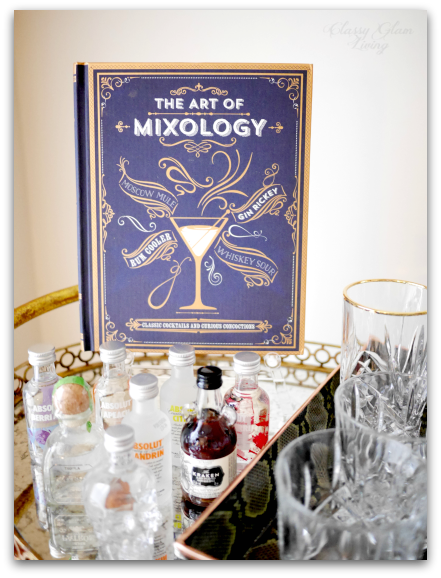
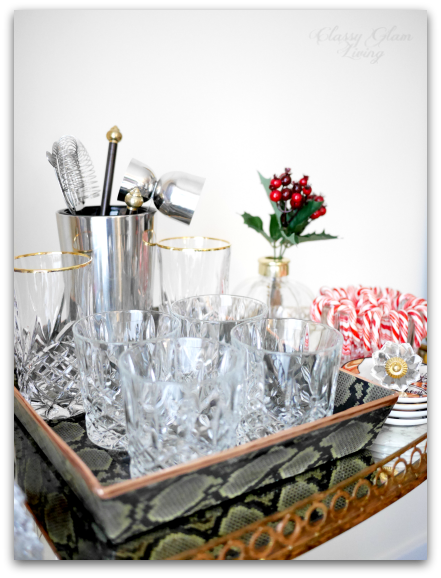
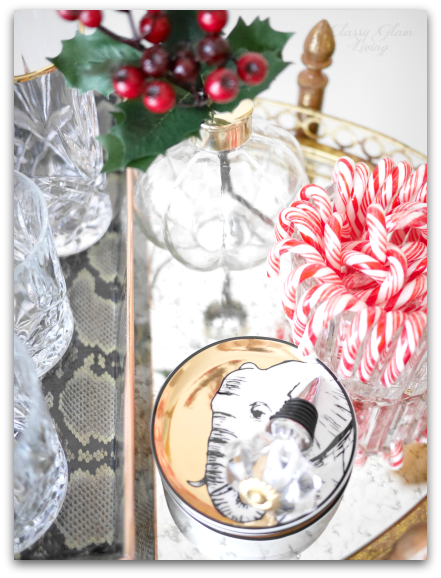
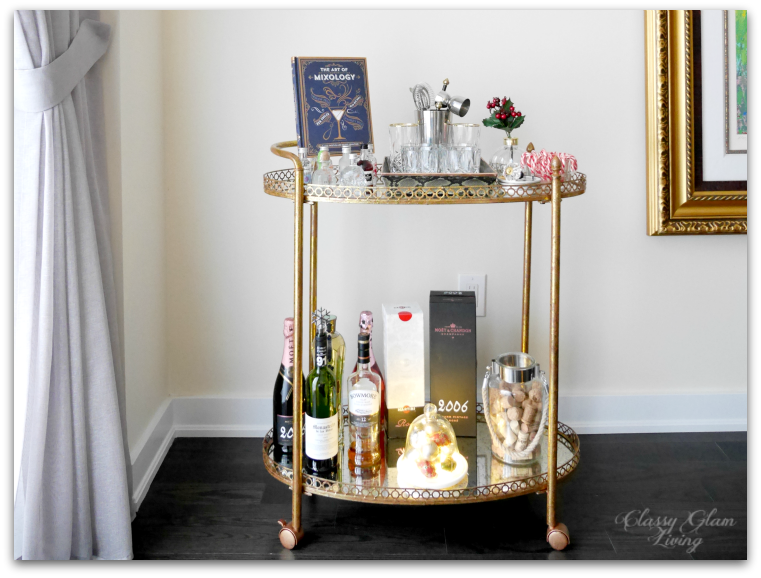
Don't forget to deck the bar cart!  Check out my post on styling the bar cart for the Holidays!

2015 Christmas Bar Cart Decor Styling | Classy Glam Living

I always love how decorators load up their rooms with Christmas decor, but I can never achieve their same look without everything looking messy and myself being overwhelmed.  I'm never one to dump Christmas all over the house.  Now that we're in a smaller house, I definitely don't want Christmas overload to happen.  I see that's the way it'll be for Christmases hereafter.  (Not to mention, it'll be much easier to clean up!)

I'll save my oohs and aahs as I indulge in other Christmas enthusiasts' instagram feeds #xmasdecor #christmasdecorations.  But for our home, I'll leave it livable and manageable.

I'm also happy (and relieved) to announce that, as of this morning, I'm done with my Christmas shopping!!  Woo hoo!

Merry Christmas from our family to yours!

2015 Christmas Tree | Classy Glam Living

* Affiliated link

Styling a Holiday-Ready Bar Cart

It wasn't until our little guy's CONSTANT offer to help us with Christmas decorating turned into an ultimatum ("are we putting up our tree today?"), that I finally dug out our Christmas decorations.  Am I ever glad that the Mr. had the foresight to separate the Christmas decor from the rest of the decor boxes.  It didn't make the discovery process any less overwhelming though.  Just to name a few greeneries - I forgot I had 4 pre-lit garlands, 1 tall Christmas tree, a short one, 2 pre-lit outdoor trees, and 3 wreaths... not sure if I missed anything else.  Did the little man actually help?  Yes, sort of.  Did we put up every one of these greenery?  Uh...  how about you take a look for yourself here...

The Christmas tree?  Done!  The staircase?  Check.  Coffee table?  Still reinventing.  Entryway table.  Finalized.  

Oh, that was a lot of work.  I need a drink...  now!

STYLING A HOLIDAY-READY BAR CART | CLASSY GLAM LIVING

Lucky for me that our bar cart is holiday ready!  Here are a few quick tips to get yours looking pretty and functional to impress your guests!

1. The Obvious

Liquors / Glassware / Barware

Have a few bottles of your favourite drinks on hand.  For the holidays, champagne is always a good idea!  Sparkling wine, red wine, and champagne are constant staples at our house.  We keep the tall bottles on the bottom tier of the bar cart so that little man's freely swinging crazy arms won't knock down any. 

STYLING A HOLIDAY-READY BAR CART | BOTTOM TIER LIQUORS TALL BOTTLES | CLASSY GLAM LIVING

It makes sense to put out on the bar cart the glassware for what you usually consume.  For safety reasons (see above), we put our stemware in our kitchen cabinet.  The top of our bar cart now has a pretty display of our rocks glasses and handy bar accessories.

GLASSWARE & BARWARE ON TOP TIER | STYLING A HOLIDAY-READY BAR CART | CLASSY GLAM LIVING

2. The Decor

Greenery

A touch of green livens up any decorated space, even one as tiny as the bar cart.  Here, just a sprig of holly leaves and berries in the corner makes the bar cart all the more welcoming.

GREENERY FROM BOWRING (SIMILAR ARRANGEMENT AT TARGET)

GREENERY FROM BOWRING (SIMILAR ARRANGEMENT AT TARGET)

Artwork

On the wall or on the bar cart, the artwork completes the look of the cart by giving it height and a touch of sophistication.  On ours, I used a mixology recipe book with a pretty cover that does double duty, perched onto an acrylic easel.

THE ART OF MIXOLOGY (AFFILIATED LINK); ACRYLIC EASEL FROM CB2

THE ART OF MIXOLOGY (AFFILIATED LINK); ACRYLIC EASEL FROM CB2

Tray

Having a tray on any surface helps to corral items and contain mess.  Here, I DIY'ed a tray for glassware using duct tape, inspired by Megan's shoe box tray.  The copper foil tape helps hide my DIY mess and nicely mimics the gold rim on the highball glasses.

SCOTCH DUCT TAPE IN PRETTY SNAKE (AFFILIATED LINK); FOIL TAPE FROM MICHAELS

SCOTCH DUCT TAPE IN PRETTY SNAKE (AFFILIATED LINK); FOIL TAPE FROM MICHAELS

Seasonal Decor

Dress up the bar cart with some small scale seasonal decor so that it's ready for any party thrown its way!  I had limited space on ours, so a small bowl of mini candy canes and a whimsical display of ornaments in a lighted cloche are plenty enough.  

SEASONAL DECOR ON BAR CART | STYLING A HOLIDAY-READY BAR CART | CLASSY GLAM LIVING
SEASONAL DECOR ON BAR CART | STYLING A HOLIDAY-READY BAR CART | CLASSY GLAM LIVING 3

Feeling Adventurous

Yes, I know, less is more when it comes to decor.  But for some, decor and alcohol draws a fine line.  Who can resist these cute mini bottles of liquors, or a dazzling bottle stopper on Jonathan Adler's Animalia coasters?  I may just add some playful cocktail napkins and fun straws to the mix!

MINI LIQUEUR COLLECTION | STYLING A HOLIDAY-READY BAR CART | CLASSY GLAM LIVING
JONATHAN ADLER ANIMALIA COASTERS; BOTTLE STOPPER FROM HOMESENSE (WHAT I REALLY LOVE)

JONATHAN ADLER ANIMALIA COASTERS; BOTTLE STOPPER FROM HOMESENSE (WHAT I REALLY LOVE)

Prepping a bar cart for the holidays is no different than decorating any space in your home.  Starting with the basics in #1, and then adding in layers of #2 takes minimal effort but will surely leave your guests impressed.  Just make sure you restock the empty bottles while you're at it!

STYLING A HOLIDAY-READY BAR CART | CLASSY GLAM LIVING

Design Inspirations for Our New Dining Room

Dining Room Design Board | Classy Glam Living

When I saw the most recent sale of Get the Look of Downtown Loft  at One Kings Lane, my heart skipped a beat.  Not because of the items for sale, but the inspirational photos of the living and dining areas show a layout just like that of our new house!  The styling is impeccable - light walls as the background for statement art pieces, an elegantly furnished sitting area, and a traditional dining area with an abundance of natural light.  I think One Kings Lane just read my mind!

I've previously talked about how our living/ dining areas are adjacent to each other.  Here's the design board for our living room.  I'm hoping it'll be be loaded with natural light during the day, just like OKL's photos above.

Here is our furniture plan for the dining area, which is open to the living area, similar to the One Kings Lane photos above.  

Living Dining Layout | Classy Glam Living

The dining area is approximately 18' x 14', so our existing dining furniture will fit in nicely.  The left side of the dining room will look similar to our previous dining room, where the console table and mirror are placed against the wall.

Dining Room Setting | Classy Glam Living

However, not everything decor-wise will remain the same at the new house.  Afterall, moving into another house is the best time to try something new!  

Wall Treatment

The trim-crazy Mr. will no doubt still want to have trims done for the living and dining areas.  This time around, instead of a chair rail separating the upper and lower walls, the wainscoting will be from floor to ceiling.  The chair rail draws the eyes along the walls, and is more approriate for a large space.  With our smaller ground floor at the new house, we want to lead the eyes upwards and that can be achieved by a full floor to ceiling wainscoting.

The style of the wainscoting will be built out, rather than installing rectangular frames on the walls like we did for our previous dining room.  We used a similar built-out effect on our kitchen island.  We like the minimalist look of inset frames, while the architectural detailing still gives the area an elegant feeling.

BUILT-OUT PANELLING - FRAME IS INSET

BUILT-OUT PANELLING - FRAME IS INSET

FINISH LOOK OF BUILT-OUT PANELLING...  JUST IMAGINE THAT ON THE WALLS!

FINISH LOOK OF BUILT-OUT PANELLING...  JUST IMAGINE THAT ON THE WALLS!

WINDOW TREATMENT

With the living and dining areas being open to each other in a smaller area, we would like to go with less heavy fabrics for draperies.  A softer look helps to open up the space, while still looking elegant.  I went from considering the extreme of a sheers-only look...

SOURCE UNKNOWN.

SOURCE UNKNOWN.

... to a sheer on sheer look...

... and then I saw this set of gorgeous linen drapes.  Linen still has the light and airy feeling I'm opting for, but it has a slight weight to it that gathers nicely with French pleats.  Pair the panels with some nice rods, and we've got a winner!

TWO CHANDELIERS ABOVE DINING TABLE

I had been searching for the longest time for the right dining room lighting fixture at our previous house.  At the new house, look no more!  We took our chandeliers above the kitchen island with us, and we'll put up the pair above the dining table!  That'll for sure be a statement piece of jewelry for the dining room!  This is my attempt to visualize the look =)

Dining Room with 2 Chandeliers | Classy Glam Living

STATEMENT ART PIECE

At the right side of the dining room, we're planning to hang a statement art piece that measures around 4'H x 3'W.  We can leave that wall as is, but it will look too bare.  Putting an armchair at the corner with a sidetable would fill up the space nicely, while creating an extra sitting nook...  for someone ready to jump to help with dinner, or someone anxiously waiting to nab at food coming out of the kitchen (aka me)..

BAR CART OR CONSOLE TABLE?

In place of the armchair at the corner, we originally thought that would be an excellent spot for a barcart.  Since we already have a console table, I think making it into a bar area looks just as attractive, similar to this look:

THE DINING RUG

Ahhhhh, the dining room rug.  The search for it seems never-ending.  It's a similar situation as the dining room light fixture.  Getting the bang for the buck on these investment pieces is just not an easy task, not to mention other factors that we need to consider.  From the rug size and style, to practicality like material and pile, it's been a long ride. We prefer rugs with a border, with a muted tone on tone pattern or neutral colours that are subtle against the statement art piece.  In short, we've (finally) narrowed down to these several looks. 

This pretty much wraps up the ground floor design of our new house.  "Small space, big living" is our new motto, and we'll achieve that with practical design of our home.  From our entryway, kitchen, living room, and now the dining room, we want to (and need to) utilize and enjoy all the space available.  We don't have the luxury of extra space for a "display only" living and dining "museum", though we'll design our space with luxurious touches that are also practical for everyday living.  

Practical design is also key when you have a kiddo who grabs any stick-like objects and starts playing floor hockey right then and there...

CAN'T WAIT TO MOVE IN!