DIY Refinishing Vintage Bedside Tables
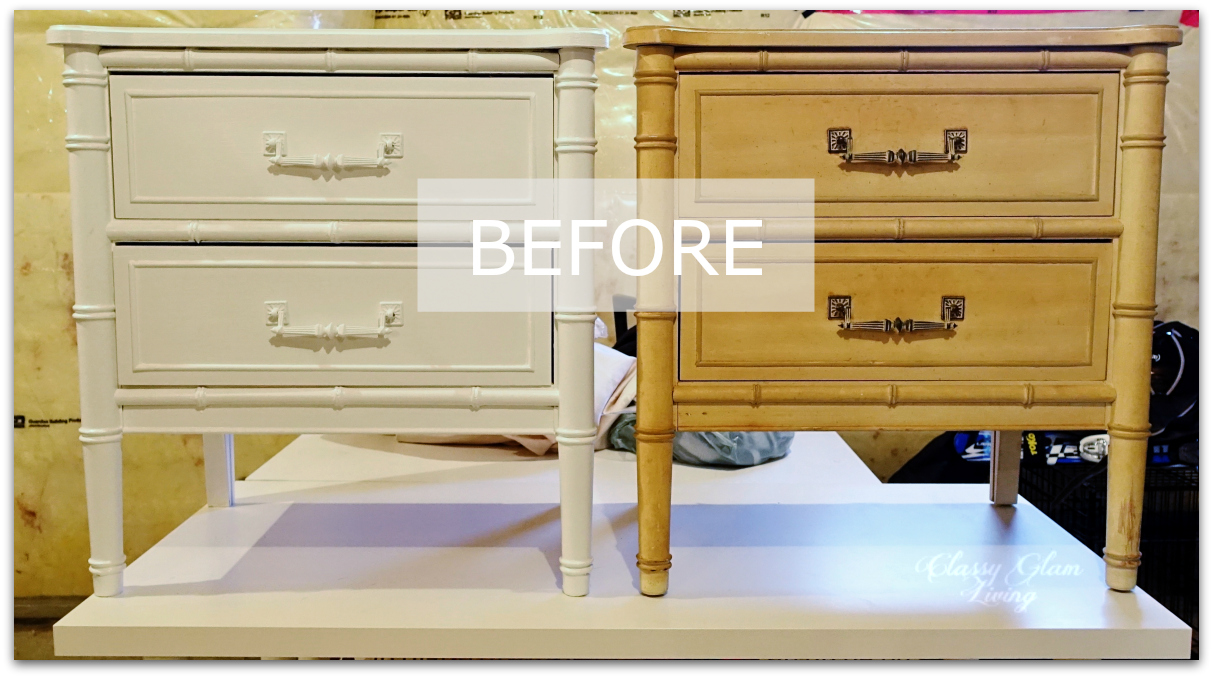
/When I was still under my parents' roof, I painted my bathroom's boring laminate grey vanity in a sky blue colour and changed out the ugly plastic knobs to brushed nickel ones from Umbra. Quality of the paint job? Questionable. Changed for the better? Absolutely. It was a joy for my young self to walk into my bathroom with a cheerfully coloured vanity. I had it in me back then to beautify dull dinginess, and I've grown to love discovering potentials in pieces even more. That was how I discovered these vintage night tables in the Henry Link Bali Hai collection, and the Mr. breathed new life into them. (I've now passed on the dirty work (-;)
Source list at the bottom of the post.
The Mr. did some basic prepping a while ago, as mentioned in this previous post. He removed the backing and unscrewed the top, since we planned on replacing it.
Removing the drawer pulls made it easier for cleaning. Make sure you give the piece of furniture a thorough cleaning on all surfaces if you're planning to repaint it. The primer and paint need to stick to the surface, not on dirt!
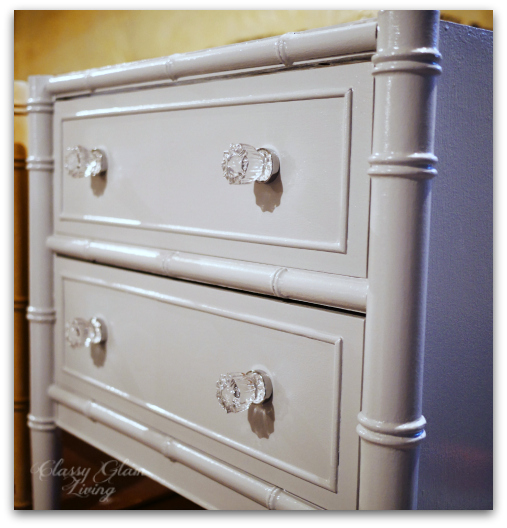
We chose to go with two knobs on each drawer. We first eyeballed the approximate positions for the two knobs, and the Mr. measured the distance from one side and replicated that on the other side.
He then filled out the holes left from the original hardwares and sanded them. For a smoother finish, the holes were re-filled and re-sanded a second time.
The Mr. preferred to use a roller when applying the primer and painting the tables, and a brush for touching up the details. The tables were in decent vintage condition, so he only applied one coat of the Zinsser primer. His review on the primer was that it went on very well, and the paint adhered to the primer smoothly.
He noticed brush strokes on the finished white table, which was most likely painted with a brush. He had to lightly sand the surface before it could be re-painted.
We chose a light grey colour in a glossy finish for a contemporary look. Two coats of paint were applied on the tables to get the evenly layered glossy look.
After the paint had cured (best to wait a day for the paint to fully dry), it was time to re-attach the backing of the bedside tables. He also painted them with the same grey paint before re-attaching. This project was a good excuse for the Mr. to get the one tool that he's been missing - a cordless staple gun.
Next was adding some jewels to the tables. We love the style of this glass knob; it gives a vintage vibe, while the chrome backing gives it a bit of modern touch.
Last but not least was the crowning of the bedside table with our beloved marble top. Its lines and edge profile were fabricated from the original table top. We love how the marble top adds sophistication to the simple elegance of the night tables.
And with that, here's the completed look of the refinished bedside table! I can't wait to move into our new house, so that we can finally install our mirror headboard and see how our "new" bedside tables match up against it!
Thanks to the Mr.'s elbow grease, the tables turned out exactly how I envisioned them! They now look all grown up from their previous ugly duckling selves when I first laid eyes on them.
I had initially wanted to install new brass pulls to mimic the original feel of the tables, but I'm glad the Mr. convinced me to use two glass knobs on either side of the drawers instead. They made the pieces look more elegant.
The grey paint on the tables is a nice neutral colour that helps to accentuate the grey veining in the statuario marble top.
I'm so glad the Mr. agreed to refinish this set of vintage bedside tables. They turned out gorgeous! We finally have the storage we've always wanted in the night tables, and the marble top gives it all the more reason to clear off the surface to enjoy its natural beauty,
Another DIY project in the queue done and done! Stay tuned for the next one in queue!
Source List
Henry Link Bali Hai collection bedside tables - Chatelet Home
Paint colour - Behr's Silver Bullet
Statuario marble source and fabrication - York Fabrica


