DIY Custom Dressing Room - Progress Update

Time flies when you're having fun!  I just realized the other day that we've moved in for just over 4 months!  It's so nice to be in our own house again, and be able to just play house.  

The Mr. has been building our closet with the little spare time that he has in a day, some nights right after dinner or playing floor hockey with the little man.  Though I never rushed him (never did!), I'm sure he just wants to put this behind him.  It's a huge undertaking, and I don't blame him one bit.  

During this time while he was building the closet, I had my clothes at the seating area of our bedroom, while his were at the playroom's closet.  All of a sudden our seating area looks so spacious =)

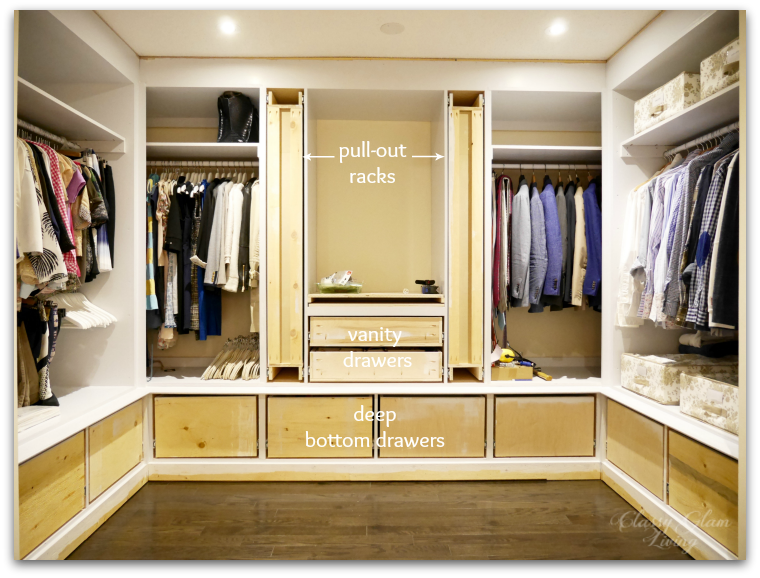
That's because the Mr. has completed our closet to a point where we can move in our clothes.  Woo hoo!!  

DIY Custom Closet Dressing Room Update | Glass Knobs | Classy Glam Living | Custom Closet with Drawers

Excuse the building material in the pic, they're just more handy for the Mr. while he was working in the closet.  The Mr. was afraid that I won't have enough hanging space for my side of the closet.  But after I've "KonMari"'d my clothes, I've purged bags of clothes and folded whatever I can KonMari-style.  All those bottom drawers sure came in handy with the folded pieces of clothing.  The vanity drawers are like our mini dresser for our intimates.  Last but not least are my dream-come-true pull-out racks!  The Mr. would use his side for ties and belts, and mine would be for scarves and belts.  It's great to have a spot for everything.

The Mr. has primed and painted the exterior frames and the closet interiors.  My colour inspiration was from this photo:

Natty by Design

Natty by Design

I love this bluish grey, not too dark nor too light.   Our dressing room doesn't get much natural light, so a dark colour would make the area a dark hole.  This shade will highlight  the cabinet's detailing just right.  A close match to this greyish blue is Benjamin Moore's Sidewalk Gray, which we chose in a glossy finish and tinted down to 50%.

Benjamin Moore Sidewalk Gray

Benjamin Moore Sidewalk Gray

This colour is a gentle backdrop for the gold hardware we chose for the closet.  I stuck with one out of my choices of gold hardware mentioned here -  a crystal knob for the vanity drawers that we'll also be using for our kitchen cabinets.  

This time around, we opted to have doors for our closet, so that our clothes aren't collecting dust while they're just sitting around.  (See the dressing room at our old house with open hanging space).  While I was shopping for gold-toned handles for the doors, I noticed the Bar Series handles from Lew's Hardware are a very popular choice amongst decorators:

They would've been an easy choice, but I think that something dressier and less contemporary would be more appropriate for the dressing nook.  The boxy bar seems to make everything else boxy in this boxy closet.  So I continued to search for something more rounded.  Rounded, I did not find, but looking around paid off...  I found this gem:

The beveled hexagon ends really give this glass handle a gem-like resemblance.  It has a good weight and it sparkles elegantly in person!  

With this splurge for the glass handles, I sure was glad when we found plate handles at just $3 a piece at Ginger's clearance section!  They would go on the bottom drawers, giving a balanced contrast to the sparkling hardware above them.

The 3 cabinet hardware look lovely together:

DIY Custom dressing room closet | Classy Glam Living | Cabinet hardware

Here is a hardware map for our dressing nook:

DIY Custom Closet Dressing Room Update | Classy Glam Living | Cabinet hardware

The Mr. is now working on the cosmetic fronts for the closet - trims, moldings, drawer fronts, and doors.  Over the weekend, he has put in the first trim around the top of the drawers.  I wanted a "lip" that extends just beyond the drawers to give the unit some details.  Similar to my original closet inspiration from Carrie's closet in Sex and the City 2:

CARRIE'S CLOSET IN SEX AND THE CITY 2, IMAGE VIA MARKS & FRANTZ

CARRIE'S CLOSET IN SEX AND THE CITY 2, IMAGE VIA MARKS & FRANTZ

DIY Custom Dressing Room Closet | Progress update | rope trim detail | Classy Glam Living

I thought the hardest part of building this closet was framing the structure and building the drawers, but he said the trim work and doors are just as much.  I guess my point was, if he could build this closet from scratch, the trimwork and doors must be easy peasy to him.  

And that's our little update on the Mr.'s DIY custom dressing room/ dressing nook/ closet.  No matter what we call it, it's truly one of a kind.  The Mr. is no carpenter; he's been learning as he went along, and I continue to be amazed by his skills...  and dedication to the project.

Just as the Mr. thought that he's safe to move along and close up the closet with trims and moldings, I added a special request for the closet.  Yup, the wifey requests never stop ;-) Can you guess what it is?

For the latest update, be sure to check my instagram feed!

Styling a Holiday-Ready Bar Cart

It wasn't until our little guy's CONSTANT offer to help us with Christmas decorating turned into an ultimatum ("are we putting up our tree today?"), that I finally dug out our Christmas decorations.  Am I ever glad that the Mr. had the foresight to separate the Christmas decor from the rest of the decor boxes.  It didn't make the discovery process any less overwhelming though.  Just to name a few greeneries - I forgot I had 4 pre-lit garlands, 1 tall Christmas tree, a short one, 2 pre-lit outdoor trees, and 3 wreaths... not sure if I missed anything else.  Did the little man actually help?  Yes, sort of.  Did we put up every one of these greenery?  Uh...  how about you take a look for yourself here...

The Christmas tree?  Done!  The staircase?  Check.  Coffee table?  Still reinventing.  Entryway table.  Finalized.  

Oh, that was a lot of work.  I need a drink...  now!

STYLING A HOLIDAY-READY BAR CART | CLASSY GLAM LIVING

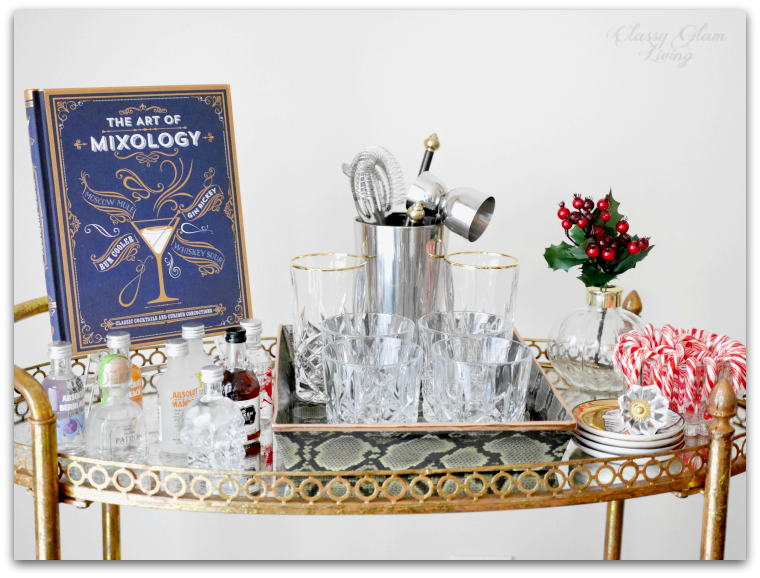
Lucky for me that our bar cart is holiday ready!  Here are a few quick tips to get yours looking pretty and functional to impress your guests!

1. The Obvious

Liquors / Glassware / Barware

Have a few bottles of your favourite drinks on hand.  For the holidays, champagne is always a good idea!  Sparkling wine, red wine, and champagne are constant staples at our house.  We keep the tall bottles on the bottom tier of the bar cart so that little man's freely swinging crazy arms won't knock down any. 

STYLING A HOLIDAY-READY BAR CART | BOTTOM TIER LIQUORS TALL BOTTLES | CLASSY GLAM LIVING

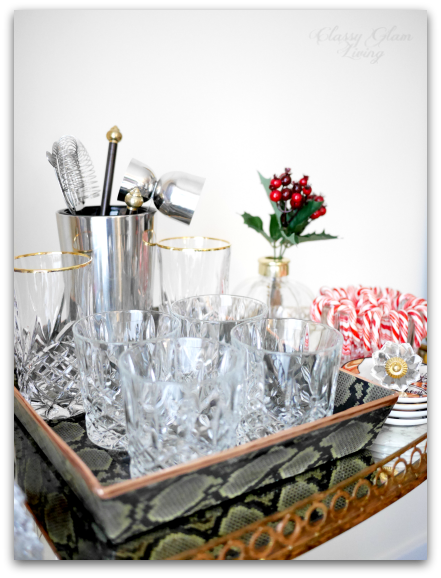
It makes sense to put out on the bar cart the glassware for what you usually consume.  For safety reasons (see above), we put our stemware in our kitchen cabinet.  The top of our bar cart now has a pretty display of our rocks glasses and handy bar accessories.

GLASSWARE & BARWARE ON TOP TIER | STYLING A HOLIDAY-READY BAR CART | CLASSY GLAM LIVING

2. The Decor

Greenery

A touch of green livens up any decorated space, even one as tiny as the bar cart.  Here, just a sprig of holly leaves and berries in the corner makes the bar cart all the more welcoming.

GREENERY FROM BOWRING (SIMILAR ARRANGEMENT AT TARGET)

GREENERY FROM BOWRING (SIMILAR ARRANGEMENT AT TARGET)

Artwork

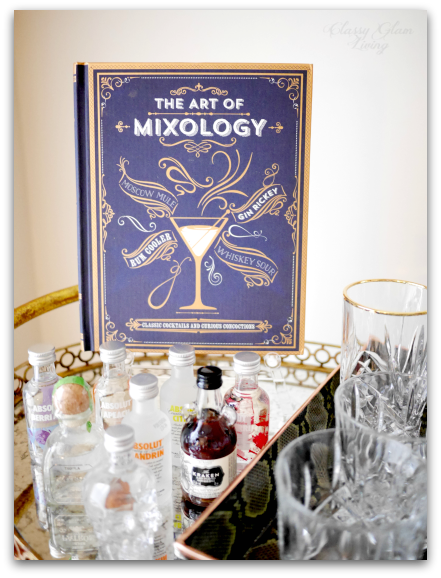
On the wall or on the bar cart, the artwork completes the look of the cart by giving it height and a touch of sophistication.  On ours, I used a mixology recipe book with a pretty cover that does double duty, perched onto an acrylic easel.

THE ART OF MIXOLOGY (AFFILIATED LINK); ACRYLIC EASEL FROM CB2

THE ART OF MIXOLOGY (AFFILIATED LINK); ACRYLIC EASEL FROM CB2

Tray

Having a tray on any surface helps to corral items and contain mess.  Here, I DIY'ed a tray for glassware using duct tape, inspired by Megan's shoe box tray.  The copper foil tape helps hide my DIY mess and nicely mimics the gold rim on the highball glasses.

SCOTCH DUCT TAPE IN PRETTY SNAKE (AFFILIATED LINK); FOIL TAPE FROM MICHAELS

SCOTCH DUCT TAPE IN PRETTY SNAKE (AFFILIATED LINK); FOIL TAPE FROM MICHAELS

Seasonal Decor

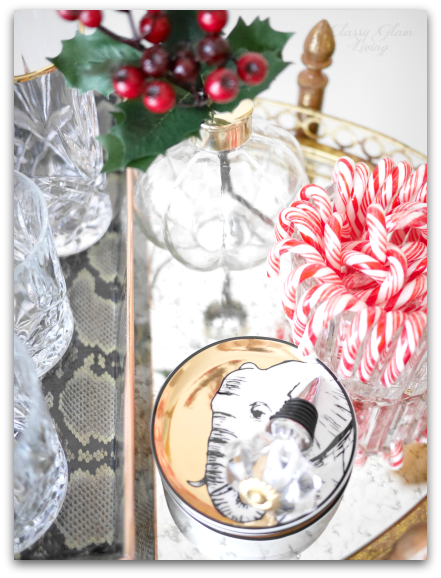
Dress up the bar cart with some small scale seasonal decor so that it's ready for any party thrown its way!  I had limited space on ours, so a small bowl of mini candy canes and a whimsical display of ornaments in a lighted cloche are plenty enough.  

SEASONAL DECOR ON BAR CART | STYLING A HOLIDAY-READY BAR CART | CLASSY GLAM LIVING
SEASONAL DECOR ON BAR CART | STYLING A HOLIDAY-READY BAR CART | CLASSY GLAM LIVING 3

Feeling Adventurous

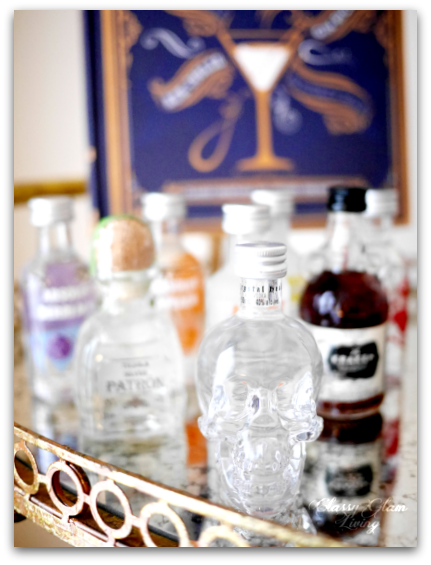
Yes, I know, less is more when it comes to decor.  But for some, decor and alcohol draws a fine line.  Who can resist these cute mini bottles of liquors, or a dazzling bottle stopper on Jonathan Adler's Animalia coasters?  I may just add some playful cocktail napkins and fun straws to the mix!

MINI LIQUEUR COLLECTION | STYLING A HOLIDAY-READY BAR CART | CLASSY GLAM LIVING
JONATHAN ADLER ANIMALIA COASTERS; BOTTLE STOPPER FROM HOMESENSE (WHAT I REALLY LOVE)

JONATHAN ADLER ANIMALIA COASTERS; BOTTLE STOPPER FROM HOMESENSE (WHAT I REALLY LOVE)

Prepping a bar cart for the holidays is no different than decorating any space in your home.  Starting with the basics in #1, and then adding in layers of #2 takes minimal effort but will surely leave your guests impressed.  Just make sure you restock the empty bottles while you're at it!

STYLING A HOLIDAY-READY BAR CART | CLASSY GLAM LIVING

WOO HOO! We've moved in!

Master Ensuite New House | Classy Glam Living

We have officially moved in over the past weekend.  *HAPPY DANCE!!!!!*  It's a great relief for us all, including our little fur baby, to be in our own home again!  It's a smaller house than our old house, but after staying at the rental for a good year+, we're glad to have more space at the new house.  Check out my Instagram feed for some snippets of our new house!

Even though this is our third house, it's still a daunting task to unpack all of the boxes.  It's just common sense to unpack and organize the daily essentials first and foremost, starting with the bathrooms and kitchen.  Bathrooms/ toiletries are the easiest for me, and I've purchased some organizers to help with that task.  

Then comes the kitchen...  It's all unpacked, and I've shoved (neatly) whatever I can into the cabinets.  As I unpacked and organized, I was reminded that we really have to be efficiently organized in this smaller kitchen.  I tried to look for wire pullout storage to save the Mr. some time and to concentrate on other to-do's around the house, but their sizes don't fit optimally in our cabinets.  Why buy them for $$$ when they don't fit?  Not to mention, the drawer hardwares are only a fraction of the price of those ill-fitting wire pullouts.  

So, you guessed it, the Mr. will need to build the pullouts himself.  Good that he's done it before at our old house for the pantry pullouts.  

And since we're "saving" on the wire pullouts, we splurged on this blind corner storage unit at Lee Valley.  It's great to not have to crawl inside the blind corner to get the rarely used stuff out!

Blind corner kitchen storage organizer | Classy Glam Living

The kitchen is now somewhat organized, but it's still a work in progress.  Most of the appliances have been installed, minus the hood, but we still need the panels to be put on the fridge/ freezer drawers and dishwasher (see Design Board).  For now, at least the kitchen is functional...  we just need time to go grocery shopping!  I'm sure the Mr. can't wait to cook up a feast in his new kitchen!

With all this organizing going on at home, I figured it's also time to post a new to-do list for our new house.  Our projects at the previous house can still be easily accessible on the "Completed Projects" tab above.  

It's all about prioritization with this to-do list.  We still have so much STUFF even after rounds of moving and purging, that storage requirement comes before any improvement on esthetics - trim work and painting.  The order is flexible, and of course, depending on deals and budgets.

We're going by a daily to-do list to get the house in better order each day.  As time goes by, this builder's house will turn into our home, with our personalized touches and DIY projects, much like our previous house.  Remember to check back from time to time on our progress!

Â