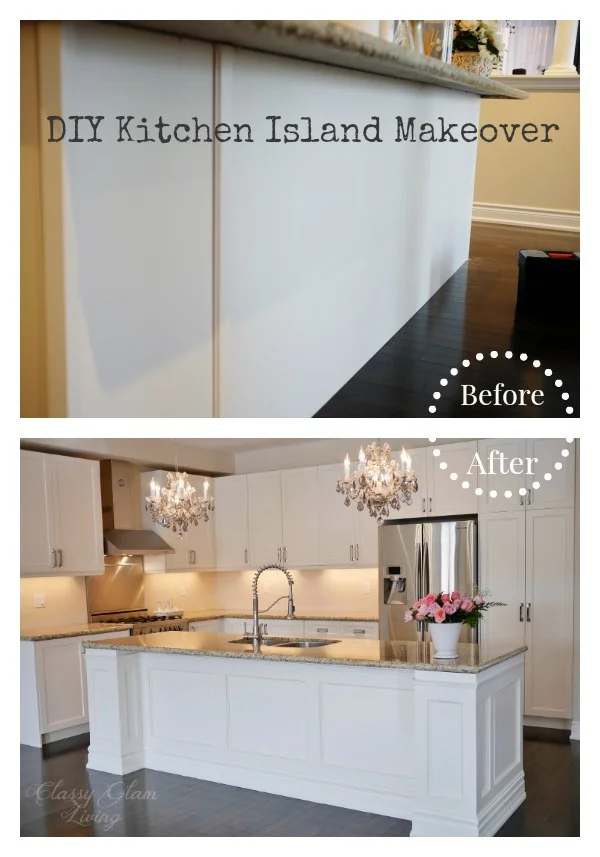
DIY Kitchen Island Makeover
/We have always loved our huge kitchen island, which gives us ample prep space for meals. At over 10-feet long, it's also the dumping spot for lunch bags, mail, and other uncategorized items. It's great for buffet style get-togethers, where guests hover around to talk and eat. However, it just looked like a hunk of cabinets, that acted as some sort of border between our family room and kitchen. The island just looked too OUT THERE to be so plain.
As mentioned in my overly-excited post of our completed DIY kitchen island makeover, I wasn't too confident about this project. But the Mr. seemed very serious about the project, and being the good wife, I should share his enthusiasm (right?!). Well, as you know, the rest was history... and was I ever glad to let him perform this cosmetic surgery on our island! So here it is, as promised, the elbow grease details of the project!
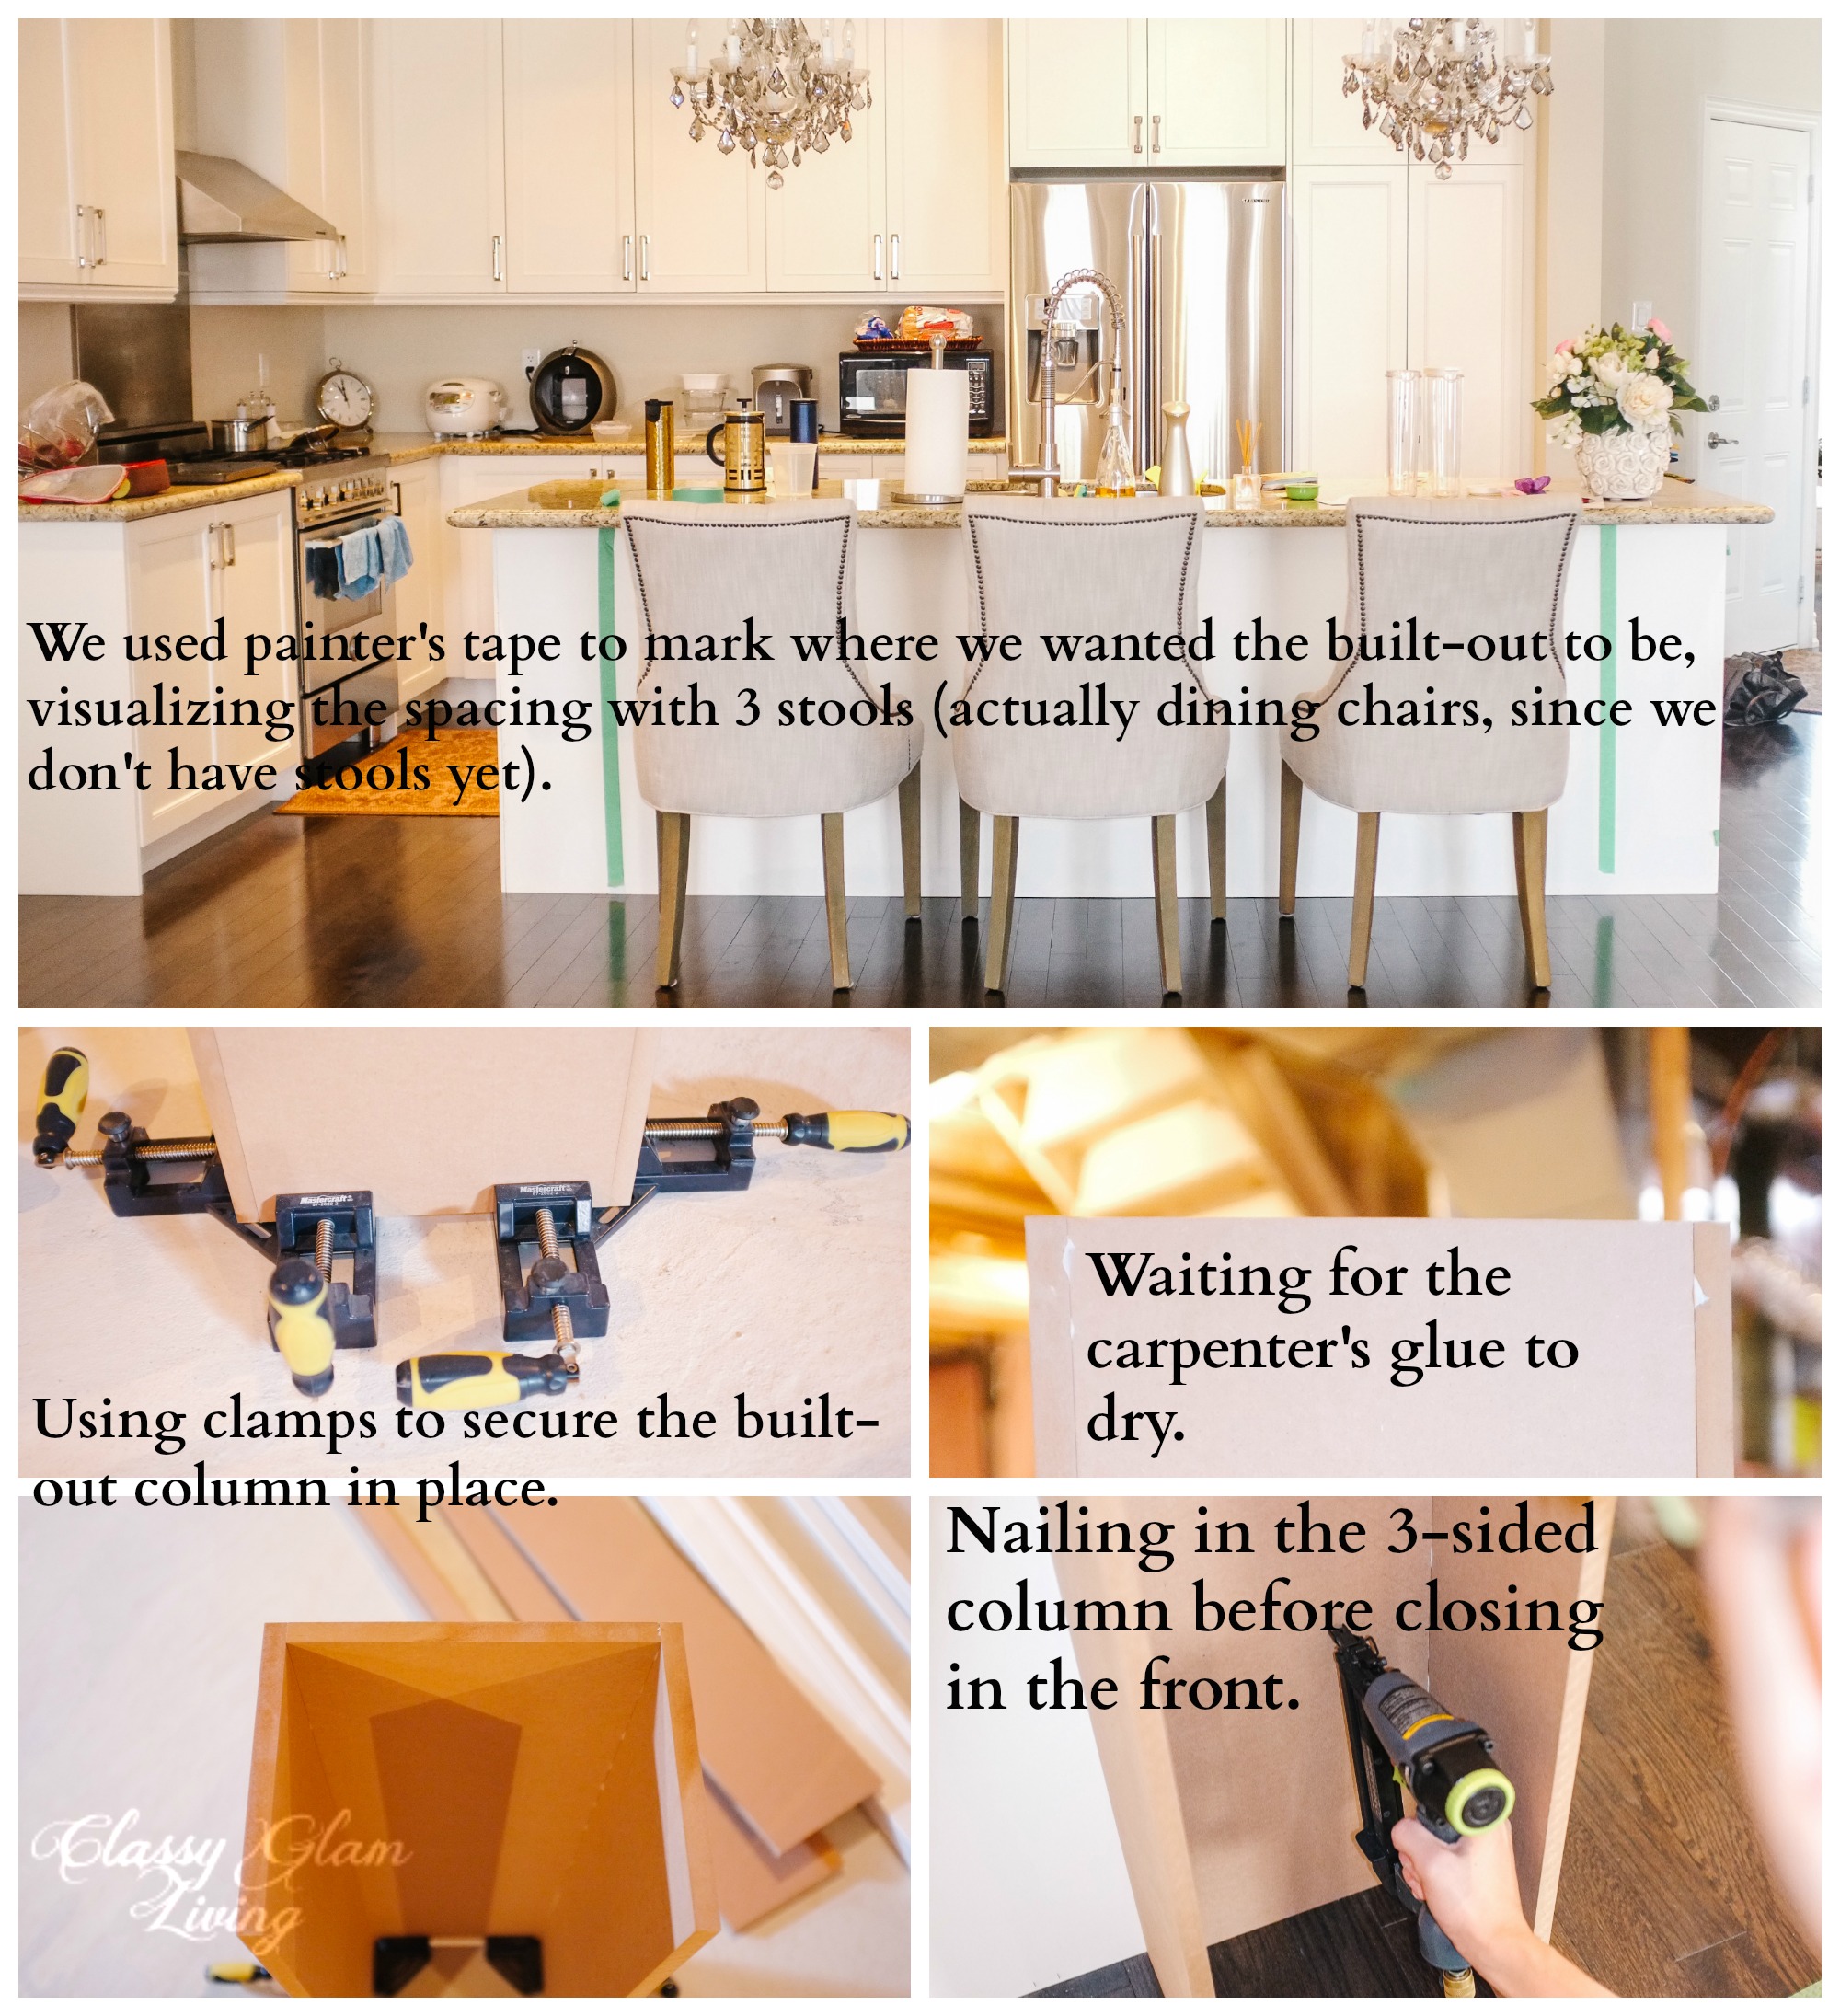
The Mr.'s plan was to build out each end of the island like columns, just to the overhang of the countertop. We both agreed that a wider built-out would look more proportional to the island. He decided the easiest way would be to build a 4-sided column. He got the MDF boards cut to the height of the island, and attached the sides with carpenter glue and nail gun. Once the columns were dried of the glue, he attached them to the back of the island using nail gun.
We were going for the wainscotting look, and decided that a 2.5" border around the frames would appear more proportional as we stepped away from the island to look at it as a whole. He attached MDF boards and framed around the perimeters, which would be the upper and lower borders of the wainscotting frame. To cover up the seam between the back of the cabinet and the column, he used the white trim that would become part of the inset frame.
He then added small frame trims around the "inner frame" to complete that wainscoting look (excuse the mess on the countertop - our dumping spot).
With such a long island, a higher baseboard would give it a more ornate look, so we chose a 7" high baseboard for that.
Yup, that's our Miss. Nosy, running around restlessly with all the going-ons at the island!
Completed look of island with baseboard - my first TA-DA moment
We included an upper trim in our design to complete the custom look. The Mr. had to account for an electrical outlet on the side of the island. He removed the electrical outlet and used a jigsaw to cut out the opening in the MDF border.
With all the fun in cutting and nailing done, here comes the dirty part... filling in the nail holes with wood filler and also caulking the seams of the moldings. Sand and repeat with filling as necessary... I was the "supervisor" to this part, and of course I got to be as picky as I could be. I lost count how many times I asked the Mr. to "sand and repeat"… but he was all game, since he's as much a perfectionist as I am!
And again, Miss. Nosy over on the right checking on the progress of her lover-boy's project.
Here's another fun part, and the next most stressful part other than getting the moldings done right - PAINT MATCHING. If the paint didn't match the rest of our existing cabinets, it would make the whole island look like an eyesore. Our cabinet colour is a creamy off-white, and even a little off would be VERY obvious. Thank goodness, our local home improvement store was able to match the paint colour of a cabinet door, which Mr. removed to get it matched (I told you he would do anything to get it perfect).
Paint matched! (Lighting in picture created the tone difference)
Here we go again - paint, sand, and repeat as necessary... and again, I searched and felt for imperfections around the built-out, just to have it re-sanded and re-painted. The Mr. spent so much time on making-over this island, I didn't want a little imperfection to dent the look. I was glad he had been patient through all this, and making it right the first time!
Island turned out great!
So after lots of ups-and-downs (and that's literal, as his "workshop" is in the basement... carrying up his pieces of wood from the basement to the kitchen, build/ re-cut), I'm so proud of the Mr.'s masterpiece! We hope you have enjoyed this lengthy tutorial. The wordy parts don't do much justice to all the blood and sweat that went into the island's making.
As I stand admiring his new masterpiece, glass of wine in hand, I would tell him how it completes the look of our kitchen. It looks like it's always been there! And with him looking so proud of himself, having proven his new-found capabilities, I'm sure he agrees that all his hard work was all worth it!
We're shopping for some counter stools to make our breakfast bar more functional. Found these at Target, but it's hard to collect all 3! It would be nice to have a place to sit, as the Mr. and I chitchat, with one of us is working in the kitchen... planning for our next home project... maybe over a glass of wine.
P.S.: I guess the Mr. would have a can of Stella... sorry for the unintentional product placement, but I didn't realize he enjoyed so many cans of Stella until I edited the pictures!


