
DIY Built-in Office Cabinet
/
After we've moved into our current house for more than 2 years, the room that we had destined to be our home office was anything but!
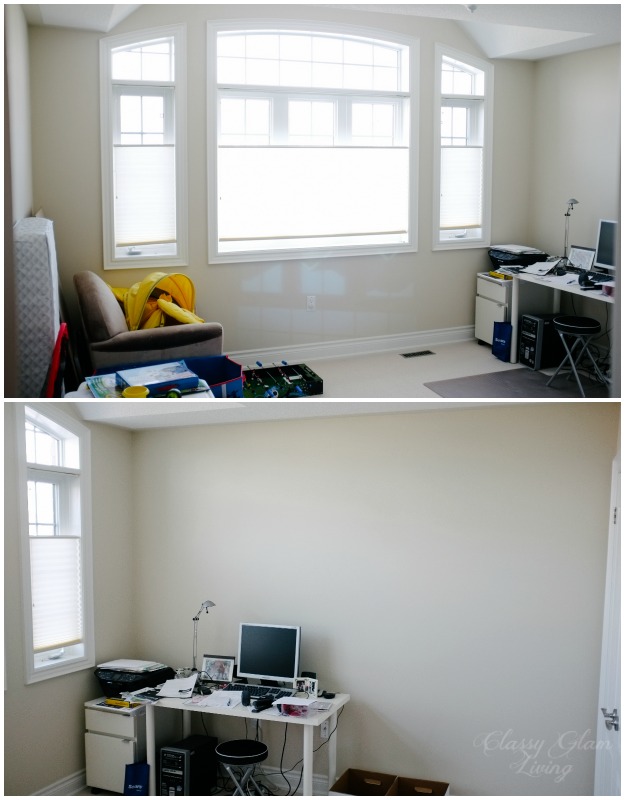
The Mr. was complaining about all the mail and junk that were piled on our kitchen island and the IKEA desk in the office, but where else can I store anything? The closet of the "office" room was already filled up to the top with STUFF. Not to mention, we still have tons of office-destined stuff still in boxes in the basement!
And so I bombarded the Mr. with pins from my Pinterest office board. Once he sees something inspiring, he would get to work =)
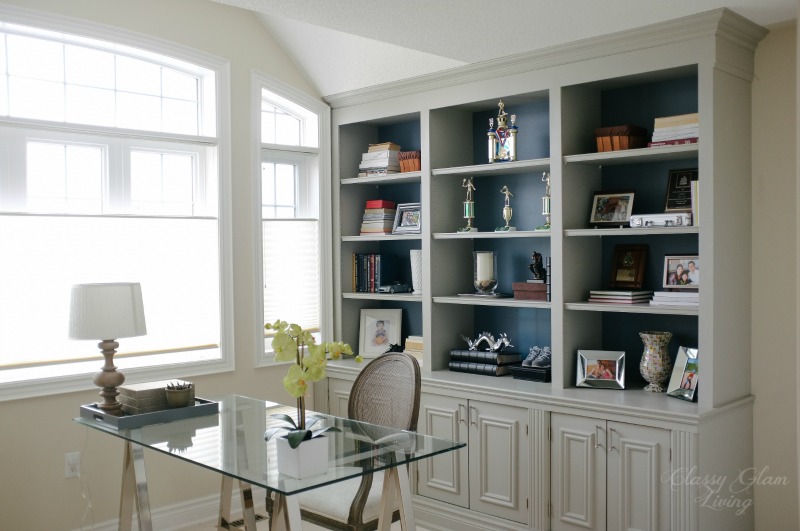
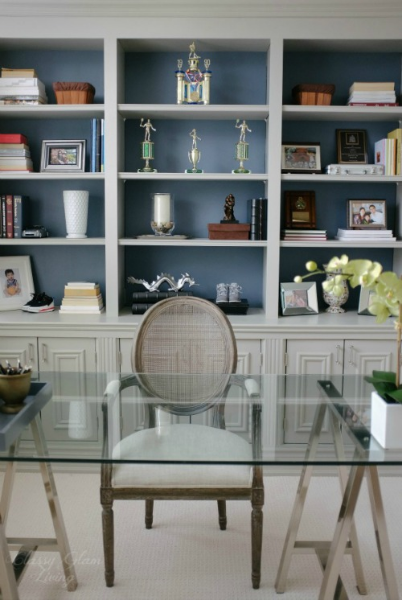
I wanted the layout to have a storage unit similar to this at the long wall, with a desk in front. This is the layout I came up with for our office:

The storage unit measured about 8-feet, leaving enough room for the closet door on the adjacent wall to swing out fully. The Mr. removed the baseboards at the built-in area, so that they can be re-used on the unit.
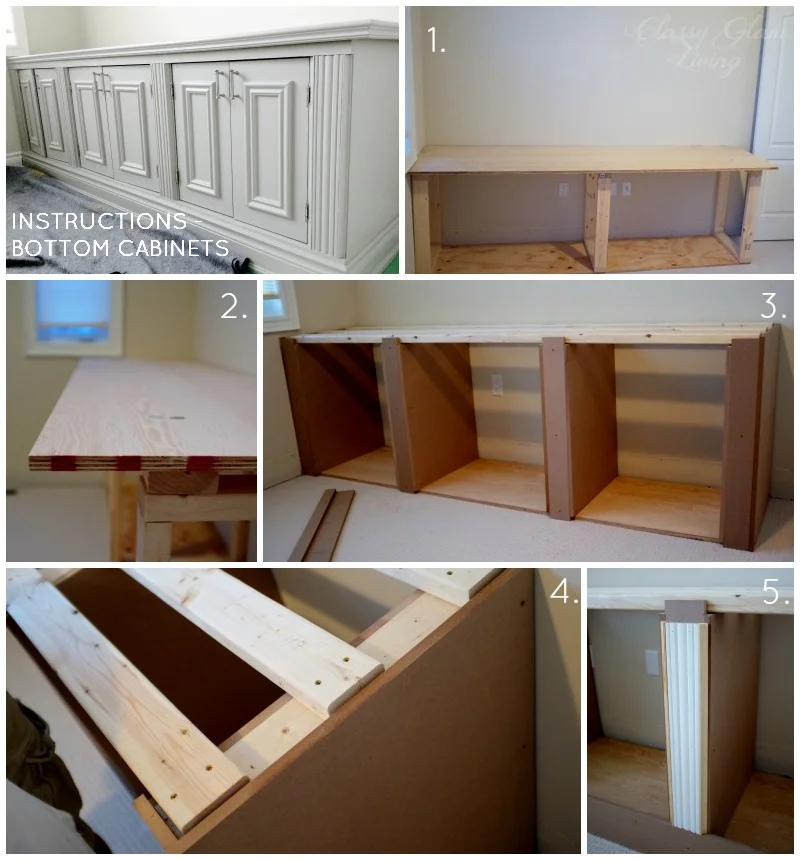
1. This picture was of the Mr.'s original plan with 2-sectioned bottom cabinets. But I fought for having 3 sections instead. For one, the swing out doors would be smaller, which means we wouldn't need as much space between the desk chair and front of the unit. Yes, several inches would make a huge difference in this room!
2. He used plywood for the countertop and floor-bottom of the cabinet. The cabinet's frames were made of 2"x4" at 20" deep. We wanted the top of the counter to sit just below window trim at the far wall, so the Mr. made the bottom frames just high enough to account for the thickness of the plywood countertop (3/4") and the 2"x4" laid across the length of the cabinet frames to support the top.
3. and 4. Next up, he screwed in 0.5" thick MDF boards on the sides of each section, and the front plates of each section frame.
5. He added the ornate trims on the front plates, and enough space on the sides for the doors to swing out fully. The trims were only the same height as the doors, because he added an MDF board that would go across the bottom where he would attach the baseboard to.
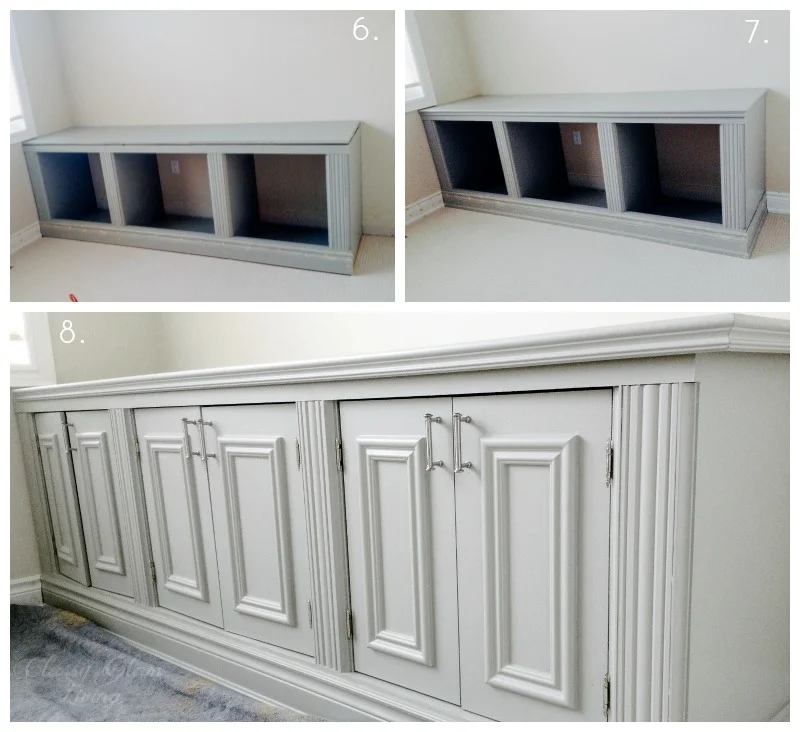
6. The cabinet frame and countertop were painted, and the top screwed in...
7. and chair rail trim added around the countertop. The baseboards can finally be added back on!
8. The cabinet doors were made of MDF. The Mr. added a decorative trim in the front to match the ornate design of the section trims. He left around 1/8" of spacing between the doors to ensure they don't brush against each other when open-and-closing.
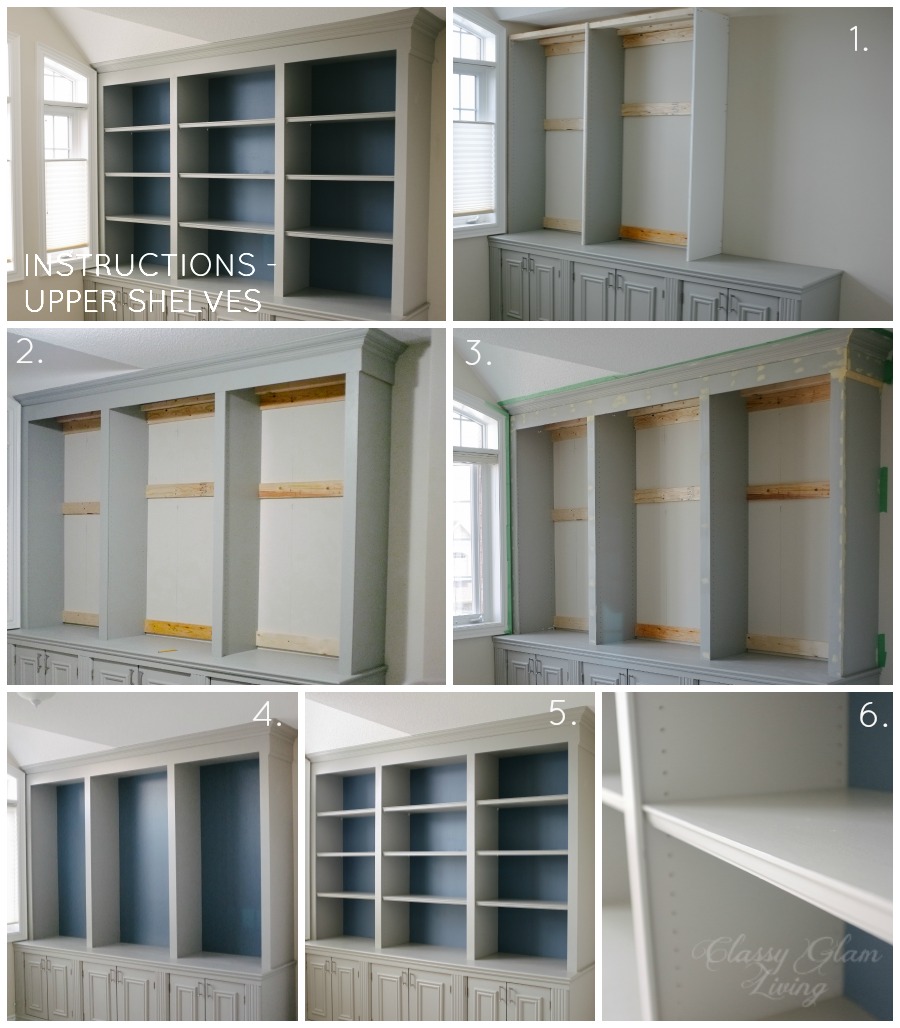
1. We wanted the shelves to come out to just beside the window trim at the far wall, which was 15" deep. The Mr. took the easy way and got pre-drilled laminate boards as the shelf supports, and they were just shy of 15". He painted them first before they were attached to the wall by 1"x4". The shelf supports were also connected to each other by 1"x2" at the top for added sturdiness.
2. After the shelf supports were up, The Mr. nailed in 0.5"x1.5" plywood trim to hide the seam front of the shelf supports. He also nailed in an MDF board across the top of the frame to add boldness to the crown moulding.
3. And then, his favourite part ever - filling in the nail holes with wood fillers and sanded them down.
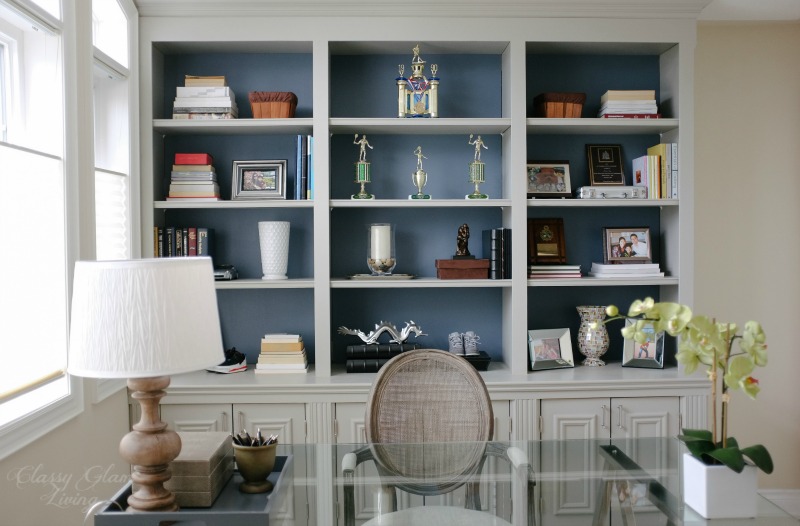
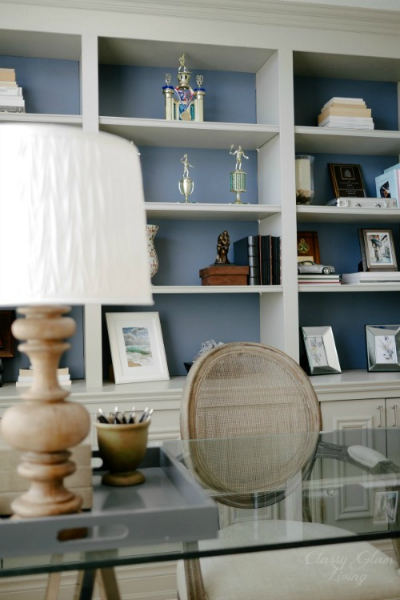
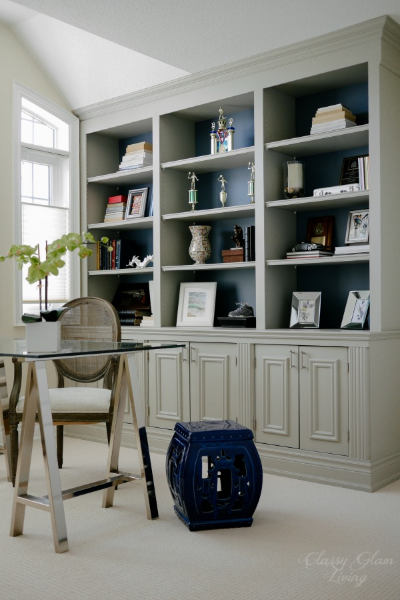
4. This is my favourite part, we added a contrasting backing to the upper shelves. This creates more visual impact. Even though we chose a blue, the colour is still neutral enough as a background. See colour source below.
5. For the height of the cabinet, the shelves would look more proportional with 4 tiers. As you can see in the photo, one of the boxes of office items was already waiting to be unpacked after being in the box for 2+ years since we moved!
6. The shelves were finished with a tiny chair rail trim, glued and nailed to the front of each shelf.
7. All was not done until a coat of minwax was applied all over the surface of the unit. We definitely didn't want to leave a tacky feeling on the painted shelves and countertop!

We love this colour contrast of the cabinet unit and the shelf backing. The grey and blue combination takes on different depths as the natural light changes throughout the day from our window wall.
Again, here's our layout and outcome.


The Mr. really built this unit to last. He was even showing me he could stand on the counter and it wouldn't even move an inch. Uh, please get off before the little man sees you!
The big kid had once again outdone himself. I would say this was more labour intensive than our kitchen island and dressing room projects. We finally have a functional office space, with a storage unit large enough for our office essentials (and more importantly, to hide my mess behind those closed doors)!
Paint colours:
- Grey colour of unit - Behr 730F-5 Nature Retreat
- Blue backing of shelves - Para Paint P5201-52 Coastal Views
How do you like the colour contrast of the cabinet? Or would you prefer a traditional white built-in?


