DIY Built-in Office Cabinet

DIY Office Built-in Cabinet | Classy Glam Living

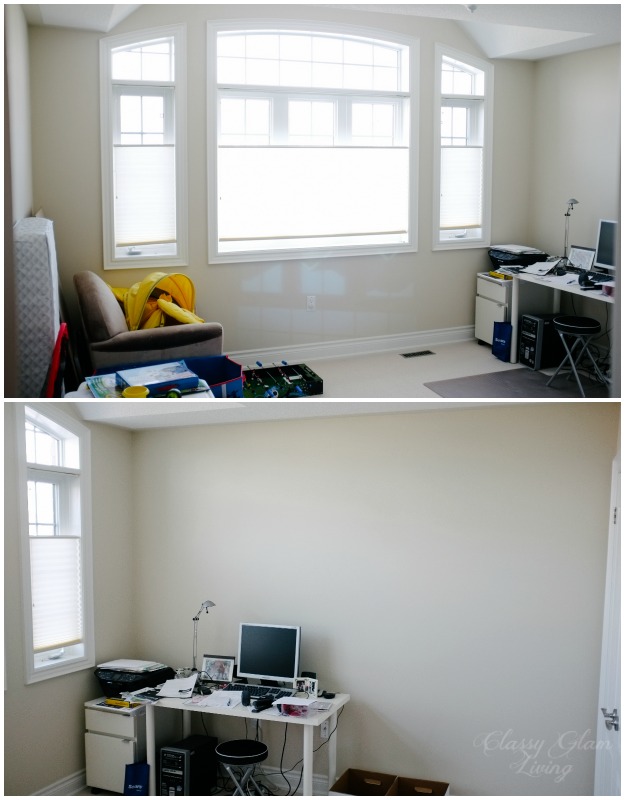
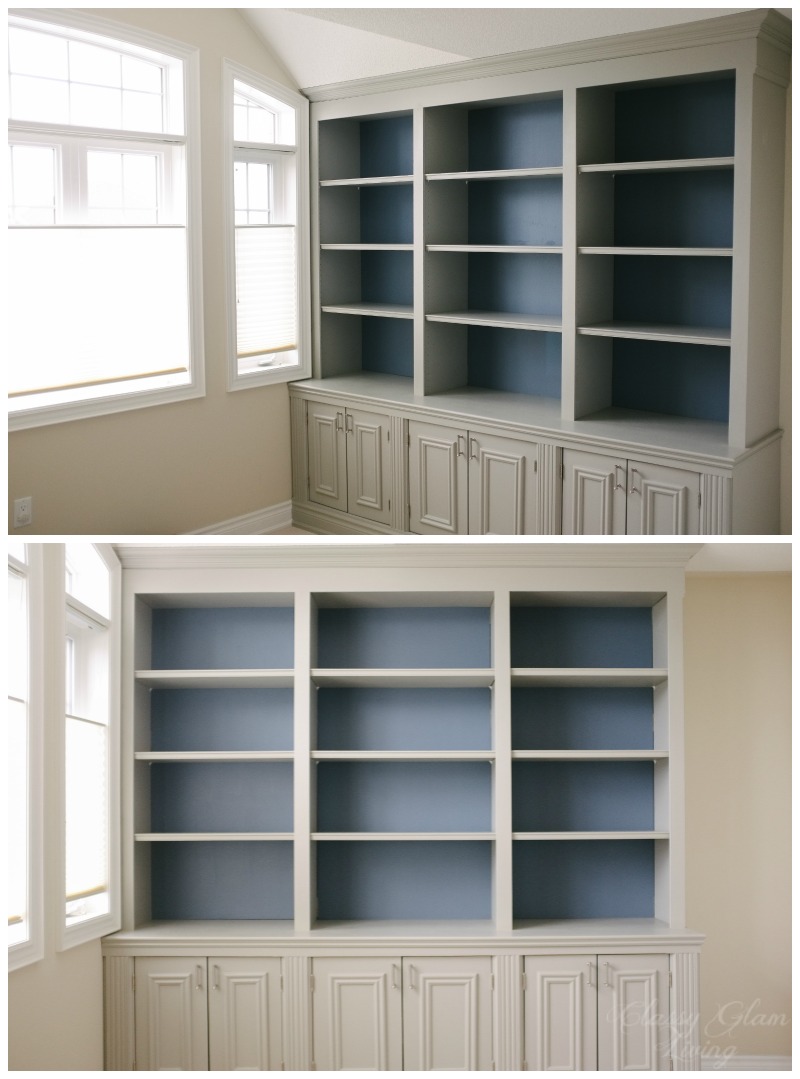
After we've moved into our current house for more than 2 years, the room that we had destined to be our home office was anything but!  

Before DIY Cabinet | Classy Glam Living

The Mr. was complaining about all the mail and junk that were piled on our kitchen island and the IKEA desk in the office, but where else can I store anything?  The closet of the "office" room was already filled up to the top with STUFF.  Not to mention, we still have tons of office-destined stuff still in boxes in the basement! 

And so I bombarded the Mr. with pins from my Pinterest office board.  Once he sees something inspiring, he would get to work =)  

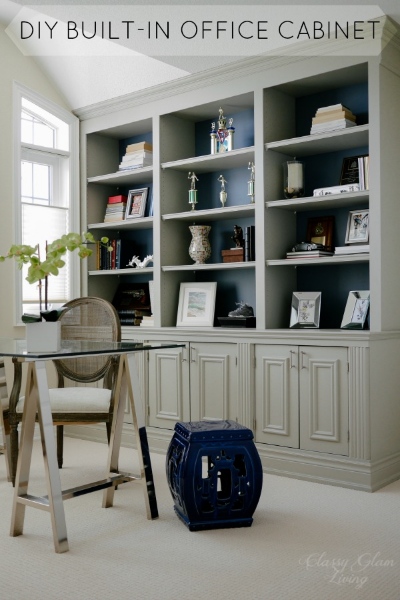
I wanted the layout to have a storage unit similar to this at the long wall, with a desk in front. This is the layout I came up with for our office:  

Office Layout | Classy Glam Living

The storage unit measured about 8-feet, leaving enough room for the closet door on the adjacent wall to swing out fully.  The Mr. removed the baseboards at the built-in area, so that they can be re-used on the unit.  

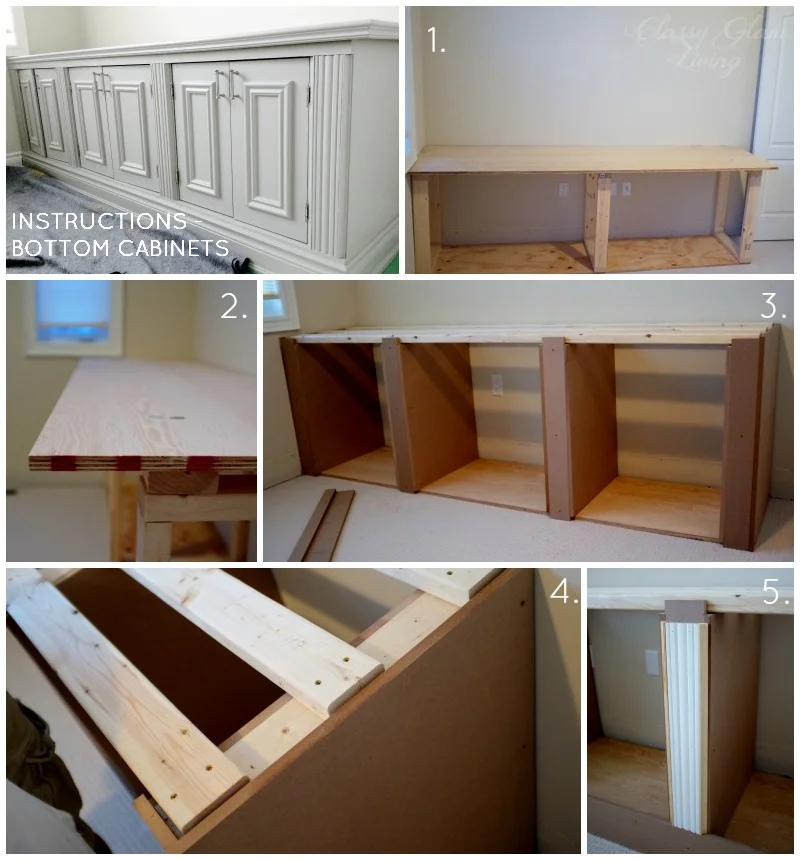
DIY Built-in Office Cabinet Bottom Instructions | Classy Glam Living

1. This picture was of the Mr.'s original plan with 2-sectioned bottom cabinets.  But I fought for having 3 sections instead.  For one, the swing out doors would be smaller, which means we wouldn't need as much space between the desk chair and front of the unit.  Yes, several inches would make a huge difference in this room!   

2. He used plywood for the countertop and floor-bottom of the cabinet.  The cabinet's frames were made of 2"x4" at 20" deep.  We wanted the top of the counter to sit just below window trim at the far wall, so the Mr. made the bottom frames just high enough to account for the thickness of the plywood countertop (3/4") and the 2"x4" laid across the length of the cabinet frames to support the top.  

3. and 4. Next up, he screwed in 0.5" thick MDF boards on the sides of each section, and the front plates of each section frame.

5. He added the ornate trims on the front plates, and enough space on the sides for the doors to swing out fully.  The trims were only the same height as the doors, because he added an MDF board that would go across the bottom where he would attach the baseboard to.

DIY Built-in Office Cabinet Bottom Instructions | Classy Glam Living

6. The cabinet frame and countertop were painted, and the top screwed in... 

7. and chair rail trim added around the countertop.  The baseboards can finally be added back on!

8. The cabinet doors were made of MDF.  The Mr. added a decorative trim in the front to match the ornate design of the section trims.  He left around 1/8" of spacing between the doors to ensure they don't brush against each other when open-and-closing.  

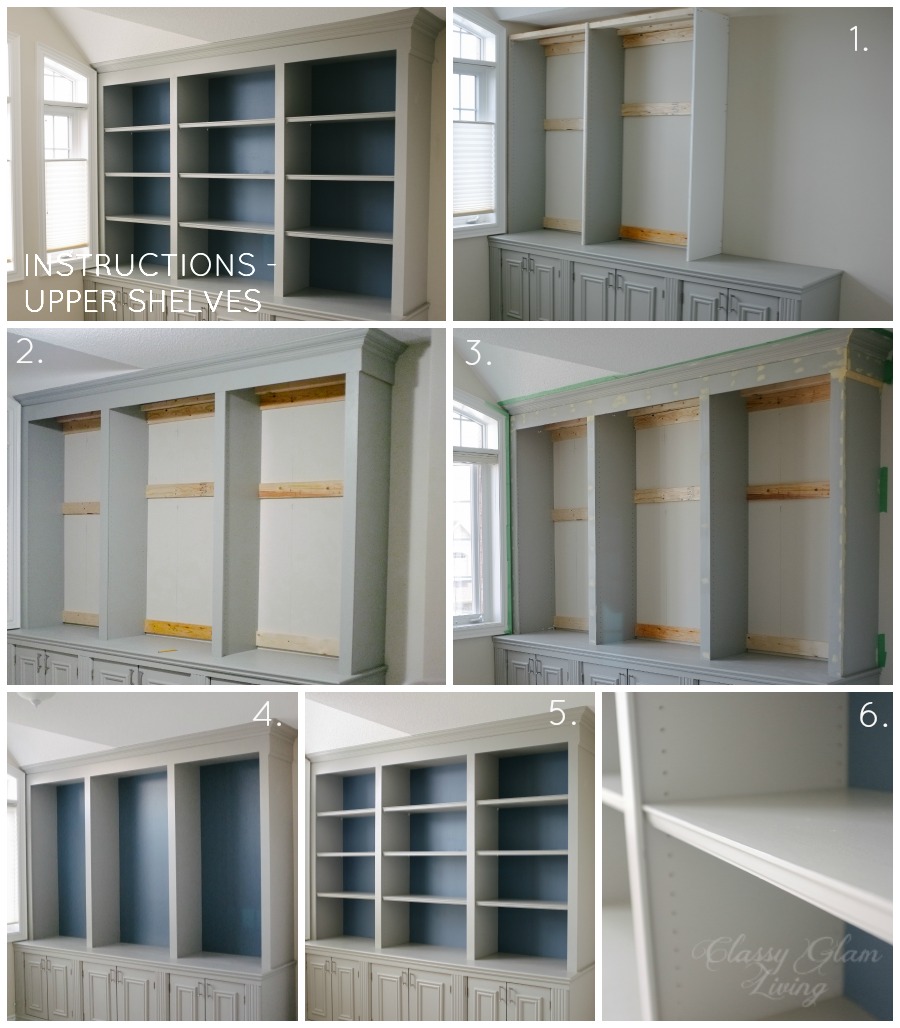
DIY Built-in Office Cabinet Upper Shelves | Classy Glam Living

1. We wanted the shelves to come out to just beside the window trim at the far wall, which was 15" deep.  The Mr. took the easy way and got pre-drilled laminate boards as the shelf supports, and they were just shy of 15".  He painted them first before they were attached to the wall by 1"x4".  The shelf supports were also connected to each other by 1"x2" at the top for added sturdiness.

2. After the shelf supports were up, The Mr. nailed in 0.5"x1.5" plywood trim to hide the seam front of the shelf supports.  He also nailed in an MDF board across the top of the frame to add boldness to the crown moulding. 

3. And then, his favourite part ever - filling in the nail holes with wood fillers and sanded them down.

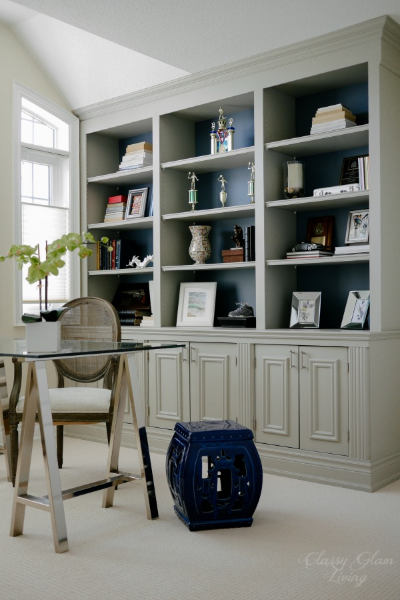
4. This is my favourite part, we added a contrasting backing to the upper shelves.  This creates more visual impact.  Even though we chose a blue, the colour is still neutral enough as a background.  See colour source below. 

5. For the height of the cabinet, the shelves would look more proportional with 4 tiers.  As you can see in the photo, one of the boxes of office items was already waiting to be unpacked after being in the box for 2+ years since we moved!

6. The shelves were finished with a tiny chair rail trim, glued and nailed to the front of each shelf. 

7.  All was not done until a coat of minwax was applied all over the surface of the unit.  We definitely didn't want to leave a tacky feeling on the painted shelves and countertop!

Grey and Blue combination | DIY Built-in Office Cabinet | Classy Glam Living

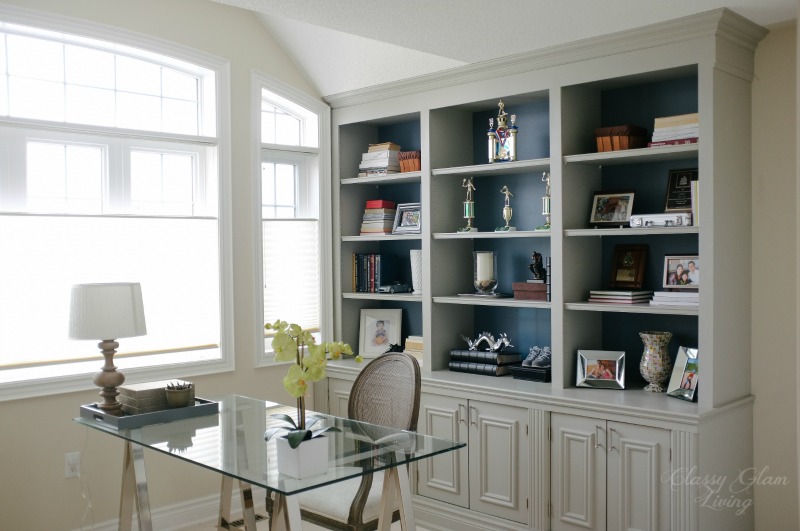
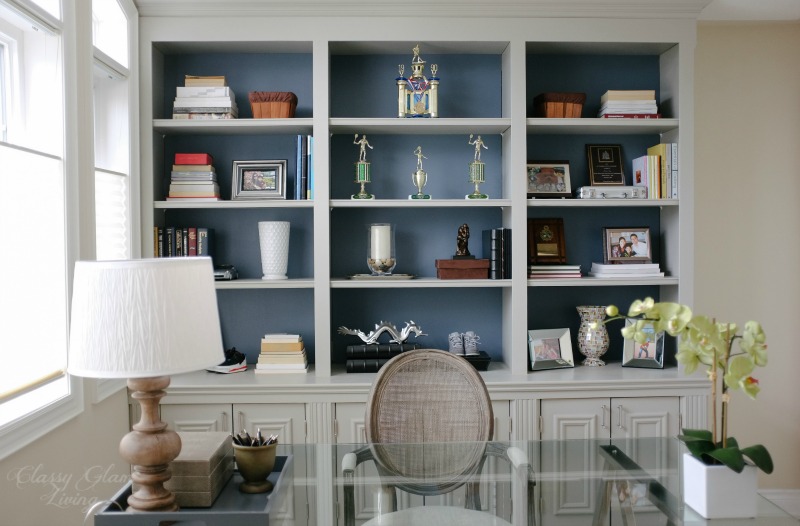
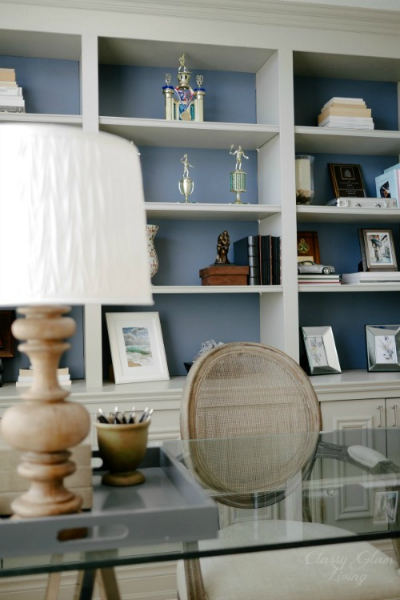
We love this colour contrast of the cabinet unit and the shelf backing.  The grey and blue combination takes on different depths as the natural light changes throughout the day from our window wall.

Again, here's our layout and outcome. 

Office Layout | DIY Built-in Office Cabinet | Classy Glam Living
Completed Office | DIY Built-in Office Cabinet | Classy Glam Living
Complete Side View | DIY Built-in Office Cabinet | Classy Glam Living
Front View | DIY Built-in Office Cabinet | Classy Glam Living
Side View | DIY Built-in Office Cabinet | Classy Glam Living
Front View | DIY Built-in Office Cabinet | Classy Glam Living

The Mr. really built this unit to last.  He was even showing me he could stand on the counter and it wouldn't even move an inch.  Uh, please get off before the little man sees you!  

The big kid had once again outdone himself.  I would say this was more labour intensive than our kitchen island and dressing room projects.  We finally have a functional office space, with a storage unit large enough for our office essentials  (and more importantly, to hide my mess behind those closed doors)!  

side view | DIY Built-in Office Cabinet | Classy Glam Living

Paint colours:

  • Grey colour of unit - Behr 730F-5 Nature Retreat
  • Blue backing of shelves - Para Paint P5201-52 Coastal Views
Completed View | DIY Built-in Office Cabinet | Classy Glam Living

How do you like the colour contrast of the cabinet?  Or would you prefer a traditional white built-in?

My Current Obsession - Notebooks

Notebooks! | Classy Glam Living

Ever since receiving my first diary with a lock, jotting down bits and pieces of my everyday life has been a part of me.  It probably started with the urge to write down something secretive, to justify having a lock on my diary.  Maybe I rode my bike on the road when my mom specifically urged me not to, or bought bags of chips and hid them under the bed...  I got busier at school, so the entries were less frequent but more dramatic, or so I thought at the time. Then I got busy dating, getting married, having a kid...  yup, blame it all on the hubs.  Eventually my full-blown storylined journal turned into a pregnancy log, consisting of a sentence or 2 of how I felt that day.  Through my pregnancy and the first year of little man's life, I had the ugliest business looking agenda to keep a log - how much he ate, how long he napped for, poopy diaper or not. Then I got some nicer agendas to jot down some notable events through his daycare years.  

Classy Glam Living

But wait, suddenly he started talking and was saying the funniest things!  We love documenting the progress of our home projects, but we're parents to this cute little monster foremost.  We definitely can't miss taking note of HIS progress!  I figured I needed something nicer than agendas to jot down his sayings and our conversations.  Something that would be worthy as keepsakes.  This was when my obsession with notebooks started...

I wanted to keep the notebooks in my purse to record our funny conversations whenever I have a moment.  My mission was to hunt down notebooks that were small and light.  I found my agendas too heavy to lug around, so I would forget those funny moments when I got home!  I also looked for notebooks with a somewhat durable cover, since I would be carrying the notebooks in my purse.  Of course, I wanted the notebooks to have nice, keepsake-worthy designs.  

Branded journals | Classy Glam Living

Sources:  1. / 2. fuchsia/ gold polka dots / 3. diamond/ green wave/ letters / 4. 

The popular notebook brands that I came across through my search include Kate Spade, Lilly Pulitzer, and Jonathan Adler, just to name a few.  I love Kate Spade home decor accessories, so naturally I've also come to love the gold foil designs on her journals.  The artistic and summery patterns of Lilly Pulitzer and the bold graphics of Jonathan Adler are all apple of my eye...  but the notebooks were too big.  They would look great in an office vignette though!

Click to view source

Click to view source

Click to view source

Click to view source

Some of my lunch hours were spent at Indigo or Papyrus.  Who doesn't feel like they're at a candy store at their stationery sections?  I always get a boost from checking out some beautiful stationery.  And then I saw these...

Click to view source

Click to view source

How incredibly cute is this notebook?  5 years in one place!  And it would look so cute at my bedside table or on my desk at the home office...  Then again, I realized it looks nicer ON THE TABLE, but too bulky in my purse.  Mission failed... 

Click to view source

Click to view source

There's of course Moleskine, but I'm looking for something more than just notebooks.  But then I found out they make a set of 12 monthly notebooks.  However, I didn't like how half of the notebook were of conversion charts and whatnots that take up too much space.  So I had to forgo that idea.  Though they would look so cute yet sohpisticated on open bookshelves.

Click to view source

Click to view source

And through some more searching, I found FIELD NOTES.  They're exactly what I'm looking for. Small sized notebooks with somewhat durable covers.  I liked the fact that they offer different designs and themes for each quarter of the year, totally made for suckers like me.  Their notebooks usually come in a set of 3 in a series of quarterly designs, which work out to be around one per month for my light entries.  Just perfect, and I have about half a year's worth of silliness in these notebooks now!  Check out their latest designs here!

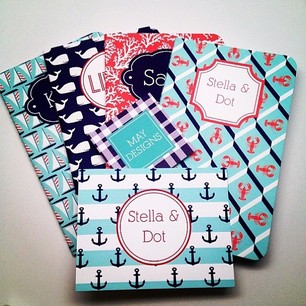
Even though my quest has seemingly ended, I'm still constantly infatuated by cute notebook designs.  I couldn't believe that I didn't know about May Designs sooner!  Their notebook covers are so on trend and sophisticated.  Better yet, they can be personalized with monograms or emblemed titles.

Click to view source

Click to view source

All of their agendas and notebooks are one size of 5"x8".  They're also quite thin, so it's suitable to be carried in the purse.  Yet, just an agenda a year isn't enough to satisfy my want of their beautiful designs!  I love the Nantucket collection, and I think the whole suite would be nice for journaling through the summer!

I would love to get little man to start on a journaling habit when he gets older.  This would be a perfect choice for him.  

Sources:  1./ 2.

Sources:  1.2.

I got his daddy the Darth Vader and Son hardcover book.  The two Star Wars fans had a blast going through the pages of parenting jokes together.

Kids grow up too fast (though admittedly, sometimes not fast enough), and there are too many things worth noting.  Keeping a notebook handy in my purse has helped me quickly make these minor events a part of our memories.  Mother's Day is coming up, these notebooks would be a perfect idea for those moms who are keen on memory keeping.  In the purse or on the table, they're all beautiful and durable.

I love flipping through these notebooks (and agendas), and I hope little man will learn to treasure them in time.  You never know, I may need these notebooks in the future to remind me of these cute moments...  like The Notebook by Nicholas Sparks. 

Do you document your child's progress and funnies?  How is it working out for you?

How We Put Together the Nursery

How We Put Together the Nursery | Classy Glam Living

I received another birthday party invitation from little man's school buddy the other day, and I realized how his buddies' birthdays are around April-June.  Most of my friends' kids have birthdays around August-November.  Attending birthday parties is like a once a month activity, if not more often.  Curiosity got the better of me, and I googled about the most popular month(s) of birth.  It turns out that summer babies are the most popular, and in particular, August babies... so you work back 9 months, and most couples were pretty busy in November...  That's what goes through my head when people tell me when they're expecting their babies!  *wink*  

And so it got me thinking back to my expecting days...  Our little man was a Fall baby.  By this time of that year, we had our nursery pretty much all planned out.  Couldn't help it, we were THAT excited!  If you're having a summer baby, you should be well on your way with baby equipment purchasing and of course, planning around the nursery!  No pressure...  if you still need some ideas, read on! 

The nursery was probably our first DIY home project back in our previous home.  This was the first trimwork project that the Mr. took on.  Adding the chair rail was a huge project in itself that made a huge difference.  By huge I mean the trim was all hand-cut and manually nailed-in - the Mr. didn't think he would be doing much wood work in the future and didn't want to invest in electric cutting equipment.  (Now he's probably cursing, "what the heck was I thinking?"  Little did he know that he would be doing all sorts of DIY projects in our new house just 2 years down the road from then!!  Like this and this!) 

How We Put Together the Nursery | Classy Glam Living

We painted the walls above the chair rail in Benjamin Moore's Robin's Nest.   I absolutely fell in love with the colour as I saw it used in a makeover of a teenage girl's room.  I showed the magazine picture to the Mr. and demanded that our baby's room be painted in this colour.  (Yes I already drove him nuts with all my picture-bombarding in the pre-pinterest days).  Even before knowing I would have a boy, I wanted it blue.  It's just such a lively colour and yet so pure.  I really didn't care if I were having a girl, she was gonna live in a blue room!  But a whole room in that colour would seem a bit too much, and that was why we had the chair rail to give it a break.  Below the rail, we painted a sandy beige to sort of tone down the colour a bit.

How We Put Together the Nursery | Classy Glam Living

Our next project was putting up the sticker wall mural of birds and cherry blossoms that we got from IKEA.  I loved how the grey went with the blue wall...  but then, a day later, we noticed some of the stickers started peeling off.  Being the pregnant me, all I could think of was there was ABSOLUTELY no way I would be picking up stickers from my baby's crib through the life of this room!  And so I started doing the unthinkable...  

How We Put Together the Nursery | Classy Glam Living

Fed up with rubbing in the stickers back on the wall, I took a pencil and outlined the stickers. Guess what, we handpainted the wall decal.  Nothing against IKEA, we love our IKEA hacked dressing room!  Maybe it was for the better this time...  

How We Put Together the Nursery | Classy Glam Living

We used a high gloss version of the colour that's a tone lighter than the walls, and I liked the softer look of this over the grey stickers!  The IKEA light fixture compliments the whimsical wall quite well.  

How We Put Together the Nursery | Classy Glam Living

Next up, we put in floating shelves on the opposite wall of the crib.  They were set up in stepped format to add some visual interest.  One thing to remember if you are installing shelves above the changing table, just make sure you're only putting soft items (eg. cloth books, stuffed toys, etc.) on them.  You don't want to risk any heavy items falling on your precious one...  you can never be too safe!

How We Put Together the Nursery | Classy Glam Living

Thank goodness for the comfortable armchair, where I sat nursing him most days.  You definitely need a chair with arms, which lend support to your aching neck/ shoulder/ elbow/ wrist as you nurse your baby.  That was also where I rested, with my legs on the ottoman for a breather...  if I was even lucky enough that he would nap for 10 minutes in the beginning (and where I sat MSN'ing my new baby forum buddy, who was also trying to get her baby to nap longer...  oh the things we moms do!)

How We Put Together the Nursery | Classy Glam Living

An important piece of furniture that is not in the picture was a side table that we had beside the armchair.  Of course you would need a spot to put the bottle, a night light, and other knick knacks!  It came in a dark wood colour, but we painted it with the leftover paint of the wall mural. Little man now has it as his bedside table, on which he has a Spiderman clock =)

Kudos to my dear Mr. to have done such a fantastic job on installing the extras and painting the room.  It was where I spent countless hours in the first few months of little man's life nursing him and trying to get him to nap.  Sometimes I wondered if I would ever get to leave the room, with his cycle of changing diapers, feeding, playing, napping, and crying.  Hey, if you're going to spend hours of your day in the room, might as well make it pretty right?

How We Put Together the Nursery | Classy Glam Living

Now that little man is more than half of my height, I think it's time we start his big boy room project.  We've converted his crib to a double bed, where he's spoiled to be able to sleep slanted in every which way.  We have a new colour palette in mind, and I think we may need to do some furniture painting...  and I LOVE these rug tiles for his big boy room!

Are you ready for your baby's arrival?  The Mr. and I agree though, that nobody will be 100% ready for a newborn.  Do you have a theme for the nursery?