How to Hang Draperies - Not the Dollhouse Way

Curtains Draperies Hanging | Classy Glam Living

We were very happy that our builder wasn't stingy on their windows offerings.  Throughout our house, most of the windows are very generous in size.  Our living area on the ground floor faces west, so we always love to see an abundance of natural light pouring in from those large windows and patio doors, greeting us as we come home from work.  Large windows are naturally a focal point to any room - they're the first thing your eyes would find, being the brightest "object" in the room.  We knew then we should dress up our windows, and beautiful draperies always get the job done!

We chose a silk fabric for the family room for its lovely sheen, and a two-tone woven fabric for the living and dining area for a more formal ambiance.  We added a thick liner for a heavier look, as well as to block out the UV rays that may cause discolouration of the fabric.  I've to be honest, I was in it more for the look...  more waves/ folds in the fabric with weight makes the drapes more luxurious.  That was exactly what we were going for!

Curtains Draperies Hanging | Classy Glam Living

With large windows come privacy issues.  We definitely didn't want to put on a show for our neighbours, not that they would care to peek...  unless they're like me.  Anyhow, knowing there's always a "neighbourhood watchdog" out there, we went with sheers underneath the drapes.  It would still let light through during daytime, and would provide adequate privacy at night.  Again, the more folds, the more privacy the sheers would provide.  I think we went with 3 to 4x the width of the windows for the sheers.

Now comes the physically intensive part - hanging of the drapes.  Although our drapery company offered installation services for the drapes, we opted to install them ourselves...  nothing's too complicated for my Mr.!  

Curtains Draperies Hanging | Classy Glam Living

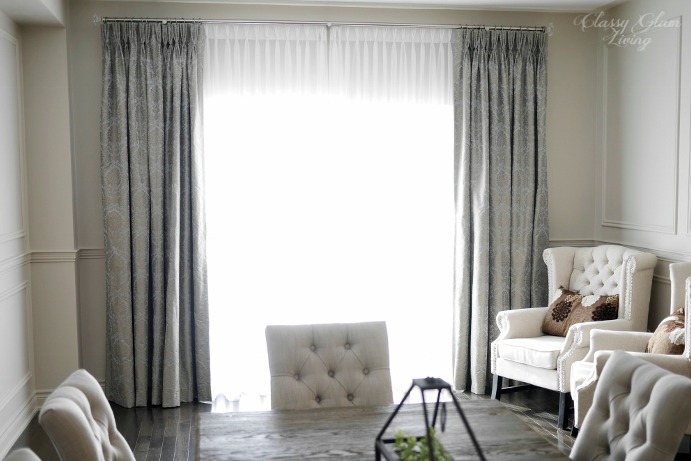
Conventional wisdom has it that hanging above and beyond the frames around 6" would make the windows appear larger.  However, we wanted to create an illusion of even taller windows than we have, so we carried the length of the drapes from the ground all the way up to the ceiling (minus enough room at the top for a future crown moulding project).  The higher you hang the drapes, the taller the windows would appear to be, as the eyes need to travel further upwards.  

It's also unnecessary to hang drapes constrained by the sides of the window frame.  If the side of a panel ends at the side of the window frame, it would block a lot of light through the window.  I guess the only exception would be if you're blessed with large and full wall-to-wall window.  We hung the drapes such that when open wide, the inner side of the curtain panel is at either side of the window frame, so we can get maximum light into the room.  

Curtains Draperies Hanging | Classy Glam Living

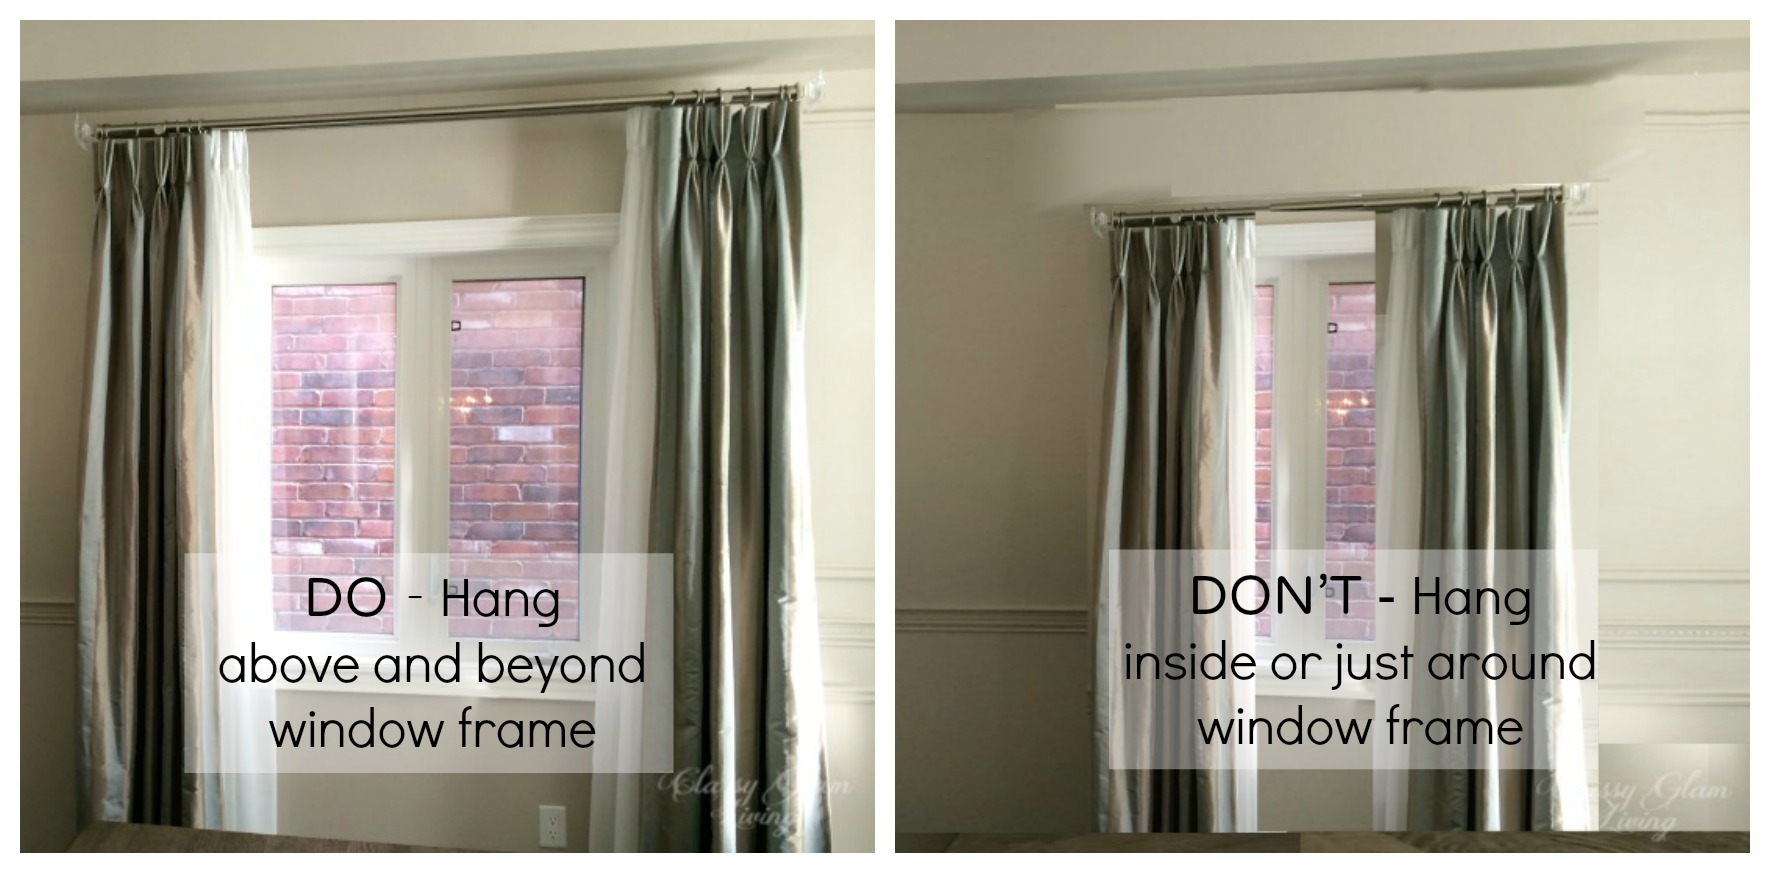
I totally enjoy the view of this red brick wall...  NOT!  I guess the builder thought it isn't much of a view facing a brick wall, so they installed a small window here on the side.  Well, then let me use this tiny window to demonstrate how to hang your drapes to bring in more light and create an illusion of a bigger window.

Curtains Draperies Hanging | Classy Glam Living

If we had hung the drapes close to the frames, the room would be darker, because much of the window is closed off to let light through.  

Just for fun, here is how the window would've looked if we had installed the drapes just around the frame.  Same drapes, but hung lower and closer together.

Curtains Draperies Hanging | Classy Glam Living

You see how all the light would be lost by hanging the drapes right around the window frame?  "OH, THE HORROR!" as the Mr. would proclaim!  I mean, it's not too bad if the purpose was to see as little of that red brick wall as possible.

Here's a side-by-side comparison of the 2 hanging methods:  our way on the left, and the tiny dollhouse way on the right.    Having the drapes around the frame makes it look like a dollhouse's window - a definite "DONT" that windows with high ceilings should avoid. 

Curtains Draperies Hanging | Classy Glam Living

A more cost effective way to achieve height with store bought panels would be to add a band of extra fabric at the top or bottom of the panels.  This is a simple job that any seamstress can help with.  To add width, you can either sew panels together length-wise, or sew that extra band of fabric on the sides.  This is a great way to personalize your ready-hang panels!

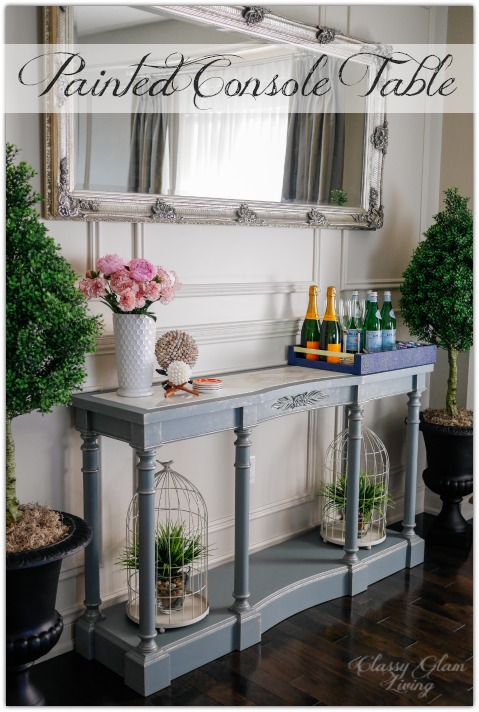
And the finishing touch, a sparkly finial at the end of the rods.  It dressed up our windows with an elegant feel like a jewel, letting our windows shine like the stars that they are. 

Curtains Draperies Hanging | Classy Glam Living

Check around your house to see if you've hung your drapes to give your rooms proper incoming light.  Give yourself a pat on the back if you did!  If you haven't, see how you can play up this optical illusion at your windows!

My Current Obsession: Trays and Styling

Tray Styling | Classy Glam Living

Back when little man was still a baby, the forward-thinking mom in me took a look at our wooden coffee table with sharp corners and declared to the Mr. that we should replace it with something soft.  Seeing how babies who are learning to walk love to pull themselves up against furniture to walk around them, you can never be too cautious (especially with us being first time parents)!  For practical reasons, we decided to get an upholstered ottoman with ample storage inside for little man's toys (and our issues of unread magazines).  

Problem was, we needed a hard surface on which to place our TV snacks/ drinks.  That was what prompted us to make our first tray purchase, and the start of an obsession...

This was the large tray we got from Pottery Barn for our coffee table / ottoman in the family room.  We love keeping copies of the Restoration Hardware catalogue on the tray (we're always in awe and inspired by how they style the rooms).  Just in time to switch to the most recent copies we got in the mail!  

Coffee Table Tray Styling | Classy Glam Living

Ever since getting that first tray, we loved using trays to keep a large surface clutter free.  The tray is like a clutter boundary - keep your clutter in it, and makes the rest of the surface much neater...  or at least I try to keep it that way!

The tray in our office keeps our stationeries easily accessible, while keeping our workspace bright with that wooden lamp.  

Office Desk Tray Styling | Classy Glam Living

Creating a tray vignette is a great way to add a little personality to a room.  Here in our home office, it makes working less dull with something pretty on the desk.

Office Desk Tray Styling | Classy Glam Living

In addition to personalizing a space, trays also make cleaning much easier.  We have a long counter in our bathroom, and I found cleaning the counter much easier than my pre-tray days.  I just need to haul away the whole tray and give the counter an easy wipe-down.   No more moving individual canisters while I clean up.  

Bathroom Vanity Tray Styling | Classy Glam Living

A sparkly mirror tray in the dressing room helps gather up bottles... 

Dressing Table Vanity Tray Styling | Classy Glam Living

... and free up some space for another mirror tray for some knick knacks - my ring holder, clock and oil diffuser.

Dressing Table Vanity Tray Styling | Classy Glam Living

Our tray obsession continued on our last trip and we brought home this faux shagreen tray from Z Gallerie.  We loved its color, and the stylish gold handles make it a perfect piece for entertaining.  It now sits nice and proud on our dining room console table.

Bar Tray Styling | Classy Glam Living

I'm not sure why we've only been getting four-sided trays.  But we're now eyeing these beauties!

Tray Styling | Classy Glam Living

Sources:  1 / 2 / 3 / 4

Maybe one day, I'll ask the Mr. to attempt this DIY project also!  I love me a marble tray!

via Almost Makes Perfect

via Almost Makes Perfect

Now go on to get organized and beautify your space with trays!

Painted French Blue Console Table

French Blue Painted Console Table | Classy Glam Living

As the Mr. was finishing up the dining room wainscoting and chair rail project, I started looking for the perfect size console table.  How did we determine what's the perfect size for our dining room?  

Our dining room is a shared large room with the living room, measuring 24-ft. in length.  We wanted THE piece to be at the short wall of the lengthy room, so that we can put a large mirror above it to reflect the light from the large patio doors. The dining table is 8-ft. in length.  We also wanted to ensure there would be enough room to walk behind a chair at each end of the table, let's say around 2.5-ft. or so including the back of the chair.  

Space between chair and console table.

Space between chair and console table.

Doing the math, that left us 24' (length of the room) - unextended dining table 8' - walk space 2.5-ft. x2 = 9-ft. to allot to the living room and a dining room console.  We don't usually leave the dining table extended, so we're fine with having the extended table eating a bit into the living room when need be.  However, I would want the living room to be at least 8-ft in length to fit in a decent sized settee.  That means, we need to find a piece that's only around 1-ft in depth.

All the math confirmed our suspicion - a chunky sideboard is out of the question, as most are at 20" or more in depth.  We loved this console table from Restoration Hardware - the zinc and cast iron would be a nice contrast to our rustic wooden dining table.  However, it comes in 20" deep, argh!  According to my math above, the ideal console table could only be around 12" deep.  The extra 8" would make or break a "just right" look.  

It proved to be a huge challenge to find such a shallow console, not to mention a style that we wanted.  Most consoles usually come in closer to 20" deep.  When we saw the style we liked, it was too deep.  When we saw the right depth, it was just...  BLEH...  You get the idea!

I usually don't look for antique/ used furniture, but I always loved checking out Châtelet Home's current inventory.  As I was casually browsing through their online photo inventory gallery, low and behold, I found the perfect piece!  I was so excited I called them right away to put a hold on the item! 

With it being a used item though, it doesn't come PERFECT.  I should've kept a before photo of the piece, it was in pastel granny's apple green with peachy pink highlights...  can it be more 80s than that?  Despite its Miami Vice colors, I couldn't pass on the gorgeous details, perfect size, and marble top!  It came at a lower price as is or a bit more than double the price for a finished piece.  Of course, I would go for the lower price option!  You know we (the Mr.) don't mind to put in some elbow grease to add our personal touch to it!

French Blue Painted Console Table | Classy Glam Living

We chose a French blue that the Mr. painted over the entire piece.  I then finished it off by dry brushing some Martha Stewart champagne gold acrylic paint around the details.  The final step was to add a coat of Min Wax on it.  Easy peasy, lemon squeezy, as the little man would put it.  Saved us some bucks by doing it ourselves...  and to our liking!

French Blue Painted Console Table | Classy Glam Living

We loved how the console table turned out.  Looking pass its original colors, it has great lines and is the perfect size for our dining room.  

French Blue Painted Console Table | Classy Glam Living

Incorporating our personal touches was a nice way to inject some colors into our neutral-colored dining room.  The Mr. also pointed out how he liked the details on the console table reflecting the baluster design on the dining table.  

French Blue Painted Console Table | Classy Glam Living

Now we have the perfect spot for everyday decor accessories and party essentials.

French Blue Painted Console Table | Classy Glam Living

I hope we have inspired you to look at used furniture in a new light, especially when you're stuck at finding the PERFECT pieces for your home.  I was never a vintage person, until I realized what magic some TLC can do.  

Good luck on your search for the perfect piece for your home!

French Blue Painted Console Table | Classy Glam Living