Drop Zone Unit - Design Board

I left off my previous post with the difficulty I had in finding the right storage unit for our drop zone, and our most feasible option would be to DIY a unit from scratch.  I'm confident it shouldn't be a problem for the Mr.; you can check out his previous builds here

The Mr. doesn't take on a build lightly.  I had to show him that I had at least tried to shop around for a unit, but my options are constrained by size and budget.   I really wanted this storage unit to blend in with the existing style of our main floor, and the elegant look of these mirrored cabinets are exactly what I'm after. 

All from Wayfair

All from Wayfair

However, as mentioned in my previous post, these are around 28-32" high, which I think is a bit too low for the 9' ceiling.  I also prefer to have all drawers, so I turned to dressers with drawers instead.

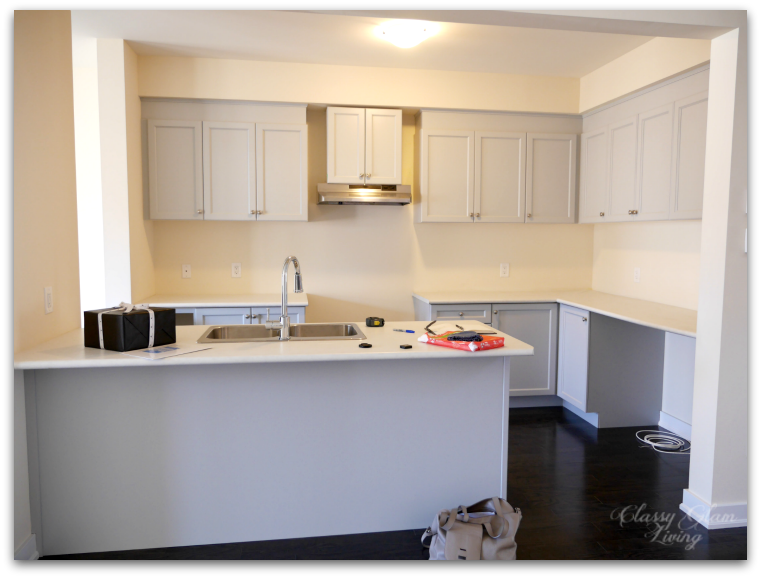
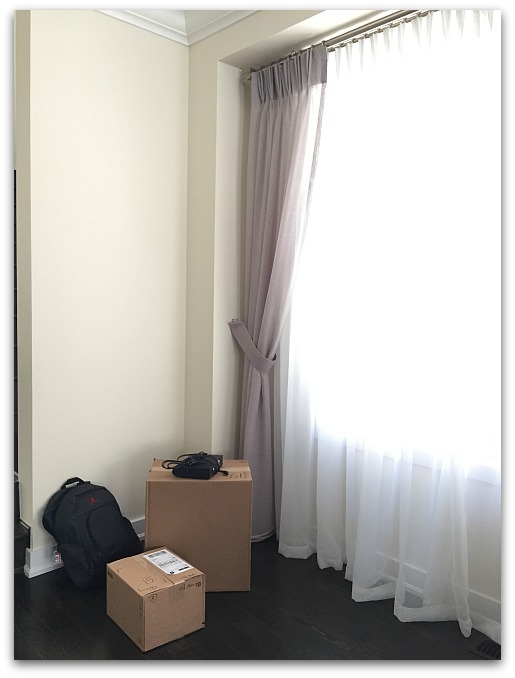
Unfortunately, dressers are usually 18-20" in depth, which would be too deep for that little nook by the window.  I wanted to keep the depth at a maximum of 15", so that the storage unit doesn't protrude too much beside the window.  See the nook right by the window, our current drop zone:

Drop zone makeover | Classy Glam Living

And that was when I turned to my last resort...  I made a MAYDAY request to the Mr. to PLEASE build a 3-drawer unit for our main floor's storage!!  Thankfully, he's all game to build another piece of DIY furniture 😁

The pros with going DIY custom route are:  1. it would be in the exact dimensions for the nook, 2. done at a fraction of the price of an actual furniture piece (if I could even find one).  The cons?  Well, it'll have to wait for the Mr.'s availability...  when the hockey season is over and he is free from his coaching and chauffeuring responsibilities.  

I was so excited for another DIY furniture piece and immediately went on Pinterest to check out design inspirations!

Design Inspirations

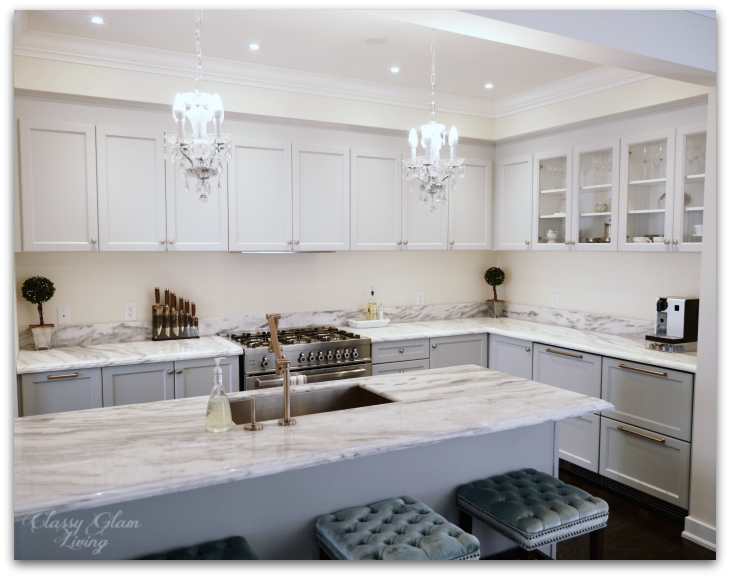
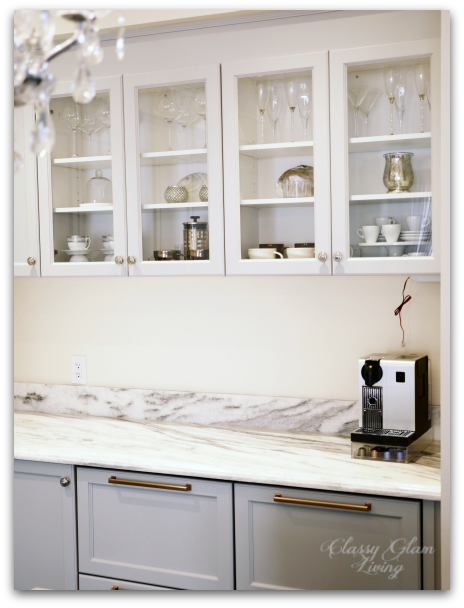
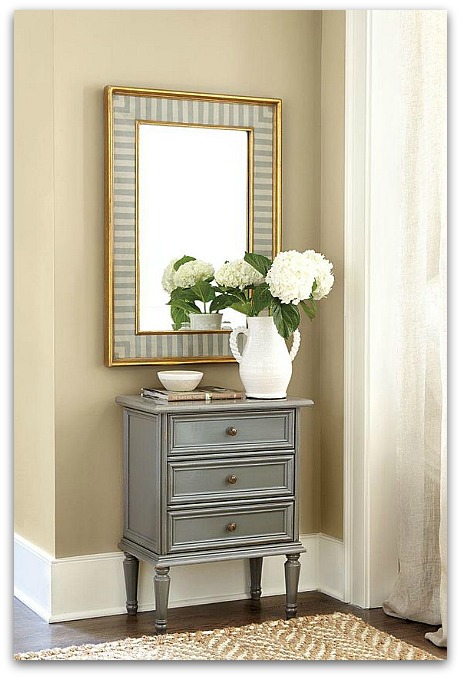
The colour combination of this unit was my jumping off point.  I love the grey unit with gold hardware.  It'll tie in with our kitchen decor!

This is such a beautiful piece from Ethan Allen.  The details surrounding the drawers and the legs are absolutely gorgeous.  Those ring pulls also reminded me of a set that the Mr. loves (more on that below).

The side profile of this unit highlights the elegance of this unit.  The top and bottom rounded edges give this unit a sophisticated touch.

Yes, I know this is a vanity, but the design is totally "buildable" by the Mr.!  I'm loving the frame at the face of the unit, enclosing the drawers.  

Hayburn & Co

Hayburn & Co

Combining the above design elements, can you imagine the finished product with this lion ring pull (the Mr.'s most favourite hardware ever)...

with these legs...

Or are you a visual person like the Mr.?  Well, here's a summary design board I made for him:

Drop zone unit design board | Classy Glam Living

I just can't wait for hockey season to be over, so that the Mr. can start on this project!  I see a light at the end of the tunnel; the day is near when our clutter will have a home!

New Kitchen Update - Integrated Hood + Upper Cabinets

SEE OUR MOST RECENT KITCHEN UPDATE!

Um...  did you notice that we have yet to post a photo of our kitchen with the upper cabinets?  That was because it looked horrific with the builder's hood vent + the dinky cabinet they so considerately installed to cover the vent.  (By code, the builder has to provide a hood vent in order for the house to close.)  

Here goes...  cover your eyes...  This is what we're trying to forget - how the hood vent looked like for the past month.  It's certainly got the "wow" factor, in a bad way ;-)

Photo taken on the day we closed the house, before any appliances were delivered.

Photo taken on the day we closed the house, before any appliances were delivered.

I figured nobody would notice when we featured our new superwhite countertop...

New house kitchen New Superwhite Quartzite countertop | Classy Glam Living

But the time has come for a reveal of the upper cabinets... 

Here was how we had envisioned this new kitchen will be, using IKEA's kitchen building tool.

New house kitchen rendering | Classy Glam Living

And here it is, after we've gotten rid of the builder's hood vent and hideous cover-up.  

Kitchen in-progress update | Grey Cabinets | Minimalist kitchen with level upper cabinets | Classy Glam Living

The installation of the hood revolved around the logistics of the hood cabinet.  Our integrated hood requires the bottom of the hood cabinet to be cut to size before installation.  However, we were forbidden by the builder to contact the kitchen supplier until we have closed on the house, and in effect, delayed the installation of our hood until now.

Earlier this week, the kitchen supplier finally came to install the hood cabinet.

Kitchen update | Integrated hood | Minimalist kitchen with level upper cabinets | Classy Glam Living

To backtrack a bit, the grey cabinet colour was a mystery to us.  We couldn't tell how light the grey would be on the maple doors based on an oak sample door at the builder's decor centre, but we took a risk ordering this light grey "Platinum" anyway.  That was back in February of 2014, and the suspense for this 1+ year was unbearable!  I had since then browsed all over the internet trying to figure out what this platinum cabinet colour could look like.  

Although we originally wanted a darker grey similar to the IKEA grey, this light grey turned out to be just grey enough.  With limited natural light going into the kitchen, darker cabinet doors would make the kitchen look like a dark hole in the middle of the house.  So the risk we took actually worked out for us!

While we were at it, we also changed out the upper cabinet doors at the fridge wall to glass doors.  We finally got the upper cabinets to look how we planned for them - a muted clean look with them level all across.  

Kitchen in-progress update | Glass doors on upper cabinets | Minimalist kitchen with level upper cabinets | Classy Glam Living

The glass doors help to break out the wall of solid doors on the adjacent wall and create a design element.  They give the illusion of a more open space, and act as a display cabinet for our drinkware and other decor items.  We'll eventually change those shelves to glass shelves to complete the look. 

Kitchen in-progress update | Glass doors on upper cabinets | Minimalist kitchen with level upper cabinets | Classy Glam Living

When the Mr. has some time, he can build us the pots and pans drawers for the lower cabinets, for which we had some custom drawer fronts made.  With all the drawer building experience that the Mr. has with the closet, he can now whip them up in no time, saving us hundreds from going with the builder's version.

Designing our kitchen has been a fun and enjoyable process, from picking out our cabinet colour to choosing our appliances, to shopping for our countertop slabs and cabinet pulls.  Although the level of customization is not to the extent of a full kitchen reno, we still put a lot of thought into making this kitchen function efficiently as the heart of the house.  A little research and some customizations with the builder later, we have a kitchen with good bones that we can take further ourselves.

Kitchen in-progress update | Grey Cabinets | Glass doors on upper cabinets | Minimalist kitchen with level upper cabinets | Classy Glam Living

For now, I would consider the kitchen's bones pretty much in place.  Next up for the kitchen will be to:  

Not too bad, considering we've done all these: 

  • Do something about that dead corner storage - DONE
  • Install panels on appliances - DONE
  • Replace countertop/ sink/ faucet - DONE
  • Replace solid upper cabinet doors on fridge wall with glass doors - DONE
  • see Design Board
Kitchen in-progress update | Grey cabinets | Glass doors on upper cabinets | Minimalist kitchen with level upper cabinets | Classy Glam Living

While being esthetically pleasing on its own, the kitchen design should also complement the overall design scheme of the house.  Our kitchen is on its way to glam-ification, slowly. I'm glad the changes we made to the builder's kitchen have added counter space, helping Chef Honey to churn out meals efficiently.  So far, he hasn't complained about the lack of counter space.  *Phew!*

Check out our original posts of this kitchen design:

Trendspotting - Kitchen Design

Kitchen appliance choices to free up counter space  

Range hood and minimalist kitchen design  

Kitchen countertops - marble and look-alike alternatives  

Our marble alternative kitchen countertop revealed! 


Top Hardware Picks for Our Dressing Room

Top Hardware Picks for Dressing Room | Classy Glam Living

Have you been following along the progress of our dressing room/ walk-in closet?  It's on Instagram, and the Mr. has been making great progress.  

Just to give you some background of our dressing room, its design is inspired by Carrie Bradshaw's huge walk-in closet in Sex and the City 2 (her side).  Similar to the dressing room in our previous house, we love the trims and moldings details of Carrie's, and the bottom section that's extended just a touch beyond the upper hanging units.  Not to mention, all those bottom drawers!!  One can never have enough drawers!

Carrie's closet in Sex and the City 2, image via Marks & Frantz

Carrie's closet in Sex and the City 2, image via Marks & Frantz

This time around, we're not hacking any IKEA PAX wardrobes; it would entail too much customization and hacking to fit in our new closet space.  So, the Mr. is building our closet from scratch!  That also means we're free to add all those bottom drawers to suit our needs.  

Here is the most updated status of our custom-built closet by the Mr.:

DIY dressing room walk-in closet progress shot | Classy Glam Living

While the Mr. goes about tackling the design and build of the closet, it's time I busy myself with looking at the little details to complement his huge undertaking.  One such is of course the gems for the closet - knobs and pulls.

The Mr. will be building shaker style doors and drawer fronts for our closet.  With this generic style, we would rely on the hardware to add a personal touch.  Instead of using only one kind of hardware, I would prefer separate styles of door handles and drawer knobs.  Not only is that less overwhelming visually, it also creates a layer of interest.  

Classic and timeless styles of hardware would suit us best.  Nothing too tacky - no rhinestones and no "crystal" knobs that are too diamond-looking.  

There're literally thousands of choices out there, but I'll know what I want when I see them.  And so, I went searching at my favourite hardware online sources:  Lee Valley, Ginger's, Anthropologie, and Etsy.

Drawer knobs

These brass knobs are timeless classics, and their subtle details add interest so that they're not just a blob of metal. 

All from Lee Valley.

All from Lee Valley.

Ever since going with glass knobs with our DIY refinished night tables, I've fallen in love with their versatility. They offer a touch of glam, and are a nice pairing with either intricate or sleek handles. 

1.-3. From Lee Vally, 4. From Gingers Bath. 

1.-3. From Lee Vally, 4. From Gingers Bath. 

Pull handles

The cabinet doors for the closet will be quite high, going from the ceiling to the top of the bottom drawers.  We would need pulls that are at least 6" in length to keep proportions in check, otherwise a tiny pull would get lost in the height of the door.  Anything 4" or less would not do!

The dressing room can handle the traditional look of these brass pulls, which I may not use for a contemporary kitchen.  While their designs are intricate, the handle parts are wide.  Aside from being ergonically friendly, they would also look proportional on a large cabinet door.

1. Lee Valley; 2. Anthropologie; 3. A Rose Rambling Etsy

1. Lee Valley; 2. Anthropologie; 3. A Rose Rambling Etsy

As much as I love classic style hardware, these contemporary pulls have understated details that don't render them too plain-Jane.

Both from Ginger's. 

Both from Ginger's. 

While there's no right or wrong way to pair cabinet door handles and drawer knobs, my preference would be to pair one with an ornate design with one of simple.  When in doubt, pairing both with simple designs would always be better than having both handles and knobs with too much detailing.

Pairing of Handles and Knobs | Classy Glam Living

Perhaps these are details so minute that nobody would notice.  So why put so much effort into mixing and matching of the knobs and pull handles?  Cabinet hardwares can make or break the design of a room.  Carefully chosen hardwares add your personal stamp to your space, and make using them on a daily basis a joy.  Make sure they're ergonomical and in a style that you love!

I'm glad I got this post out, because it sure did help me in narrowing down my choices.  I think I now know which ones I would go with.  Let me just run them by the Mr.!