New Kitchen Update - Integrated Hood + Upper Cabinets
/SEE OUR MOST RECENT KITCHEN UPDATE!
Um... did you notice that we have yet to post a photo of our kitchen with the upper cabinets? That was because it looked horrific with the builder's hood vent + the dinky cabinet they so considerately installed to cover the vent. (By code, the builder has to provide a hood vent in order for the house to close.)
Here goes... cover your eyes... This is what we're trying to forget - how the hood vent looked like for the past month. It's certainly got the "wow" factor, in a bad way ;-)
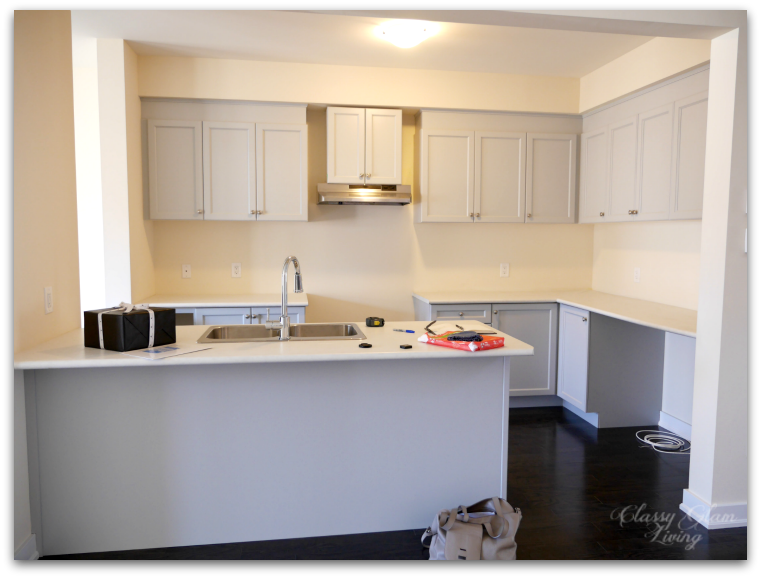
Photo taken on the day we closed the house, before any appliances were delivered.
I figured nobody would notice when we featured our new superwhite countertop...

But the time has come for a reveal of the upper cabinets...
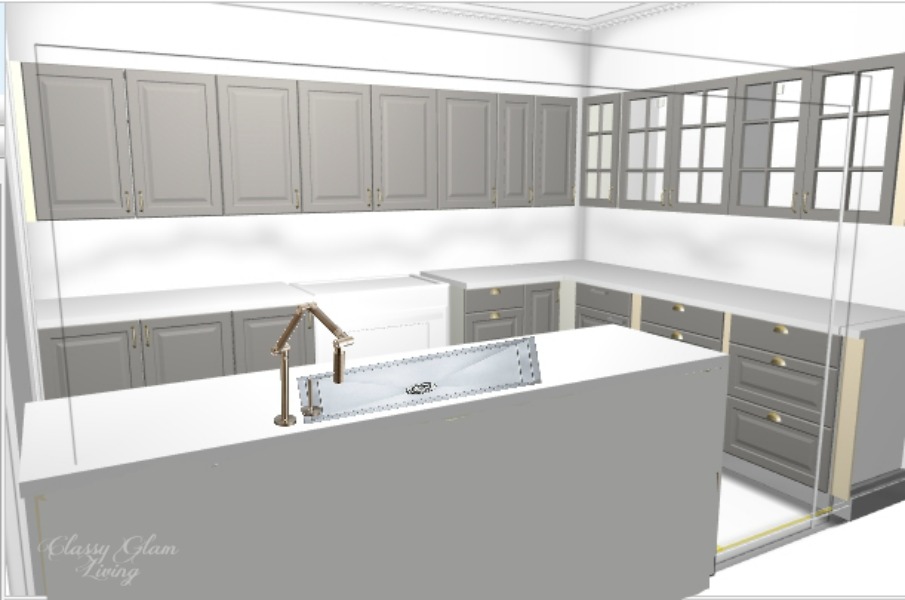
Here was how we had envisioned this new kitchen will be, using IKEA's kitchen building tool.

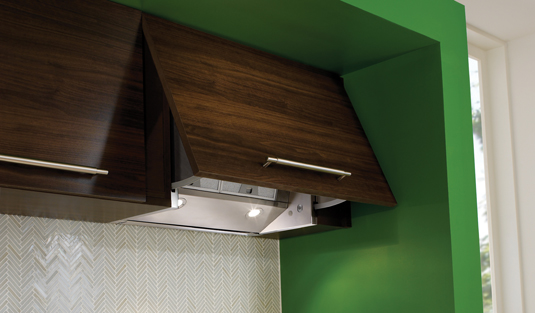
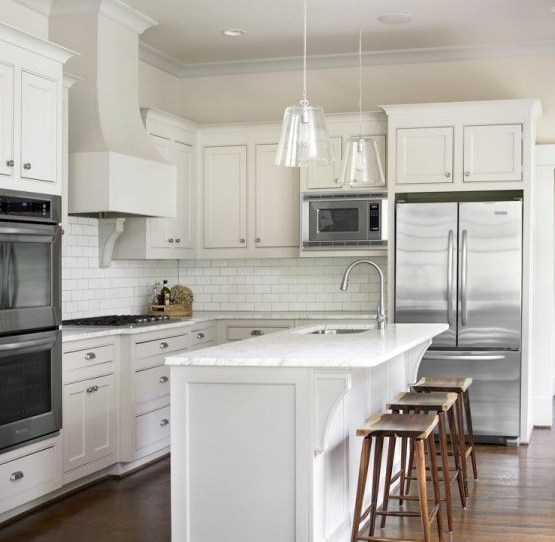
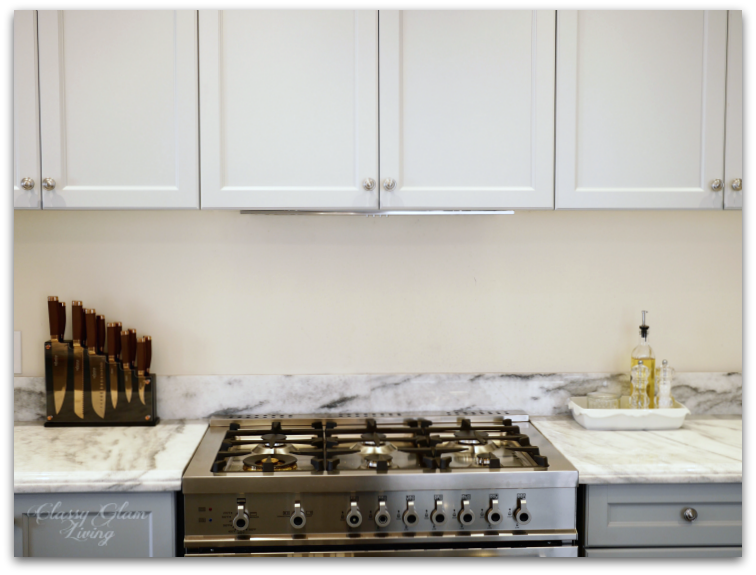
And here it is, after we've gotten rid of the builder's hood vent and hideous cover-up.
The installation of the hood revolved around the logistics of the hood cabinet. Our integrated hood requires the bottom of the hood cabinet to be cut to size before installation. However, we were forbidden by the builder to contact the kitchen supplier until we have closed on the house, and in effect, delayed the installation of our hood until now.
Earlier this week, the kitchen supplier finally came to install the hood cabinet.

To backtrack a bit, the grey cabinet colour was a mystery to us. We couldn't tell how light the grey would be on the maple doors based on an oak sample door at the builder's decor centre, but we took a risk ordering this light grey "Platinum" anyway. That was back in February of 2014, and the suspense for this 1+ year was unbearable! I had since then browsed all over the internet trying to figure out what this platinum cabinet colour could look like.
Although we originally wanted a darker grey similar to the IKEA grey, this light grey turned out to be just grey enough. With limited natural light going into the kitchen, darker cabinet doors would make the kitchen look like a dark hole in the middle of the house. So the risk we took actually worked out for us!
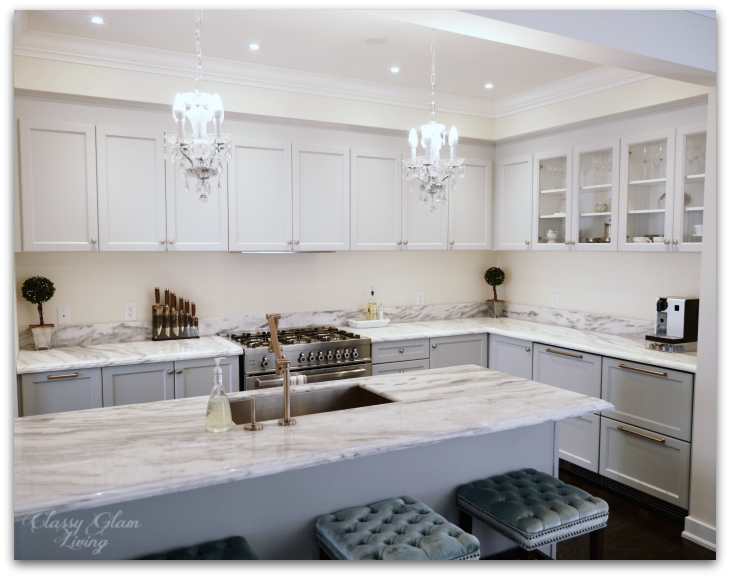
While we were at it, we also changed out the upper cabinet doors at the fridge wall to glass doors. We finally got the upper cabinets to look how we planned for them - a muted clean look with them level all across.
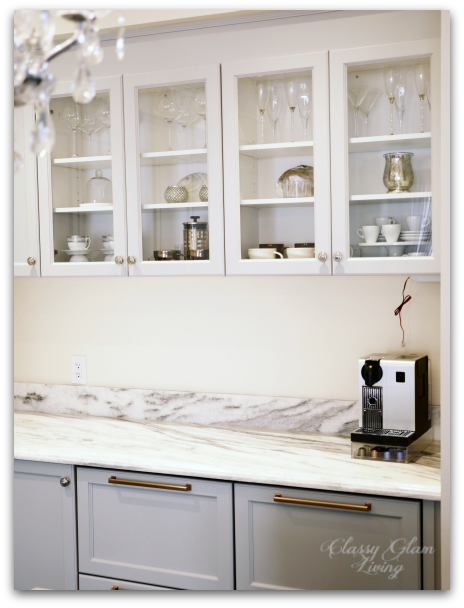
The glass doors help to break out the wall of solid doors on the adjacent wall and create a design element. They give the illusion of a more open space, and act as a display cabinet for our drinkware and other decor items. We'll eventually change those shelves to glass shelves to complete the look.


When the Mr. has some time, he can build us the pots and pans drawers for the lower cabinets, for which we had some custom drawer fronts made. With all the drawer building experience that the Mr. has with the closet, he can now whip them up in no time, saving us hundreds from going with the builder's version.
Designing our kitchen has been a fun and enjoyable process, from picking out our cabinet colour to choosing our appliances, to shopping for our countertop slabs and cabinet pulls. Although the level of customization is not to the extent of a full kitchen reno, we still put a lot of thought into making this kitchen function efficiently as the heart of the house. A little research and some customizations with the builder later, we have a kitchen with good bones that we can take further ourselves.

For now, I would consider the kitchen's bones pretty much in place. Next up for the kitchen will be to:
- Change out knobs for uppers and pulls for lower cabinets
- Install Backsplash
- Install mirror backing in glass upper cabinets
- Install under-cabinet lighting
- Replace slim cabinet crowns under the bulkhead with thicker crowns. Love this by Sarah Richardson.
- DIY another island upgrade, see what The Mr. did at our previous house
Not too bad, considering we've done all these:
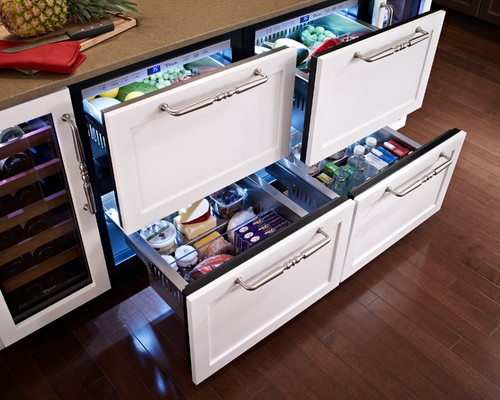
- Do something about that dead corner storage - DONE
- Install panels on appliances - DONE
- Replace countertop/ sink/ faucet - DONE
- Replace solid upper cabinet doors on fridge wall with glass doors - DONE
- see Design Board

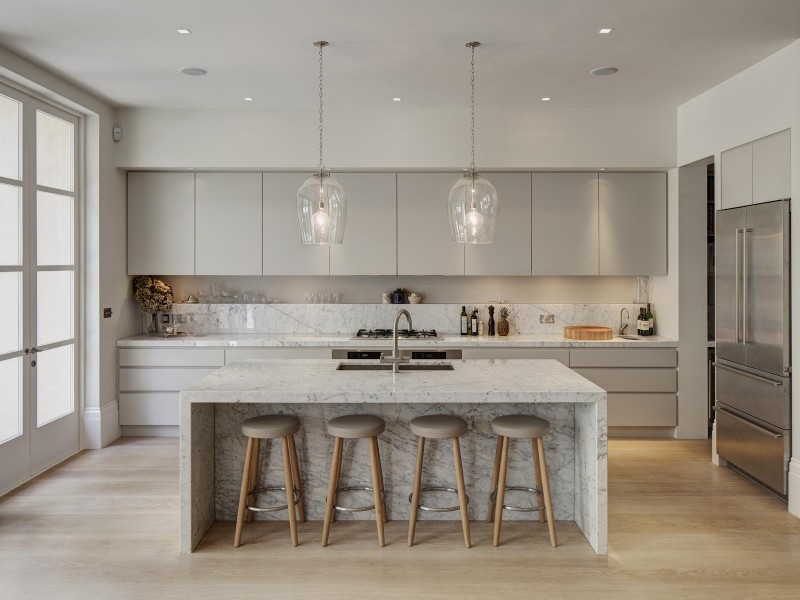
While being esthetically pleasing on its own, the kitchen design should also complement the overall design scheme of the house. Our kitchen is on its way to glam-ification, slowly. I'm glad the changes we made to the builder's kitchen have added counter space, helping Chef Honey to churn out meals efficiently. So far, he hasn't complained about the lack of counter space. *Phew!*
Check out our original posts of this kitchen design:
Trendspotting - Kitchen Design
Kitchen appliance choices to free up counter space
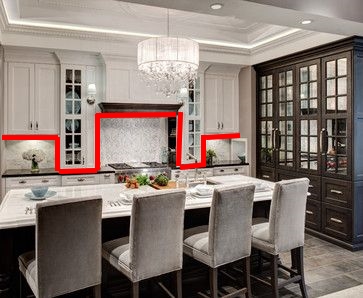
Range hood and minimalist kitchen design
Kitchen countertops - marble and look-alike alternatives
Our marble alternative kitchen countertop revealed!