How We Put Together the Nursery

How We Put Together the Nursery | Classy Glam Living

I received another birthday party invitation from little man's school buddy the other day, and I realized how his buddies' birthdays are around April-June.  Most of my friends' kids have birthdays around August-November.  Attending birthday parties is like a once a month activity, if not more often.  Curiosity got the better of me, and I googled about the most popular month(s) of birth.  It turns out that summer babies are the most popular, and in particular, August babies... so you work back 9 months, and most couples were pretty busy in November...  That's what goes through my head when people tell me when they're expecting their babies!  *wink*  

And so it got me thinking back to my expecting days...  Our little man was a Fall baby.  By this time of that year, we had our nursery pretty much all planned out.  Couldn't help it, we were THAT excited!  If you're having a summer baby, you should be well on your way with baby equipment purchasing and of course, planning around the nursery!  No pressure...  if you still need some ideas, read on! 

The nursery was probably our first DIY home project back in our previous home.  This was the first trimwork project that the Mr. took on.  Adding the chair rail was a huge project in itself that made a huge difference.  By huge I mean the trim was all hand-cut and manually nailed-in - the Mr. didn't think he would be doing much wood work in the future and didn't want to invest in electric cutting equipment.  (Now he's probably cursing, "what the heck was I thinking?"  Little did he know that he would be doing all sorts of DIY projects in our new house just 2 years down the road from then!!  Like this and this!) 

How We Put Together the Nursery | Classy Glam Living

We painted the walls above the chair rail in Benjamin Moore's Robin's Nest.   I absolutely fell in love with the colour as I saw it used in a makeover of a teenage girl's room.  I showed the magazine picture to the Mr. and demanded that our baby's room be painted in this colour.  (Yes I already drove him nuts with all my picture-bombarding in the pre-pinterest days).  Even before knowing I would have a boy, I wanted it blue.  It's just such a lively colour and yet so pure.  I really didn't care if I were having a girl, she was gonna live in a blue room!  But a whole room in that colour would seem a bit too much, and that was why we had the chair rail to give it a break.  Below the rail, we painted a sandy beige to sort of tone down the colour a bit.

How We Put Together the Nursery | Classy Glam Living

Our next project was putting up the sticker wall mural of birds and cherry blossoms that we got from IKEA.  I loved how the grey went with the blue wall...  but then, a day later, we noticed some of the stickers started peeling off.  Being the pregnant me, all I could think of was there was ABSOLUTELY no way I would be picking up stickers from my baby's crib through the life of this room!  And so I started doing the unthinkable...  

How We Put Together the Nursery | Classy Glam Living

Fed up with rubbing in the stickers back on the wall, I took a pencil and outlined the stickers. Guess what, we handpainted the wall decal.  Nothing against IKEA, we love our IKEA hacked dressing room!  Maybe it was for the better this time...  

How We Put Together the Nursery | Classy Glam Living

We used a high gloss version of the colour that's a tone lighter than the walls, and I liked the softer look of this over the grey stickers!  The IKEA light fixture compliments the whimsical wall quite well.  

How We Put Together the Nursery | Classy Glam Living

Next up, we put in floating shelves on the opposite wall of the crib.  They were set up in stepped format to add some visual interest.  One thing to remember if you are installing shelves above the changing table, just make sure you're only putting soft items (eg. cloth books, stuffed toys, etc.) on them.  You don't want to risk any heavy items falling on your precious one...  you can never be too safe!

How We Put Together the Nursery | Classy Glam Living

Thank goodness for the comfortable armchair, where I sat nursing him most days.  You definitely need a chair with arms, which lend support to your aching neck/ shoulder/ elbow/ wrist as you nurse your baby.  That was also where I rested, with my legs on the ottoman for a breather...  if I was even lucky enough that he would nap for 10 minutes in the beginning (and where I sat MSN'ing my new baby forum buddy, who was also trying to get her baby to nap longer...  oh the things we moms do!)

How We Put Together the Nursery | Classy Glam Living

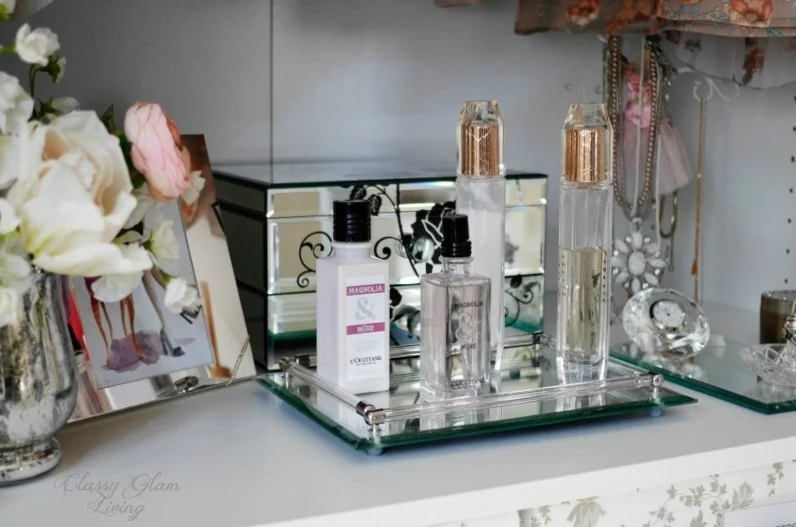
An important piece of furniture that is not in the picture was a side table that we had beside the armchair.  Of course you would need a spot to put the bottle, a night light, and other knick knacks!  It came in a dark wood colour, but we painted it with the leftover paint of the wall mural. Little man now has it as his bedside table, on which he has a Spiderman clock =)

Kudos to my dear Mr. to have done such a fantastic job on installing the extras and painting the room.  It was where I spent countless hours in the first few months of little man's life nursing him and trying to get him to nap.  Sometimes I wondered if I would ever get to leave the room, with his cycle of changing diapers, feeding, playing, napping, and crying.  Hey, if you're going to spend hours of your day in the room, might as well make it pretty right?

How We Put Together the Nursery | Classy Glam Living

Now that little man is more than half of my height, I think it's time we start his big boy room project.  We've converted his crib to a double bed, where he's spoiled to be able to sleep slanted in every which way.  We have a new colour palette in mind, and I think we may need to do some furniture painting...  and I LOVE these rug tiles for his big boy room!

Are you ready for your baby's arrival?  The Mr. and I agree though, that nobody will be 100% ready for a newborn.  Do you have a theme for the nursery?

Basic Pieces of Our Hall Table

Looking out the window, blowing snow and all (in the middle of April??), I don't think my previous post on a spring dining tablescape warded off Mother Nature's winter spell.  Can you believe there was a 28C (82F) degrees difference between these 2 days?   Stop teasing us, and let there be spring already!  On a happier note, I have some exciting news to share!  You may already know about this if you follow me on instagram.  I submitted our dramatic dining tablescape for One Kings Lane's instagram event of #homespringhome. Hubby and I were so delighted that our tablescape was chosen and featured on One Kings Lane's instagram!

Continuing with our spring discussion, our entryway table is definitely ready for it!  The eggs have been laid, so to speak, just in time for Easter.

Basic pieces hall table | Classy Glam Living

Soft colourful floral arrangement, easter eggs and nest adorn our baby blue ceramic tree trunk table.  These are the seasonal accessories that we change out of our basic pieces.

Basic pieces hall table | Classy Glam Living

Think about fashion for a minute, your wardrobe should have some key pieces.  A crisp white shirt for work, little black dress for those special occasions, and the list goes on.  These can be all-year-round pieces, and you can spice them up for different seasons with jewelries, colour of your bag and shoes.  Any tablescape can move forward in a similar fashion.

The basic pieces on our hall table are the large vase, the glass display box, and the chrome tray. We change out seasonal items in our basic pieces, eg. In Winter/ Christmas season, I would put some glass ornaments in the glass display box, and some pine cones and berries on the chrome tray.  Whether or not the change is done in time is another story...  (It's quite time-consuming and tiring being a hockey mom...  to a preschooler.)  The clock is there to stay because we need to know the time as we rush out the door EVERY morning!

Changing the floral arrangement is quite a hassle (actually, I'm just lazy), so this is usually here to stay for the spring and summer.  This was my DIY project, and I scoured the internet for real-looking faux blooms.  Many of these came as a bouquet, which I just cut them apart with pliers and snips.  I could've easily stopped at just the flowers, but the hall table is under an "open to above" ceiling, and faux branches of cherry blossoms brings the arrangement more proportional to the high ceiling.

Basic pieces hall table | Classy Glam Living

As I mentioned in my "Coffee Theory" of tablescapes, with a grande size main piece, the other accessories on the hall table should be more airy.  The half-opened glass display case is perfect in this sense.  The see-through open top gives the vignette an illusion of height, without taking away the importance of the floral arrangement.  It also marks its territory on the table to balance out the grande presence.  Without this piece for mid-height real estate, there would be too much of a distance between the height of the floral arrangement and the other flat pieces on the table.  That will look too much like David and Golliath.

Basic pieces hall table | Classy Glam Living

So now, let's get the eggs crackin' and bring on spring!  Happy Easter and enjoy whatever activities you have planned with your family over the upcoming long weekend!

Basic pieces hall table | Classy Glam Living

What are the basic pieces on your hall table?  Do you re-dress them seasonally or are they set for life?

Our DIY Dressing Room Hacked IKEA PAX Wardrobe

DIY Dressing Room IKEA PAX | Classy Glam Living

*** cLICK HERE FOR THE FINAL REVEAL OF OUR NEW DRESSING ROOM***

We were very fortunate to have been able to move to our current house.  We love the openness of the ground floor's layout and the bedrooms are practical in size.  The dressing room came about when we were at the builder's office examining our floor plan, and a light bulb went on in the Mr.'s head.  "Can we add a door on this wall?", he asked the builder's rep, pointing at the wall between the master ensuite and an adjacent bedroom.  What was pictured in the air bubble above his head was to delete the planned walk-in closet in our master bedroom, and instead make the bedroom behind the ensuite into our dressing room.  This way, we will have a nice sitting area in our bedroom and practically the back half of the upper floor to ourselves!   

DIY Dressing Room IKEA PAX | Classy Glam Living

Everything went according to our plan, and it was a dream-come-true for both of us!  (Yes, for the Mr. also, just look at his shirt collection!)  It was the first room we tackled after moving in, because we really didn't want to be living out of Rubbermaid bins for who-knows-how-long.   

DIY dressing room IKEA PAX | Classy Glam Living

The Mr. hacked the IKEA PAX Wardrobe system and added trims and mouldings to make the closet frames look as if they were custom built.  Our ceiling on the second floor is 8' high, so we bought the 236cm high frames.  We had several different plans of the frames' layout, but ultimately chose this one.  We each have 2 wide hanging frames and a slim frame in the middle with drawers.  But of course, I also took up the third wall's hanging space...  and some shelves. 

DIY dressing room IKEA PAX | Classy Glam Living

Being his "particular" self, the Mr. had already amassed a collection of IKEA wooden hangers for his dress shirts.  I, on the other hand, was still using all different coloured hangers, plastic/ wooden/ drycleaner metal hangers...  you name it, I got it.  

All different hangers I have collected over the years.

All different hangers I have collected over the years.

Our un-glamourous side...  ok, it was mostly my stuff while I was purging.  All those bags of purged items drove the Mr. crazy...  they sat there for...  um, a long time.  Well, I just needed time to COMPLETE the p…

Our un-glamourous side...  ok, it was mostly my stuff while I was purging.  All those bags of purged items drove the Mr. crazy...  they sat there for...  um, a long time.  Well, I just needed time to COMPLETE the purging, that's all.

I eventually got some white velvet hangers on a flash sale site at an awesome price!  They're the best for women's clothes, which usually have thin and slippery material.  Just that small investment made the dressing room more coherent and less chaotic.   

Ahhhh...  this looks so much better, and the Mr. felt relieved. 

DIY dressing room IKEA PAX | Classy Glam Living

I don't know if the Mr. noticed, but I purposely hung my lighter-coloured clothing at the frame that faces the dressing room's entrance.  I think it helps make the room lighter than if I were to hang dark-coloured clothes there.   

DIY dressing room IKEA PAX | Classy Glam Living

So there you have it, our somewhat glamourous dressing room...  though it's really still a work in progress.  We still need to: 

  • get 2 seats, one each for the Mr. and myself, or a small bench in front of the island - got a bench instead

  • hack 2 IKEA dressers, put them back-to-back to form an "island" in the middle of the room. 

  • finish off the drawer fronts - to make them look custom 

  • design window treatment 

  • maybe get some wall art 

  • maybe get some plants at the window 

  • maybe paint the frames and moldings a taupe colour 

DIY Dressing Room IKEA PAX | Classy Glam Living

The blue bench was our most recent addition to the dressing room.  It's great to be able to sit while putting on socks, and not hopping around while at it.  (I'll try not to use it as my next dumping spot.)

Would you convert an extra bedroom to a dressing room?