One Year Anniversary at Our "New" House - THANK YOU!
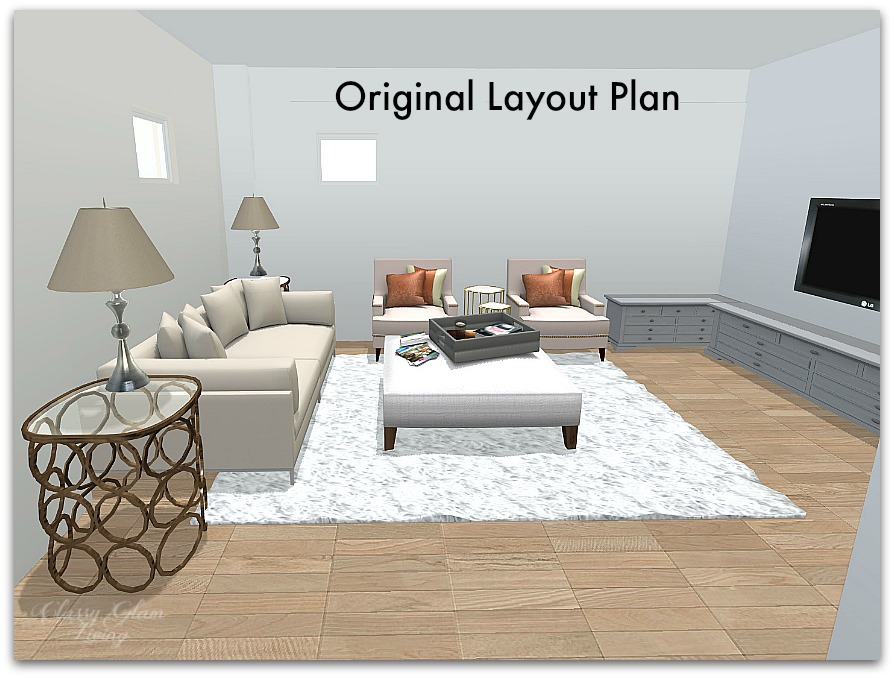
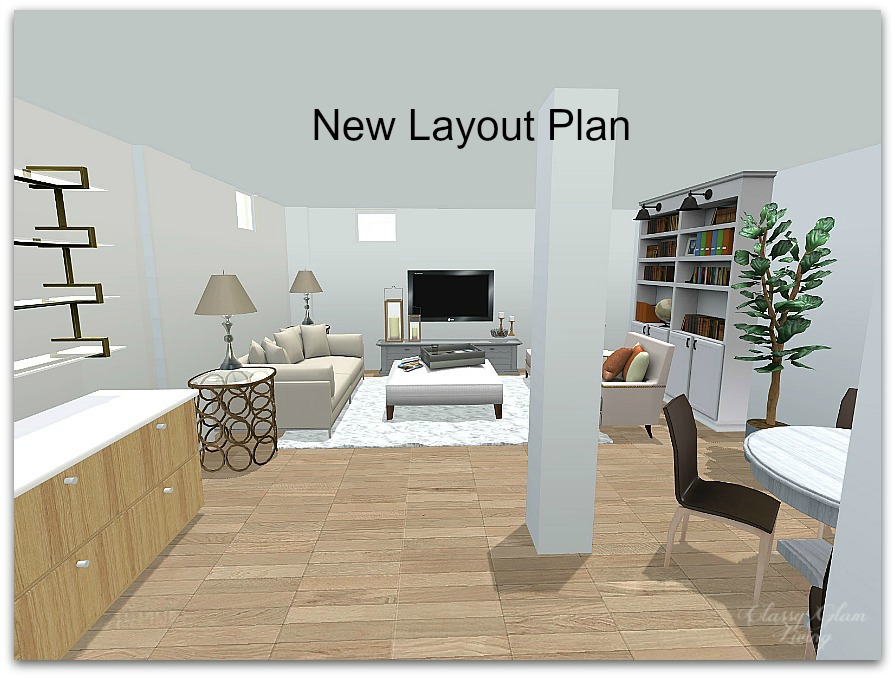
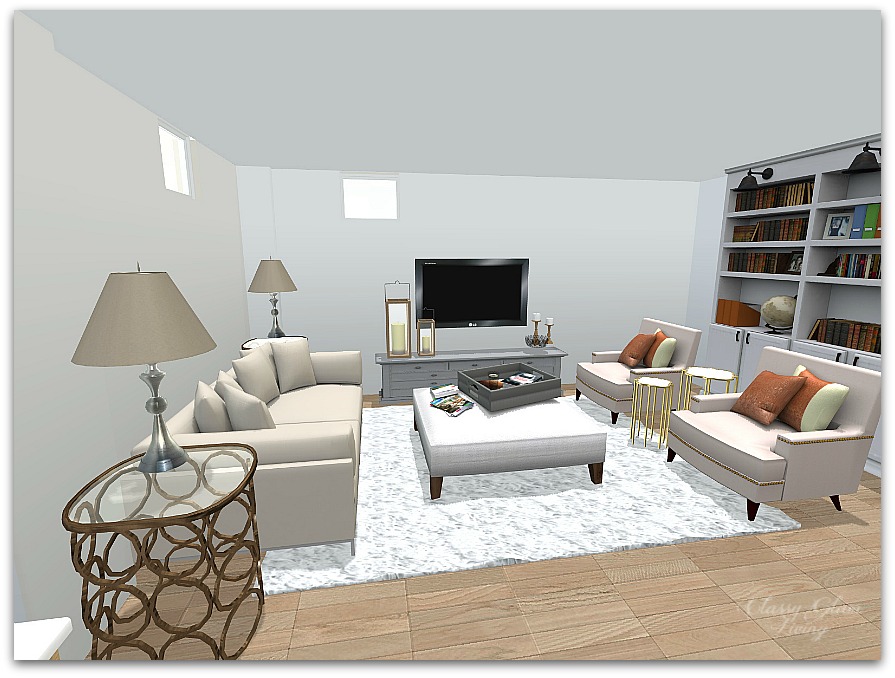
The saying "Time flies when you're having fun" really applies to us here at our "new" house.  It's not so new anymore, we've just celebrated our first year anniversary here!  Our builder's cookie-cutter townhouse is slowly, but surely, turning into our home sweet home - thanks to the Mr.'s tightly packed DIY projects schedule.  

Addressing storage was on the top of our priority list when we moved in.  Having a spot for everything definitely helps with keeping the house more organized (though admittedly, I'm still not very good at staying organized!).

DIY Custom Closet Dressing Room | Classy Glam Living

If you've been following along, then you would know the Mr.'s ultimate build was our closet/ dressing room.  We had designed it to have a spot for everything, from his ties to my scarves.

Since the building of the closet was a lengthy process, we decided to make a video of it instead of blogging about it with pictures.  To our surprise, the YouTube video of his entire process has more than 12,000 views and our channel has more than 170 subscribers!  

Of course, this is nothing compared to the millions of views garnered by celebrities!  But your continued support and kind comments, both on YouTube and Instagram, mean a great deal to us!! The Mr. and I are immensely grateful for all the love you've shown us, and we thank you for that.

If you haven't watched our video, grab a coffee and take a moment to enjoy it (see video below).  Let us know of any feedback in the comment section.  We want to make our videos better and are open to any constructive feedbacks.

You can read more about our DIY Custom Closet here, with links to previous updates in the post.  You can also check out my post on how to add glam to your boudoir here.

I think our one year house anniversary calls for a review/ roundup of our home projects this year.  I will have that up on the blog soon.  Be sure to subscribe to our blog for our latest update!

Plan for Our Basement Family Room

Basement Family Room Layout | iHomeRegistry | Classy Glam Living

Now that Summer is over, and Fall is creeping up on us, the Mr. is itching to start with getting our basement entertainment area ready.  I guess he envisions that's where we'll curl up for some weekend movie nights in the winter months.  Love it when he plans ahead!

We asked our builder to finish the basement as our family room, so that we can banish our TV downstairs.  It was the best decision we've made for this house, allowing us to live in peace upstairs without TV distractions, and actually be more productive with our after-dinner activities.

So back to our basement... When the Mr. has the itch to get the basement done, I need to help scratch it by getting the design nailed down.  If you're following me on Instagram, and has seen my IG stories, then you would know that he has already painted the walls in Benjamin Moore's Intense White!

I'm so glad I've recently discovered iHomeRegistry.com as my design helper!  It is an online 3D home designing software.  I've never been professionally trained to use the CAD softwares for interior design, and yet I find iHomeRegistry very easy to navigate.  Best thing was, I can custom size everything, down to each piece of furniture!

Armed with my "drawings", I held a design meeting with the Mr.  (The following drawings were all prepared with iHomeRegistry.)

We wanted to maximize the TV viewing distance in the entertainment area, so naturally, this layout below made the most sense, with the couch and TV setup lengthwise across the space:

Basement Family Room Layout | iHomeRegistry | Classy Glam Living

This is my inspiration of the wrap-around media unit:

One of my pet peeves in decorating is working around the TV unit. However, with this being our entertainment room, I have no choice but to comply with it. Another challenge with this layout is the ducts and vents on the walls, which we can't block in case we need emergency access to them.  

That means we had to change our whole furniture placement to accommodate for these ducts and vents.  So, we moved things around.  Here's the new furniture placement layout, with the view from the stairs:

Basement Family Room Layout | iHomeRegistry | Classy Glam Living

As much as I hate coming down and staring straight at the TV, this layout allows us to accommodate for the wall ducts and vents.  Our couch stays on the left wall, and armchairs are now on the right.  Behind the armchairs, the Mr. will build a storage unit, similar to one at our old home office.  I'm still at a loss as to what should be done at the TV wall. 

Basement Family Room Layout | iHomeRegistry | Classy Glam Living

Here's what reality of this new layout looks like, after the Mr. has painted the walls and moved the furniture pieces around (did I tell you he's a visual person?):

Basement Family Room Layout | iHomeRegistry | Classy Glam Living

On the right side of the storage unit will be our eating/ crafting/ gaming area:  

Basement Family Room Layout | iHomeRegistry | Classy Glam Living

For this all-purpose area, I'm planning to pair the IKEA Ingatorp extendible dining table:

... with the 4 chairs that the Mr. reupholstered last year:

On the left side of the couch, we'll create a bar area:

Basement Family Room Layout | iHomeRegistry | Classy Glam Living

My inspiration of the bar unit with brass and glass shelves is from this pantry at Chicago Restoration Hardware's 3Arts Cafe:

Basement Family Room Layout | iHomeRegistry | Classy Glam Living

It's the first time I'm using iHomeRegistry to play around with layouts, and it's so much fun and so easy to use, I'm hooked!  It's a great communication tool for the Mr. and I, because I can't draw for the life of me to get my design across to him, but he's a visual person who needs to SEE what's in my head 😆   This has helped me stop pulling at my hair when we sit down to talk design 😂

So to tally up our new furniture pieces, the Mr. will be building 3 units - the media unit, the built-in bookcase, and the bar cabinets.  I requested that the door fronts be of the same style for all 3 units (with varying widths), so that they have a sense of coherence even though they're far apart.  Now the question is, does he build from scratch again (like he did for our DIY closet) or hack an IKEA cabinet (like our first IKEA hacked dressing room)?

DIY Art Display Frame

Summer is almost over (and already over for some kiddos)!  Have you had a chance to clear out the previous school year's work?  No judging here...  I haven't!  Are you prepared for another year's inflow of arts and crafts from school?

DIY Art Display Frame | IKEA Gunnabo frame | Shadow frame | IKEA hack | Classy Glam Living

Little man never seems to slow down his art production, so I had to come up with a way to have an in and out system.  Shhhh...  Yes I toss out his art work in the end, but not until I've taken a photo of the piece for a photobook of his masterpieces.  I only keep the ones for special occasions 😊

DIY Art Display Frame | IKEA Gunnabo frame | Shadow frame | IKEA hack | Classy Glam Living

Now that this art display frame is in place, we can actually display his work before I take a photo and then...  shhhh....

So without further ado, let me share with you this DIY project's step by step details in this video.  It's so simple that I attempted this DIY without the Mr.'s assistance!  I think this is my first DIY project for the blog!

Recap of materials:

  • IKEA's Gunnabo frame (50x70cm used in this project)
  • Hanging wire
  • Screw eyes (6 for this project)
  • Glue gun
  • Burlap
  • Optional:  pliers, wire cutter, shears
DIY Art Display Frame | IKEA Gunnabo frame | Shadow frame | IKEA hack | Classy Glam Living

I hope I've given you some inspirations on handling the flood of art work coming your way this new school year.  With this art display frame, we can decorate the wall with little man's art while having a systematic approach about his art storage. 

Just wanted to remind you that I've partnered with Canvas N Decor for a free canvas art giveaway of your choice.  Have you tagged yourself and friends for a chance to win?  For details, check out my Instagram post here.

You can find the rest of his playroom revealed here.