Plan for Our Basement Family Room

Basement Family Room Layout | iHomeRegistry | Classy Glam Living

Now that Summer is over, and Fall is creeping up on us, the Mr. is itching to start with getting our basement entertainment area ready.  I guess he envisions that's where we'll curl up for some weekend movie nights in the winter months.  Love it when he plans ahead!

We asked our builder to finish the basement as our family room, so that we can banish our TV downstairs.  It was the best decision we've made for this house, allowing us to live in peace upstairs without TV distractions, and actually be more productive with our after-dinner activities.

So back to our basement... When the Mr. has the itch to get the basement done, I need to help scratch it by getting the design nailed down.  If you're following me on Instagram, and has seen my IG stories, then you would know that he has already painted the walls in Benjamin Moore's Intense White!

I'm so glad I've recently discovered iHomeRegistry.com as my design helper!  It is an online 3D home designing software.  I've never been professionally trained to use the CAD softwares for interior design, and yet I find iHomeRegistry very easy to navigate.  Best thing was, I can custom size everything, down to each piece of furniture!

Armed with my "drawings", I held a design meeting with the Mr.  (The following drawings were all prepared with iHomeRegistry.)

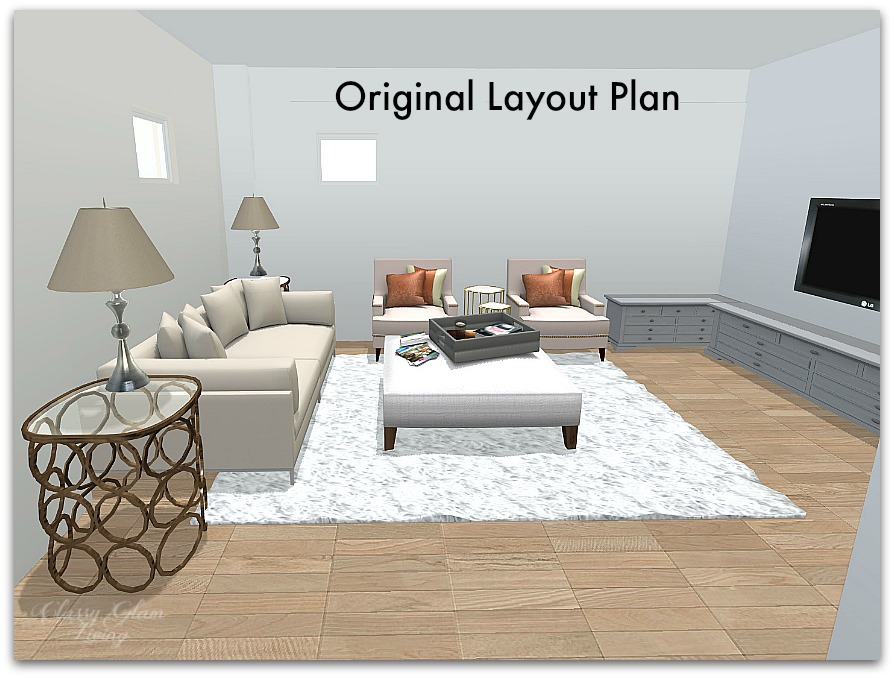
We wanted to maximize the TV viewing distance in the entertainment area, so naturally, this layout below made the most sense, with the couch and TV setup lengthwise across the space:

Basement Family Room Layout | iHomeRegistry | Classy Glam Living

This is my inspiration of the wrap-around media unit:

One of my pet peeves in decorating is working around the TV unit. However, with this being our entertainment room, I have no choice but to comply with it. Another challenge with this layout is the ducts and vents on the walls, which we can't block in case we need emergency access to them.  

That means we had to change our whole furniture placement to accommodate for these ducts and vents.  So, we moved things around.  Here's the new furniture placement layout, with the view from the stairs:

Basement Family Room Layout | iHomeRegistry | Classy Glam Living

As much as I hate coming down and staring straight at the TV, this layout allows us to accommodate for the wall ducts and vents.  Our couch stays on the left wall, and armchairs are now on the right.  Behind the armchairs, the Mr. will build a storage unit, similar to one at our old home office.  I'm still at a loss as to what should be done at the TV wall. 

Basement Family Room Layout | iHomeRegistry | Classy Glam Living

Here's what reality of this new layout looks like, after the Mr. has painted the walls and moved the furniture pieces around (did I tell you he's a visual person?):

Basement Family Room Layout | iHomeRegistry | Classy Glam Living

On the right side of the storage unit will be our eating/ crafting/ gaming area:  

Basement Family Room Layout | iHomeRegistry | Classy Glam Living

For this all-purpose area, I'm planning to pair the IKEA Ingatorp extendible dining table:

... with the 4 chairs that the Mr. reupholstered last year:

On the left side of the couch, we'll create a bar area:

Basement Family Room Layout | iHomeRegistry | Classy Glam Living

My inspiration of the bar unit with brass and glass shelves is from this pantry at Chicago Restoration Hardware's 3Arts Cafe:

Basement Family Room Layout | iHomeRegistry | Classy Glam Living

It's the first time I'm using iHomeRegistry to play around with layouts, and it's so much fun and so easy to use, I'm hooked!  It's a great communication tool for the Mr. and I, because I can't draw for the life of me to get my design across to him, but he's a visual person who needs to SEE what's in my head 😆   This has helped me stop pulling at my hair when we sit down to talk design 😂

So to tally up our new furniture pieces, the Mr. will be building 3 units - the media unit, the built-in bookcase, and the bar cabinets.  I requested that the door fronts be of the same style for all 3 units (with varying widths), so that they have a sense of coherence even though they're far apart.  Now the question is, does he build from scratch again (like he did for our DIY closet) or hack an IKEA cabinet (like our first IKEA hacked dressing room)?

Playroom Painted in a Shade of Gray

Playroom Benjamin Moore Gray Owl 50% tinted | Classy Glam Living

On nights when The Mr. "indulges" himself with his pet DIY project, our walk-in closet/ dressing room, little man would busy himself with his own Lego design and build projects or other master art pieces.  These are quiet nights for me when they're on their own; no floor hockey/ goalie plays and no gunning battles in the basement family room.  But I can't help but notice little man lacks a space to play and make art.

Little man has never had his own work space.  The dining room table has been his creative space since he first picked up a crayon eons ago.  Now that we've moved into our new house though, we don't want his masterpieces to take over the dining table.  

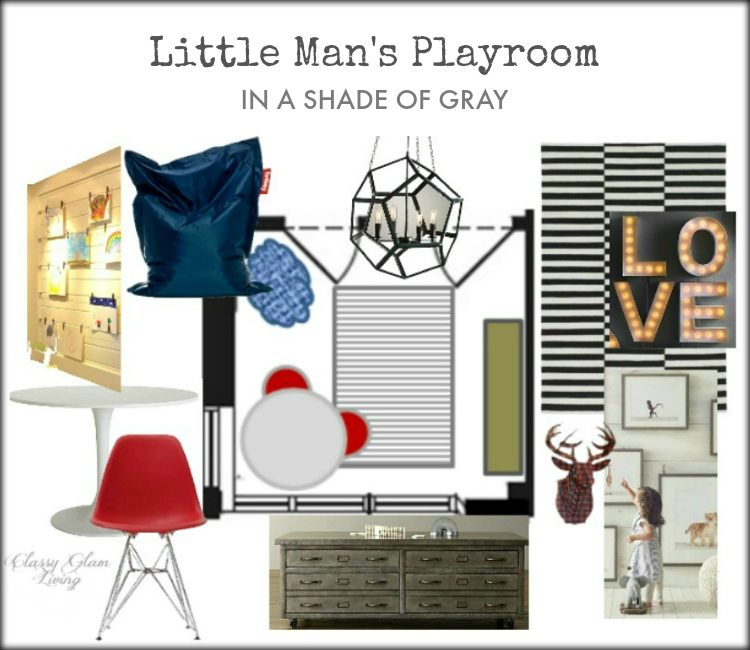
That's when I finally dug out my plan for his playroom, as posted here.

The playroom is a spare third bedroom upstairs, and not a big room at all.  To save some space, we got him a desk instead of that IKEA round table.

I still love the style of this Target Campaign desk from when I wrote about the perfect desk for him, and this one is bang for the buck since I got it on sale!  The drawers will be perfect for all the papers and other miscellaneous items.

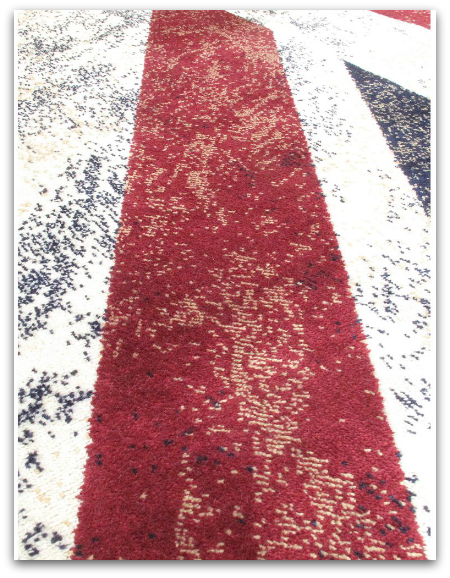
As another spin to my original design board, I found the cutest and fun rug for the playroom!  The Union Jack rug from Ecarpet Gallery totally fits my budget and the fun factor of the playroom.  

The colours are mixed and woven in a way to give the rug a vintage vibe.

rug close up.png

That's a lot of red in the room with the desk, but I don't mind it being more playful.  Who knows?  The red may help spark more creativity in the little man =)

In anticipation of taking delivery of the desk, we painted the playroom a light gray last weekend.  I loved the soft gray in this room by Amanda Moore of Hunter Baby.

I have been on the hunt for the perfect gray ever since seeing it used in this room.  Not going to inject another "50 shades of gray" joke here, but that number is an understatement!  If you've been sourcing grays, you would know all about the tinted grays!  I just wanted a gray that's, well, gray.  So I decided to try out the ever popular Benjamin Moore Gray Owl, and the just as amazing trick, at 50% tint.

Here is little man's playroom after painted in Gray Owl.  This shade of gray suits the playroom decor perfectly.  With just a tiny bit of tan, it picks up the vintagy vibe of the desk (to be delivered) and rug just right.  

Playroom Benjamin Moore Gray Owl at 50% tint Union Jack rug | Classy Glam Living

The playroom doesn't really need black-out curtains or too much privacy.  We chose to outfit the large window with simple sheers from IKEA on a track system by Allen + Roth.  

As you can see in the photo above, little man has gradually moved into his new playroom, no invitation required :-)  Funny how he lugged his beloved Lego in the playroom first, and I take it he's loving the space already!  I can't wait to put the playroom together for him!

Next up for the playroom:

Our Marble Alternative Kitchen Counterop Revealed!

Marble Alternative Kitchen Countertop New Superwhite Quartzite | Classy Glam Living

***UPDATE***:  SEE HOW OUR KITCHEN CURRENTLY LOOKS IN THIS POST!

OUR MOST RECENT KITCHEN UPDATE!

As of 3 months ago, we were still very optimistic about using marble as our kitchen countertop, and have decided we're going with statuario marble.  But... this wasn't the first time we again changed our minds...

I forgot how many times we've decided on marble, only to have doubts about it.  Time and time again, we would check out any evidence of etching during our meals at restaurants that use marble tabletops and we would be assured that marble isn't too bad afterall.  We would decide that we can live with some patina from usage.  Even our test of red wine on marble didn't deter us from going forward with the Statuario marble.  

However, while living at the rental, every spill and missed spot from cleaning would remind us of our roughness on countertops.  We wanted what we love, but we're not the best cleaners.  At the rate we go, the marble will be "patina'd" in no time.  

We were both probably waiting for the other to say no first!  

What we chose in the end

We wanted a polished countertop with a white background to match our light grey cabinets.  We looked into Caesarstone's Pure White (we didn't want specks like the Blizzard) but it was just a tad cheaper than Statuario Marble.  We're old fashioned, and don't feel like we're getting the bang for the buck if we're paying that much for manmade "stone".  We then narrowed down to natural stone, and we all know that there aren't a lot of choices of natural stone with a white background!

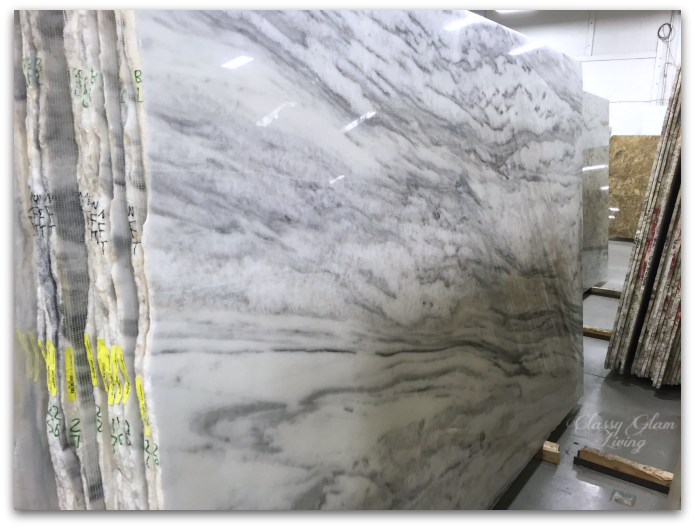
We could choose from Statuario marble, or a whiter piece of carrara marble that wouldn't be as expensive.  As luck would have it, the stone expert introduced us to the NEW Superwhite quartzite.  The slab we saw was absolutely gorgeous; a white background with grey veining, plus crystalization within the slab that we love.  It's different from Superwhite, which tends to be more grey.  Sadly, the whole block was already sold out.  Well, all's not lost, at least we found a marble alternative that we love.  Patience now...  

And then we got the call from the stone warehouse that a new block of New Superwhite arrived!  It's not as white as the slab we previously saw, but it has more crystallization in the slab.  

NEW SUPERWHITE QUARTZITE | Classy Glam Living
The slab is quartzite, tiny crystals are visible, making the slab sparkly.

The slab is quartzite, tiny crystals are visible, making the slab sparkly.

We're sold!  We get the white background that we wanted, without the pain and fuss of maintenance as with marble.  Nothing beats the beautiful veining of Statuario marble, but the crystals formed in the slabs of New Superwhite quartzite are just as mesmerizing and beautiful.  Not to mention, it's a stronger material compared to the softness of marble.

From ordering the slabs to fabrication, I would say it was a pretty easy and smooth process.  We're so glad we didn't go with the builder's expensive stock upgrades with limited choices!

Here are some photos of the installed countertop:

NEW SUPERWHITE quartzite kitchen counter | New house kitchen | Classy Glam Living

The crystallization inside the slabs are difficult to pick up in photos, and the countertop is sparkly in person.  The veins in the stone are actually formed by dark crystals.

NEW SUPERWHITE quartzite kitchen counter | New house kitchen | Classy Glam Living
Zoomed in of the grey veining from the red portion in the photo above, showing dark crystals in veins.

Zoomed in of the grey veining from the red portion in the photo above, showing dark crystals in veins.

More tiny crystals visible at the ogee edge.

More tiny crystals visible at the ogee edge.

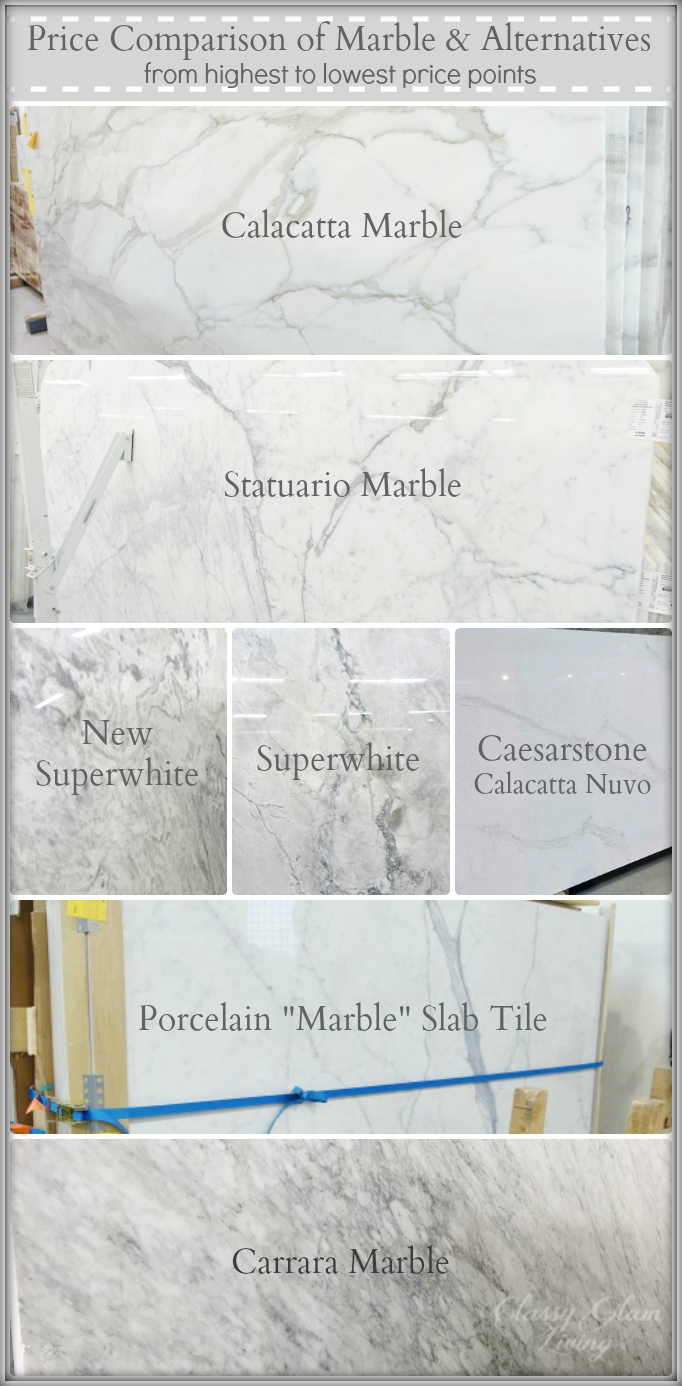
I'm sure you're interested in the price points of these different marbles and alternatives.  Based on the size of our kitchen and quotes that we got:

Price Comparison of Marble & Alternatives | from highest to lowest price points | Classy Glam Living

We absolutely love our new countertop, as much as we would had it been made of statuario marble, if not more.  It's a great alternative to Statuario marble, at a cheaper price and less maintenance hassle.  Not that we would care any less with this New Superwhite quartzite, but It would save us from unnecessary heart attacks if we spill anything on it!

The kitchen is slowly taking shape, and we've finally had the appliances panels installed! We had been going back and forth on using silver or gold hardware, until we saw these pulls at Gingers. 

Panel-ready undercounter fridge and freezer | New house kitchen | Classy Glam Living

So now I guess it's decided we're going with gold. These are actually bronzy-gold, and they go nicely with our bronze Kohler Karbon faucet! Pure fluke on our part! 

New Superwhite Quartzite kitchen counter | Classy Glam Living

Bit by bit our kitchen will take shape and become our dream kitchen that's functional and outfitted in our style.  Here's our view from the living room, as mentioned in our kitchen and living room design boards.

NEW SUPERWHITE quartzite kitchen counter | New house kitchen | Classy Glam Living

Our next to-do's for the kitchen are:

  • Change out cabinet knobs and pulls
  • Install mirror backsplash  
  • Build more drawers in lower cabinets
  • Replace solid doors with glass doors at uppers above the fridge (see kitchen trends post)
  • Install mirror backs + glass shelves for those upper cabinets
  • Install LED rope lighting for under the upper cabinet  
  • Install valence

I hope we've shown you a marble alternative that you can consider if you're having trouble deciding on a marble countertop like we did.  Here's how we use our kitchen:

  • As per the Mr., I have butter fingers, that means a higher chance of spillage  :-(
  • We're rough on the counters, being efficient cooks sometimes means that banging stuff on the counters may be inevitable
  • We may not clean up right after we cook
  • We're not the best cleaners, ie. best if stains on the countertops can be somewhat camouflaged

Do you have butter fingers like me?  Do you love marble enough to live with its patina?