Little Man's Big Boy Room Reveal

Neutral Big Boy Room Reveal | Boy's room | Kid's room | Classy Glam Living

Moving and unpacking are always stressful events.  Having a kid tag along for the ride is even more challenging.  This is our third move with little man and we always try to minimize any potential hiccups with him by setting up his room first.  This time around, he is older and has more belongings, but we had to start afresh since his new room didn't have any storage units.  It took us some time to get everything in place, which allowed us to take inventory of what kind of storage he needs.  

His room isn't as large as the one at the old house, but it feels bigger with 9-ft. ceiling and wall-to-wall windows (that Mommy loves).  Considering he also has the adjacent room as his playroom, I would say his bedroom is plenty enough.

I wrote about inspirations for his bedroom almost a year ago, and originally wanted colours inspired by a union jack rug (red, navy, and white) for his room.  Instead, I decided to use those colours for the playroom, and kept his bedroom serene with a palette of white and soft grey with touches of navy.

Neutral Big Boy Room Reveal | Boy's room | Kid's room | Classy Glam Living 1

He's had robin's egg blue walls in his nursery, so this time I left the wall colour a lot more neutral.  I was obsessed in searching for a soft grey that's not tinted red, blue, or green.  I finally found one that lots of decorators rave about - Benjamin Moore's Gray Owl.  To make it the soft gray that I was after, I had the Benjamin Moore rep lightened it by 50%.  It came out in exactly the soft gray I was looking for!

Neutral Big Boy Room Reveal | Boy's room | Kid's room | CB2 sleigh bed | Classy Glam Living

We took advantage of the tall ceiling and got little man a sleigh bed.  The high back makes for a comfy lounging spot where he would read (for a bit) on weekend mornings.

For his bedside table, I wanted something of a warmer colour to balance the cool tones of the room.  Something simple with a drawer would be perfect.  This one from Target fits my criteria and the chrome legs are a nice contrast to the rustic wooden top.  As an added bonus, it was on sale when I purchased it! 

Neutral Big Boy Room Reveal | Boy's room | Kid's room | Target Threshold bedside table | Classy Glam Living

To add a bit of contrast to the white and soft grey, we installed an industrial-feel metal wall shelf that also helps to balance the height of the room.  It has some great cubby space to display his treasures!

Neutral Big Boy Room Reveal | Boy's room | Kid's room | IKEA PS cabinet and CB2 metal wall shelf | Classy Glam Living

Thought I'd try to wrap the shelf with some mini lighted garland I hogged over Christmas.  Little man likes it turned on as his night light as he drifts off to sleep.

Neutral Big Boy Room Reveal | Boy's room | Kid's room | CB2 metal wall shelf with garland lights | Classy Glam Living

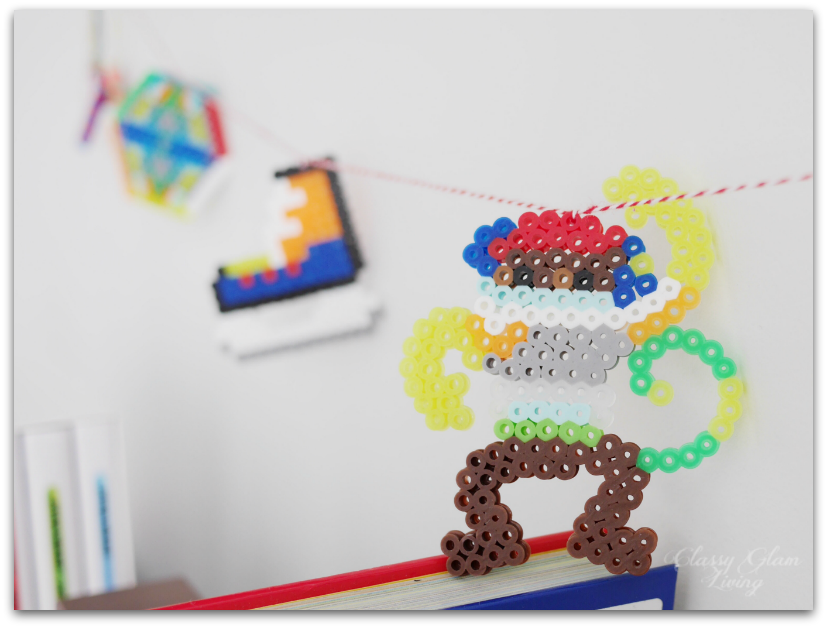
There was a time when little man would bring home these melted beads "artwork" from school.  What should I do when he couldn't part with them?  I tried to save them all, but these are all that I have left...  so I made a short garland out of them as a temporary display until he's sick of seeing them.

Neutral Big Boy Room Reveal | Boy's room | Kid's room | IKEA white PS cabinet | Classy Glam Living
Big Boy Room Reveal | Boy's room | Kid's room | Melted beads garland | Classy Glam Living

When little man helps with chores, eg. dusting, he gets a buck (or toonie $2) in his Darth Vader bank.  I think it's time he uses his allowance for his Star Wars mini library so I can free up some budget for my coffee table books!

Big Boy Room Reveal | Boy's room | Kid's room | Darth Vader piggy bank | Classy Glam Living

It's funny when I see little man trying to get creative with decorating his cabinet.  I guess it's every boy's dream to be a superhero (or sidekick), driving a red convertible?

Big Boy Room Reveal | Boy's room | Kid's room | Classy Glam Living

Baskets, you can never have too many of them.  Spiderman needs a spot to hangout when his job as sleeping buddy is done, and Mommy places the cushions that were stuffed in here to take pictures =)

Big Boy Room Reveal | Boy's room | Kid's room | Storage basket | Classy Glam Living

On the wall at the foot of his bed, I would eventually want to hang up his sports jerseys in some sort of shadow box frames.  But for now, this banner I had printed for his FC Barcelona birthday party would serve as wall art.  The photo was taken by our travel buddy when we visited FCB's stadium, Camp Nou.  My photo here doesn't do it justice.

Big Boy Room Reveal | Boy's room | Kid's room | FC Barcelona Banner | Classy Glam Living

In making this a big boy room, and keeping it theme-free, I hope it will last little man a long time as he grows into it.  There're enough cubby space in the wall shelf to change up his obsessions as he grows, and decent storage space in the IKEA cabinet for whatever secrets he may eventually want to lock up.  

Big Boy Room Reveal | Boy's room | Kid's room | Classy Glam Living

I'm glad I chose a neutral backdrop for his room, and I love how his belongings fill the room with personality and colours. When you enter a room, it should convey to you its owner's personality.   My VIP client here is easy going (sometimes) like the room's neutral white and grey palette, casual (track pants) lover like the relaxed industrial modern furnishings, a little bit edgy like the Sputnik light fixture, and definitely opinionated as to what he likes (a sports fan, Marvel know-it-all, and die hard little Star Wars fan). 

I think I've nailed it with this one.  Now if only I can get my client to make his bed with those cushions that are forever stuck in the standard goods basket.  Ya think?

source list

  1. Bed - West Elm

  2. Bedside table - Target (discontinued)

  3. White storage cabinet - IKEA

  4. Wall shelf - CB2 (discontinued, similar)

  5. Rug - Lowes - ECarpet Gallery Noto Beige

  6. Faux sheep skin - IKEA

  7. Light - One Kings Lane (similar - affiliated link)

  8. Basket - H&M Home

  9. Curtain panels - IKEA

5 Things to Consider for an "Effortless" Gallery Wall

5 THINGS TO CONSIDER FOR AN EFFORTLESS GALLERY WALL | CLASSY GLAM LIVING

Now that the Holidays are over, I'm still reluctant to pack away the sparkly decorations and Christmas lights that line our staircase.  Actually, call it a case of mild procrastination.  Afterall, it took quite some effort to lay out the decorations, they should stay out for a bit longer, don't you think?
I blame the delay of packing up our Christmas decorations on decorating the little man's headquarters - his bedroom and playroom.   Not that I'm doing any of the installations...  Anyway...  Little man's working corner in his playroom is finally in place, and I should really unpack some packages lying around that are for a gallery wall in the room.

A gallery wall is an eclectic display of art, giving the room a casual vibe.  For our house, there's no better place than the playroom to have some fun with it!  The. Mr is not a huge fan of gallery walls, but he has reluctantly played along with the idea for one in the playroom.  So to honour that, I promise to keep it small scaled with a somewhat neat demeanor.  My plan is to have it above a future toy storage unit, with a wall space of around 5-feet wide.

I want the gallery wall to look effortlessly casual, but it still takes some effort while taking these factors into consideration:

1. DETERMINE THE BOUNDARY

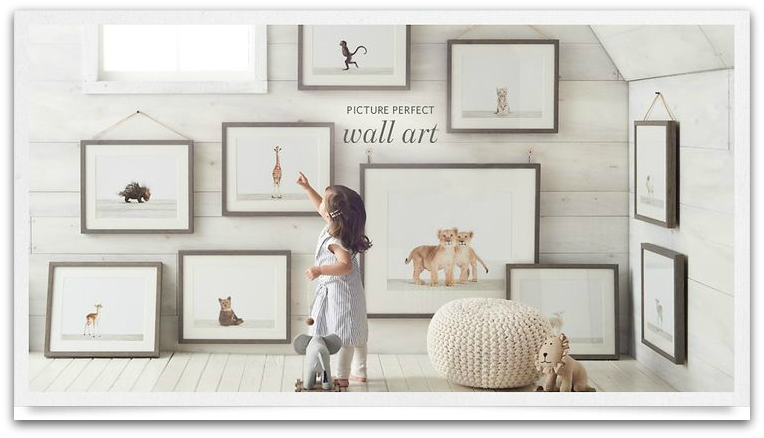
The width of most gallery walls are bounded by, or just beyond, the width of the furniture below it, if any.  For dramatic effect, you can even go wall to wall, similar to the sample image below.  As for a vertical boundary, a more comfortable grouping would see the bottom of the layout at 6"-8" above any piece of furniture, up to around 2-ft off the ceiling.  You know the general rule of hanging wall art at 60-62" from the ground?  In the case of a gallery wall, treat the whole layout as a group, so that the group's centre is at eye-level.  You don't want to be crunching your neck to look up to ALL your pieces!

2. SHAPE OF THE LAYOUT

Do you have a neat and structured personality, like my Mr.?  Then a square or rectangular shape gallery wall will most likely be your pick.  Or are you more coherently random, like me?

Structured shape via The Southern Thing

Structured shape via The Southern Thing

coherently random shape by Lay Baby Lay

coherently random shape by Lay Baby Lay

3. SHAPES, SIZES, AND COLOURS OF THE FRAMES

Using various shapes and sizes of frames for the gallery wall is one way to give it a dose of your personality.   For little man's playroom, I originally planned on using colourful frames.  I'm having second thoughts about that, and I think monochromatic frames would play a balancing role against the pops of colours around the room full of toys.  

4. SPACING AROUND THE PIECES 

A visually appealing gallery wall should have just enough pieces that are grouped comfortably together.  The key is to avoid looking too messy.  Spaced too tight, it would look like too many pieces are crying for attention, and the frames would look crammed; spaced too far apart, then they look like individual art pieces sharing the wall.  

To be easy on the eyes, I find that the optimal distance between each piece should be around 2-3".  There're no hard and fast rules about it, and it all depends on the different sizes and shapes of the pieces.

via RH Teen

via RH Teen

5. INCLUDE WHIMSICAL ACCENTS

Gallery walls are never boring - display some loved and dearest pieces to let your personality shine through!  A touch of whimsical accessories bring these gallery walls to life!

The next time you see a casually and effortlessly chic gallery wall, you can count on the fact that the more casual it looks, the more effort it required!  A lot of planning goes into perfecting even a seemingly random placement of pieces.  But don't be boggled down by the planning; afterall, the point of a gallery wall is to have fun with it!  Once you have collected your pieces, it's definitely a fun exercise to hone your sense of design and use of space.  Let loose and have some fun!

Simple Christmas Tour - New House

2015 Christmas House Tour - Classy Glam Living

I should thank the eager Christmas enthusiasts in our neighbourhood that started decking their exteriors in early November.  It got our little man all hyped up and on repeat...  "When are we putting up our Christmas decorations?  Mommy I'll help you!"  "Do we have (exterior) lights like those?"  And when he was told no, we don't, "Aw~~...  can we get them?"  Well, you know the drill...

Don't get me wrong.  Christmas is my favourite time of the year - who doesn't love all the sparkly festival decorations?  I love decorating for Christmas, with Christmas tunes playing in the background on the radio.  It's also a good opportunity to refresh decor around the house.  

With all the hussle and bustle leading up to the Holidays, I opted to keep our Christmas decor simple.

So with little man's help, while he also managed to flip through a Lego catalogue and announced his Christmas wishlist, we put up the Christmas tree.  That was several weekends ago!  After playing around with placements and such, I think I'm happy with our Christmas decor this year.  

Welcome to our new house (not so new anymore)!  This is our entryway console table, on which I placed two IKEA faux sheepskin to mimic fluffy snow for the grazing brass reindeers.  I like how the whiteness of the sheepskin tones down all the gold accents on the table.  

2015 Christmas Entryway New House | Classy Glam Living | IKEA faux sheepskin
2015 Christmas Entryway Vintage Brass Accents | Classy Glam Living

Coming in through the hallway, I kept the garland on the staircase simple this year.  I used to wrap these faux garlands around the banister, but I noticed how the metal parts would scratch the railings at our old house.  This time around, I just used floral wires to gather the garland at the swivels.

2015 Christmas Hallway | Classy glam Living | Stockings on Railing

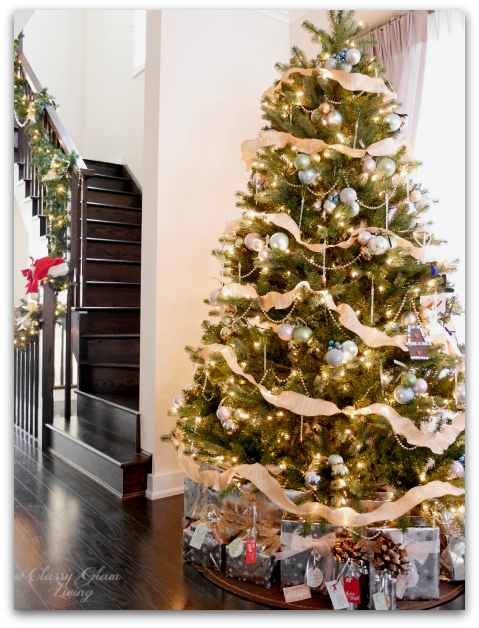
We've placed our Christmas tree at the entrance of the sitting area, so that we can enjoy its twinkling lights from most of the ground floor.  And those are real presents underneath the tree!  Wrapping up fake presents is not for me.

2015 Christmas Tree New House | Classy glam Living

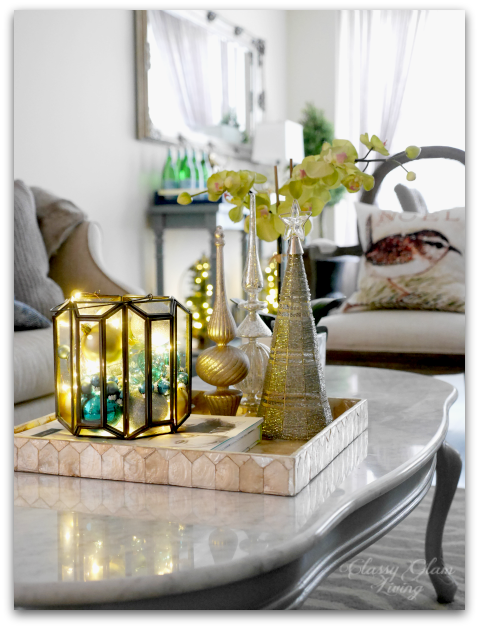
I've started to hoard a good supply of LED stringlights* this Christmas.  I've put them anywhere and everywhere I can!  Here in our sitting area, I placed a strand of the LED lights into the container of extra ornaments.  The lights add even more twinkling effect to the beaded cone tree and the mercury glass tabletop finials.

2015 Christmas Living Room | LED stringlights ornaments | Classy Glam Living
2015 Christmas Coffeetable Decor | Classy Glam Living

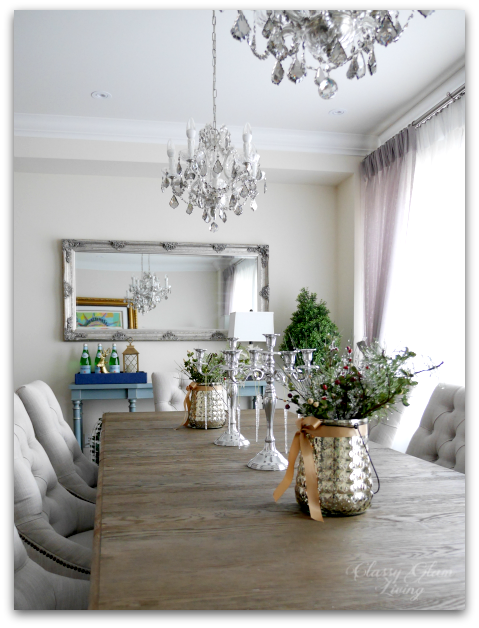
For everyday Christmas decor on the dining table, I added two pots of faux greeneries with some berries on either side of the candelebras.  I pulled apart 2 twigs of faux branch arrangements and fanned out the smaller branches into the mercury glass lanterns.  

2015 Christmas Simple Dining Room | Classy Glam Living

The Mr. commented that setting the table makes it more festive, but I'll save that for when my family comes over for Christmas dinner =)

2015 Christmas Dining Room Console Table | Classy Glam Living
2015 Christmas Dining Table Decor | Candelebra DIY faux greeneries | Classy Glam Living

The console table is another spot for me to use those beloved LED stringlights, which I wrapped around tiny Christmas trees placed in the birdcages.  Those are the same birdcages we used in the Spring Tablescape decor back in old house.

2015 Christmas Console Table Decor | Classy Glam Living

Aside from string lights, I've also added some gold accessories to our Christmas collection.  This gold resin deer from Target...

2015 Christmas Console Table Decor | Classy Glam Living

... and this pair of gold antlers were part of my recent haul.

2015 Christmas Console Table Decor | Ornaments in glass display box gold antlers | Classy Glam Living

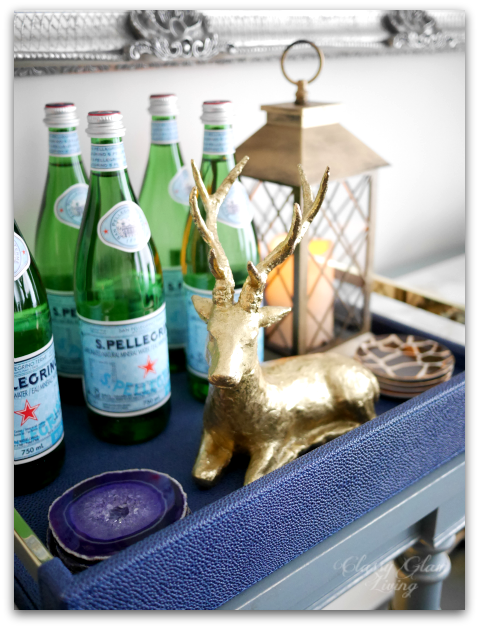
Don't forget to deck the bar cart!  Check out my post on styling the bar cart for the Holidays!

2015 Christmas Bar Cart Decor Styling | Classy Glam Living

I always love how decorators load up their rooms with Christmas decor, but I can never achieve their same look without everything looking messy and myself being overwhelmed.  I'm never one to dump Christmas all over the house.  Now that we're in a smaller house, I definitely don't want Christmas overload to happen.  I see that's the way it'll be for Christmases hereafter.  (Not to mention, it'll be much easier to clean up!)

I'll save my oohs and aahs as I indulge in other Christmas enthusiasts' instagram feeds #xmasdecor #christmasdecorations.  But for our home, I'll leave it livable and manageable.

I'm also happy (and relieved) to announce that, as of this morning, I'm done with my Christmas shopping!!  Woo hoo!

Merry Christmas from our family to yours!

2015 Christmas Tree | Classy Glam Living

* Affiliated link