Would've-Could've Series - Dressing Room

Dressing Room Design Board | Classy Glam Living

We've settled in nicely into our rental townhouse, albeit some hickups with power outage and dealing with a non-functioning air conditioning unit thereafter.  Thank goodness it was fixed within a day, and the weather was cool enough to be without it for a bit!

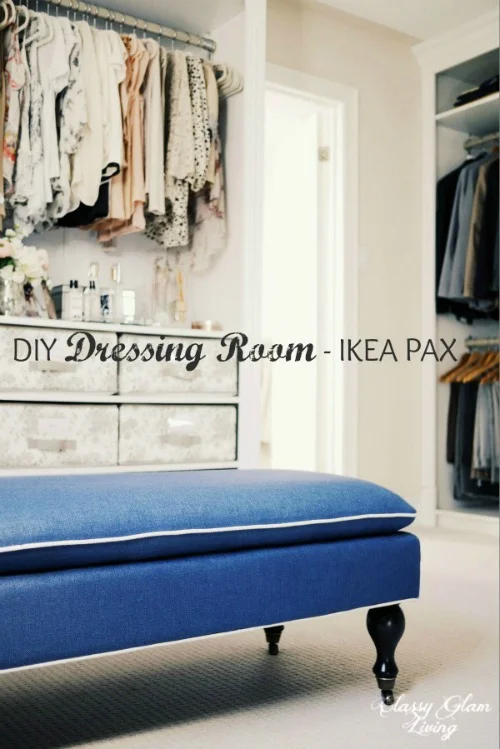
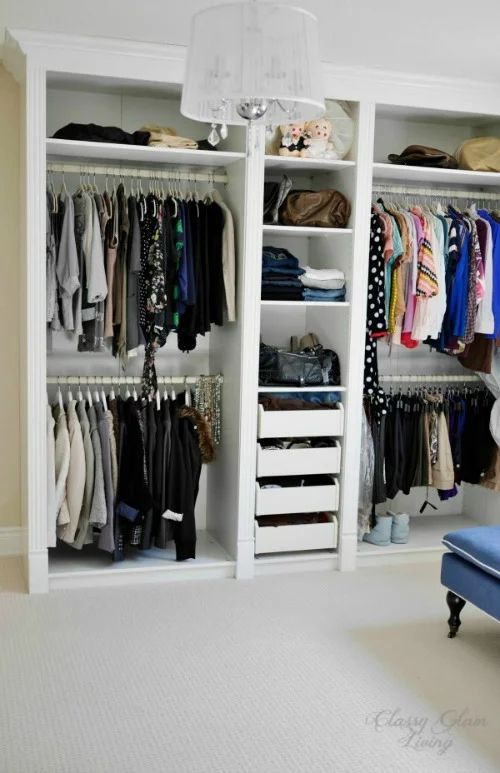
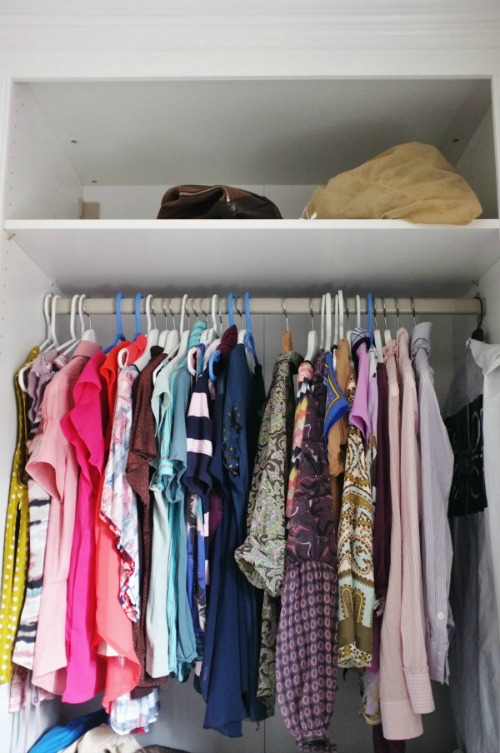
This short-term disruption in comfortable sleeping temperature was a prelude to a longer-term adjustment in this house.  I think both the Mr. and I have been spoiled by the huge walk-in closet/ dressing room in our previous house...  well, at least we still managed to stuff our rental closets to the max:

new closet at rental

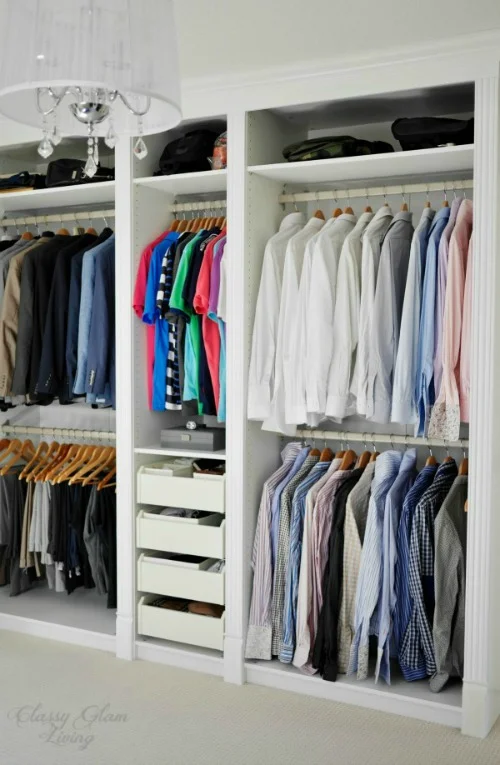
The Mr. was nice enough to let me take the entire master bedroom's walk-in closet, while he took the single closet in the 3rd bedroom (aka his new dressing room/ laundry sorter and drying room).  He has an extra clothing rack in that room as well.  Kinda squished there!

Gone are the days where we could stretch out our arms to fill in our sleeves and hop around as we put on our bottoms without bumping into walls or doors.  No biggie, we'll just need to fine tune our balancing finesse!

Of course, that brings me to reminisce about our dressing room.  As promised, this is the first of the "Would've/ Could've" series, which will run for the rest of August.  As in, if we would've stayed at our previous house, how we could've decorated the rooms.  

Prior to buying our new house, the next item on the Mr.'s honey-do list was to put an island under our dressing room's chandelier.  Similar to these gorgeous dressing rooms:

This would've been another IKEA hack project for the Mr.  I've found this perfect chest of drawers...

IKEA Birkeland 3 drawer chest

IKEA Birkeland 3 drawer chest

At 36" high, it's at the perfect height as a counter.  We would want to put two of these chests of drawers back to back to form THE island, and its depth is perfect for our room size.  However, the trim work at the bottom of the unit wouldn't work when put back to back.  That means the Mr. would have to DIY his own bottom with some baseboards around it.  To cover the seam on the top surface formed by placing the two dressers together, we would have a mirror cut to size.  Yup, a mirror top island would've looked just right in the dressing room!  Similar to this:

Without having the island looking too blended-in with all the white frames on the walls, I would paint it in a light greyish colour.  Colours similar to these cabinets would be my top choices:

Click to view source.

Click to view source.

Love the hint of lilac in these greys...  sorry hon, for my plan to make the dressing room a tad feminine =)

Our window in the dressing room was bare, and we were never in a rush to put up anything since it looked straight out to our neighbour's brick wall.  Had we been looking for drapery designs, we would be looking for some softness around the windows to offset the hard lines of the wardrobe frames and moldings:

Love the nailhead details in the valence of the window treatment below, but the whole look seemed a bit too busy for the dressing room.

The treatment below has a dreamy look and it's the ultimate in softness.  However, I think the Mr. would prefer something less fussy, minus the puddling look.

Never thought that I would like the ballooning valence style, but it's nice and elegant in this space.  

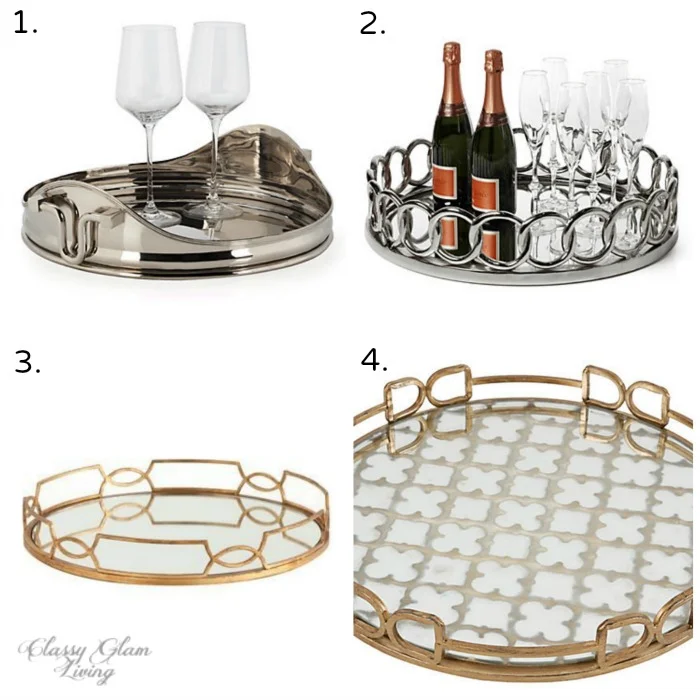
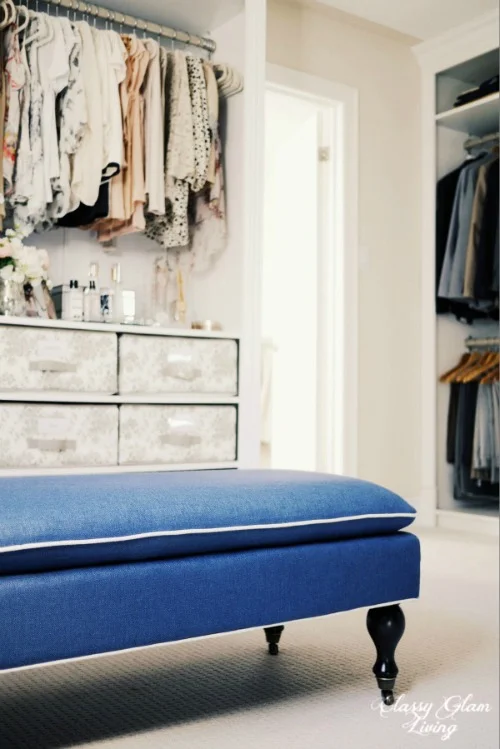
No dressing room is complete without some kind of seating.  Afterall, who wants to hop around single-legged while putting on pants or socks?  Getting small stools for each of us was on my to-do list, but we got a bench instead.  It was fine when we didn't have the island, but it would've taken up too much space if the Mr. had gotten around to finish installing the island.  So I was still searching for smaller seats in case the Mr. was ready to jump on another project again, once he was off of the break he took after the office cabinet project.

Sources:  1 via Horchow; 2, 3, and 4 via One Kings Lane.

Sources:  1 via Horchow; 2, 3, and 4 via One Kings Lane.

I loved choices 1 and 2 for its feminine flare, however, I had to consider the fact that I shared the dressing room with the Mr.  Not that he would've minded, but I also loved choices 3 and 4 for their more contemporary style, with the separated seat cushion look.  Ultimately, I would've chosen #4, to inject some colour contrast into the room and balance the light-coloured wardrobes and island.

To up the luxurious feel of the dressing room, a fluffy rug would've felt nice and soft against bare feet.  However, we already have broadloom in the dressing room...  so forget about a fluffy area rug.  But these sheepskin rugs from IKEA are bang for the buck and would've been so heavenly, pleasing to the eyes and under our feet!

IKEA Sheepskin Rug

IKEA Sheepskin Rug

If we had the wallspace, I would've loved to incorporate some pieces of art into the dressing room.  Sorry again for making our dressing room too feminine, but these pieces bring out the sensuous side of the room.  

Sources:  1, 2 source unknown; 3 via ZGallerie; 4 via One Kings Lane

Sources:  1, 2 source unknown; 3 via ZGallerie; 4 via One Kings Lane

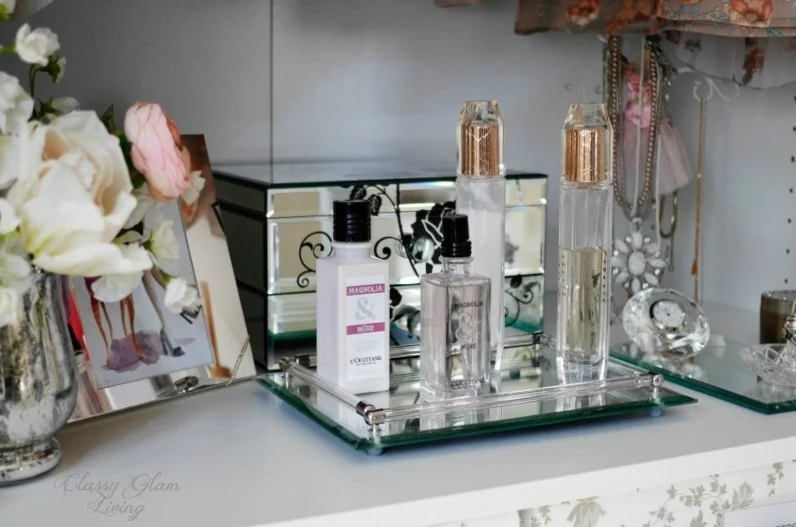
With our dressing room's wardrobes being all open and the clothes in plain view, it was already quite colourful.  I think I would keep the artwork toned down.  I'm loving the gold foil prints that are all the rage these days.  These prints of classic perfume bottles would be my choice to bring out the sparkly in the room, while still low-key in a sense that they are monochromatic.

Here is how the dressing room would've been decorated by incorporating our design choices above.  A calming and luxurious feel, brought about by the mirror top island and the softness of the window treatment and sheepskin rugs.

Island crop - Lisa Vanderpump's closet

Island crop - Lisa Vanderpump's closet

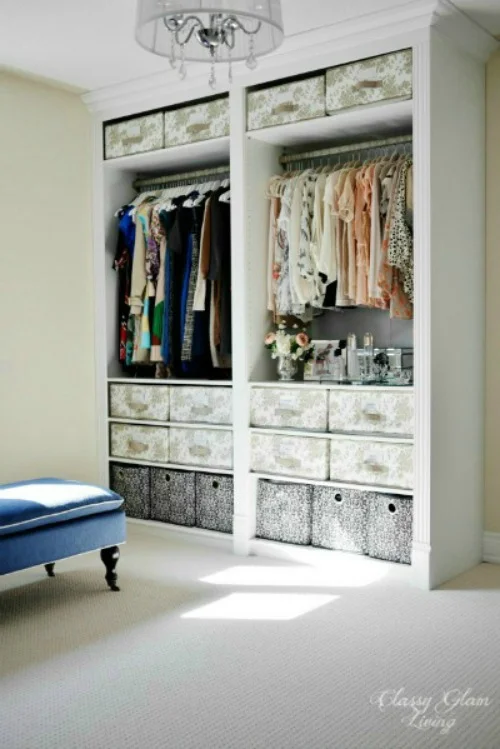
We won't have a dressing room the same size as this one in our new townhouse, but we have made some floor plan changes for a good size...  let's call it a dressing area.  I will leave that for a future post.  For now, you can check out my Dressing Room Pinterest Board to get a sense of our new dressing area project!

My Current Obsession: Trays and Styling

Tray Styling | Classy Glam Living

Back when little man was still a baby, the forward-thinking mom in me took a look at our wooden coffee table with sharp corners and declared to the Mr. that we should replace it with something soft.  Seeing how babies who are learning to walk love to pull themselves up against furniture to walk around them, you can never be too cautious (especially with us being first time parents)!  For practical reasons, we decided to get an upholstered ottoman with ample storage inside for little man's toys (and our issues of unread magazines).  

Problem was, we needed a hard surface on which to place our TV snacks/ drinks.  That was what prompted us to make our first tray purchase, and the start of an obsession...

This was the large tray we got from Pottery Barn for our coffee table / ottoman in the family room.  We love keeping copies of the Restoration Hardware catalogue on the tray (we're always in awe and inspired by how they style the rooms).  Just in time to switch to the most recent copies we got in the mail!  

Coffee Table Tray Styling | Classy Glam Living

Ever since getting that first tray, we loved using trays to keep a large surface clutter free.  The tray is like a clutter boundary - keep your clutter in it, and makes the rest of the surface much neater...  or at least I try to keep it that way!

The tray in our office keeps our stationeries easily accessible, while keeping our workspace bright with that wooden lamp.  

Office Desk Tray Styling | Classy Glam Living

Creating a tray vignette is a great way to add a little personality to a room.  Here in our home office, it makes working less dull with something pretty on the desk.

Office Desk Tray Styling | Classy Glam Living

In addition to personalizing a space, trays also make cleaning much easier.  We have a long counter in our bathroom, and I found cleaning the counter much easier than my pre-tray days.  I just need to haul away the whole tray and give the counter an easy wipe-down.   No more moving individual canisters while I clean up.  

Bathroom Vanity Tray Styling | Classy Glam Living

A sparkly mirror tray in the dressing room helps gather up bottles... 

Dressing Table Vanity Tray Styling | Classy Glam Living

... and free up some space for another mirror tray for some knick knacks - my ring holder, clock and oil diffuser.

Dressing Table Vanity Tray Styling | Classy Glam Living

Our tray obsession continued on our last trip and we brought home this faux shagreen tray from Z Gallerie.  We loved its color, and the stylish gold handles make it a perfect piece for entertaining.  It now sits nice and proud on our dining room console table.

Bar Tray Styling | Classy Glam Living

I'm not sure why we've only been getting four-sided trays.  But we're now eyeing these beauties!

Tray Styling | Classy Glam Living

Sources:  1 / 2 / 3 / 4

Maybe one day, I'll ask the Mr. to attempt this DIY project also!  I love me a marble tray!

via Almost Makes Perfect

via Almost Makes Perfect

Now go on to get organized and beautify your space with trays!

Our DIY Dressing Room Hacked IKEA PAX Wardrobe

DIY Dressing Room IKEA PAX | Classy Glam Living

*** cLICK HERE FOR THE FINAL REVEAL OF OUR NEW DRESSING ROOM***

We were very fortunate to have been able to move to our current house.  We love the openness of the ground floor's layout and the bedrooms are practical in size.  The dressing room came about when we were at the builder's office examining our floor plan, and a light bulb went on in the Mr.'s head.  "Can we add a door on this wall?", he asked the builder's rep, pointing at the wall between the master ensuite and an adjacent bedroom.  What was pictured in the air bubble above his head was to delete the planned walk-in closet in our master bedroom, and instead make the bedroom behind the ensuite into our dressing room.  This way, we will have a nice sitting area in our bedroom and practically the back half of the upper floor to ourselves!   

DIY Dressing Room IKEA PAX | Classy Glam Living

Everything went according to our plan, and it was a dream-come-true for both of us!  (Yes, for the Mr. also, just look at his shirt collection!)  It was the first room we tackled after moving in, because we really didn't want to be living out of Rubbermaid bins for who-knows-how-long.   

DIY dressing room IKEA PAX | Classy Glam Living

The Mr. hacked the IKEA PAX Wardrobe system and added trims and mouldings to make the closet frames look as if they were custom built.  Our ceiling on the second floor is 8' high, so we bought the 236cm high frames.  We had several different plans of the frames' layout, but ultimately chose this one.  We each have 2 wide hanging frames and a slim frame in the middle with drawers.  But of course, I also took up the third wall's hanging space...  and some shelves. 

DIY dressing room IKEA PAX | Classy Glam Living

Being his "particular" self, the Mr. had already amassed a collection of IKEA wooden hangers for his dress shirts.  I, on the other hand, was still using all different coloured hangers, plastic/ wooden/ drycleaner metal hangers...  you name it, I got it.  

All different hangers I have collected over the years.

All different hangers I have collected over the years.

Our un-glamourous side...  ok, it was mostly my stuff while I was purging.  All those bags of purged items drove the Mr. crazy...  they sat there for...  um, a long time.  Well, I just needed time to COMPLETE the p…

Our un-glamourous side...  ok, it was mostly my stuff while I was purging.  All those bags of purged items drove the Mr. crazy...  they sat there for...  um, a long time.  Well, I just needed time to COMPLETE the purging, that's all.

I eventually got some white velvet hangers on a flash sale site at an awesome price!  They're the best for women's clothes, which usually have thin and slippery material.  Just that small investment made the dressing room more coherent and less chaotic.   

Ahhhh...  this looks so much better, and the Mr. felt relieved. 

DIY dressing room IKEA PAX | Classy Glam Living

I don't know if the Mr. noticed, but I purposely hung my lighter-coloured clothing at the frame that faces the dressing room's entrance.  I think it helps make the room lighter than if I were to hang dark-coloured clothes there.   

DIY dressing room IKEA PAX | Classy Glam Living

So there you have it, our somewhat glamourous dressing room...  though it's really still a work in progress.  We still need to: 

  • get 2 seats, one each for the Mr. and myself, or a small bench in front of the island - got a bench instead

  • hack 2 IKEA dressers, put them back-to-back to form an "island" in the middle of the room. 

  • finish off the drawer fronts - to make them look custom 

  • design window treatment 

  • maybe get some wall art 

  • maybe get some plants at the window 

  • maybe paint the frames and moldings a taupe colour 

DIY Dressing Room IKEA PAX | Classy Glam Living

The blue bench was our most recent addition to the dressing room.  It's great to be able to sit while putting on socks, and not hopping around while at it.  (I'll try not to use it as my next dumping spot.)

Would you convert an extra bedroom to a dressing room?