Small Space + Marie Kondo's The Life-Changing Magic of Tidying Up
/Now into the second week of having moved in, we're still unpacking. Well, we took a break after we've unpacked the essentials, and continued to unpack once the crown moldings were installed. It was a nice break from all the boxes; afterall, there's no point to decorate just to have them be in the way for the crown installers, right?

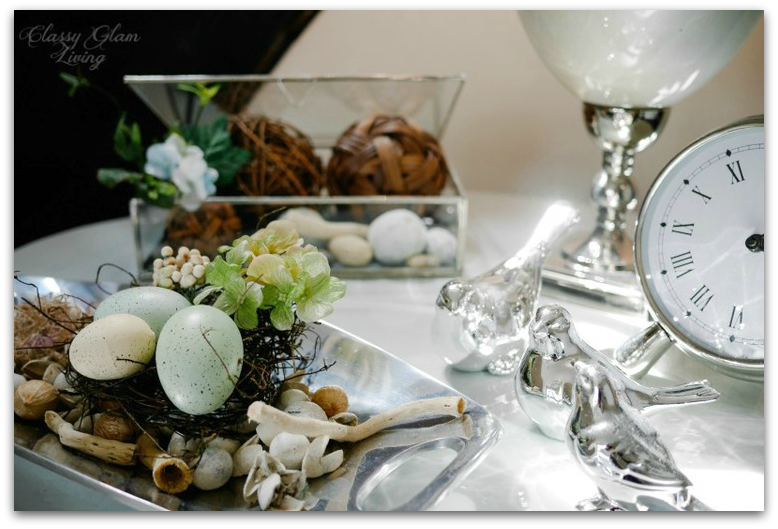
We couldn't wait to decorate the entryway once the crown moldings were installed!
Unpacking may be an endless task, and I'm embarrassed to admit that, for a family of 3, we just have so much stuff! I didn't realize we were such hoarders - it took our 4 movers 7 hours to move out of the rental and into our new house. It's true that we don't have much furniture, as one of the movers said, but we have a lot of STUFF. As a result, I'm always looking for more storage space.
Then, as I was browsing for organizing methods, I learned about Marie Kondo, a celebrity organizer in Japan and author of The Life-Changing Magic of Tidying Up. It sounded magical for sure, so I delved into it further and read the e-book in one go.
This isn't a book about cleaning, but more of decluttering by ridding of things that don't "spark joy" in us. It has a spiritual undertone to it, and in essence, it's more about a lifestyle change. That by knowing what you love, you become more grateful to your possessions, gain the ability to be a more decisive person (through the decluttering process), and make positive changes in life.
It's definitely an eye-opener and timing just couldn't be better! We're in a smaller house now, and it's ridiculous to still have so much after rounds of purging. We're at the best time to start with a clean slate as we unpack the boxes! This is the easiest way to declutter all in one go, as Marie Kondo stresses. Purge the unwanted, then store the remaining in its own place, to minimize rebounding back to clutter. Afterall, "tidying is not the purpose of life."
Little did I know, I was actually already following the Konmari method's order of decluttering - starting from your least emotionally attached items: clothing, books, papers/ documents, miscellany, and lastly, momentos.
I first learned about the capsule wardrobe after we moved into our rental last year, and have subsequently purged bags after bags of clothes. The essence of a capsule wardrobe indeed goes hand in hand with the KonMari method - keep and wear what you love, or "spark joy".

Gosh, this was embarrassing... I've nothing to wear...
For the next category, books, I've finally gotten rid of my textbooks from university... seriously, why did I even keep them?! As for novels, I only kept the ones that are classics - and I consider my Harry Potter collection a classic :-) I got rid of several boxes of books from this purge.
I'm currently tackling the miscellany category, and our biggest collection is undoubtedly home decor. We love all the home decor and accessories, and I was all for a layered look in our previous larger house. Though it's true a layered look is a feast for the eyes, too many home accessories would just make our current smaller home look cluttered. Not to mention, having too much stuff out also makes it a pain to clean, and encourages procrastinating on cleaning (speaking from experience here).
Our front hall table at the old house. Layered look is "out" at our new house.
More and more, I find myself loving the clean home decor look of the instagrammers I follow. They've shown me that I don't need a lot to make a space look comfortably lived in and welcoming. Having some blank space lets the eyes rest easily on single objects and devour their beauty. If I only display things that I love, I would opt to take better care of them with proper cleaning. I can totally relate to Marie Kondo here:
"Human beings can only truly cherish a limited number of things at one time As I am both lazy and forgetful, I can't take proper care of too many things. That is why I want to cherish properly the things I love, ..."
So, I'll be purging some home decor items that don't "spark joy" this week. Does a bowl with ratten balls on my coffee table spark joy? I think I'm over that phase.
And onto momentos... I'm a sentimental person, and naturally a hoarder of birthday cards and any occasional cards. When we moved from our old house, I've purged all Christmas cards from previous years. Sorry good friends. And now, I'm more than ready to rid of the birthday cards I've collected over the years. Though I still have a special box for all the cards the Mr. has given me since we started dating =) Yes, that sparks joy in me, forever.

"Souvenirs" from our recent Europe vacation - "sparks joy" - KEEP pile.
This is our third house, and third time must be the charm. I hope I've finally found a way to put our house in order! It's been liberating to purge and I haven't been browsing online stores aimlessly. My goal in following the KonMari Method is to have less, and buy less; spend less time in perfecting a layered look and more time enjoying our uncluttered house. I'm sure the Mr. will also breath a sigh of relief for not having to build racks after racks for storage after all this decluttering!
Have you taken on the KonMari challenge? Have you stay decluttered without rebounding back?