Reupholstering French Louis Chairs
/This summer seemed to have been a blur, as does every summer. It went by too fast and now it's a wrap with the little man back to school. The Mr. also wrapped up the reupholstering of the chairs, meeting his deadline goal of finishing them before we move into our new house.
Today, I'm sharing the Mr.'s approach to his first attempt at reupholstering. Note that these are not professional instructions, but they were what worked for him.
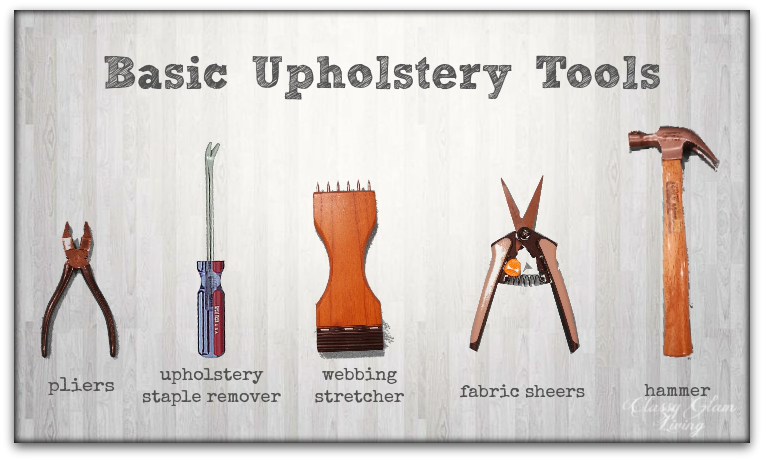
Gather your tools
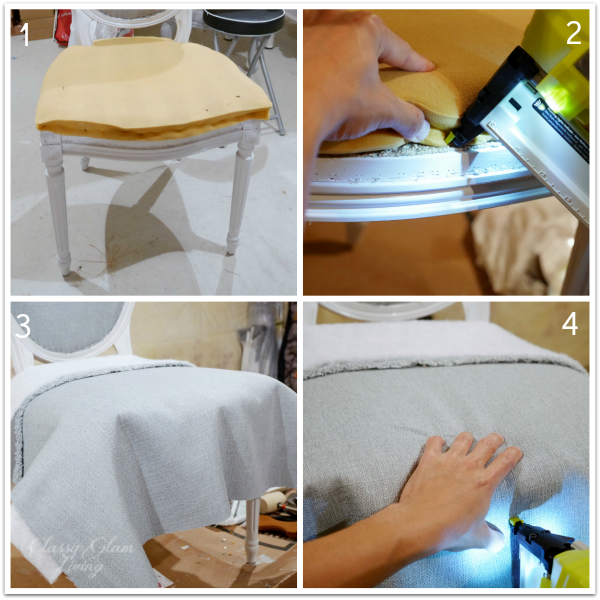
1. Remove original upholstered material (trim, fabric, foam, padding, and webbing)
Remove the finishing trims around the seat and back. Beware of staples coming out of the trims:
Check the condition of the foam or filling under the fabric. You may replace it if you want everything new. For us, we chose to re-use the original foam as it was in decent condition. If you choose to re-use the foam, take care in removing the staples around it.
Set aside foam to be re-used.
Continue to remove the staples until you've gutted the chair down to the bones. The Mr. found the upholstery staple remover very helpful in saving his wrist.
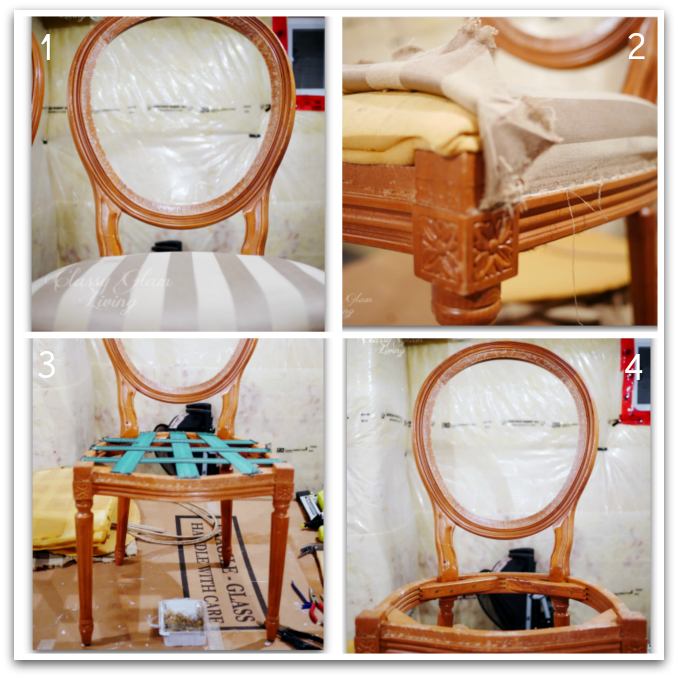
Remove the original webbing. This step is optional, but the Mr. opted to install new ones so that the chairs have a new and sturdier support.
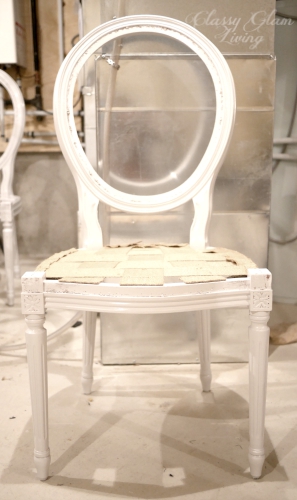
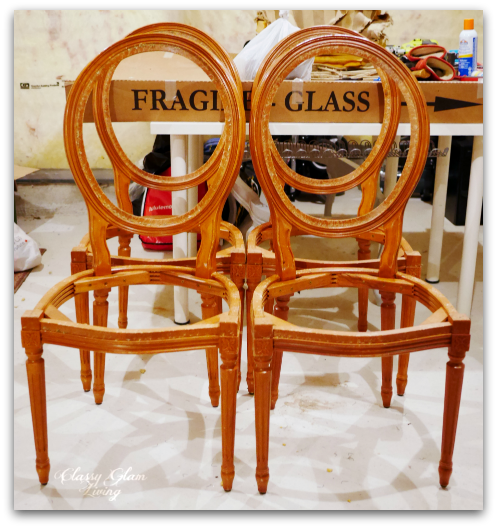
TA DA! All 4 chairs stripped to the bones! This was by far the most time-consuming and back breaking part of the job.
2. Prime and paint chair frames (optional)
This step is optional, depending on whether or not you plan on giving the chairs a new look. We're not big fans of this cherry wood colour, and decided on another colour instead. Since the original chairs were not painted, sanding down wasn't necessary. The Mr. applied a good coat of his favourite primer before painting with an angled brush.

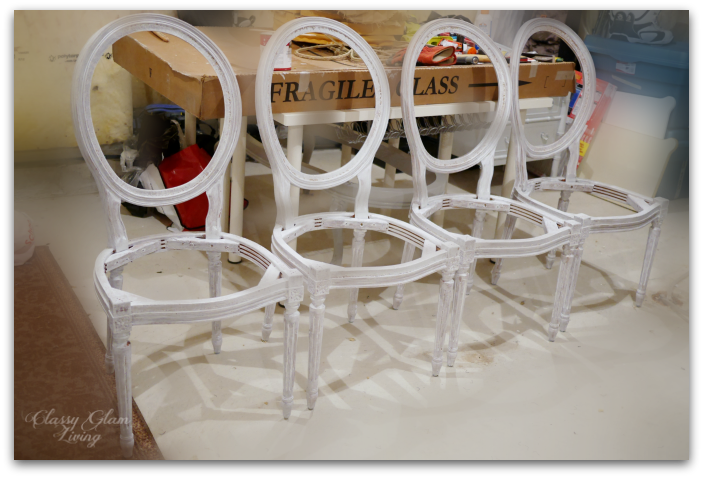
Primed chairs.

An angled brush helps getting into the grooves.
3. Reupholstering back of the chair
I bought enough fabric to account for a safe margin and mishaps. Now, turns out we have more for throw pillow covers :-)
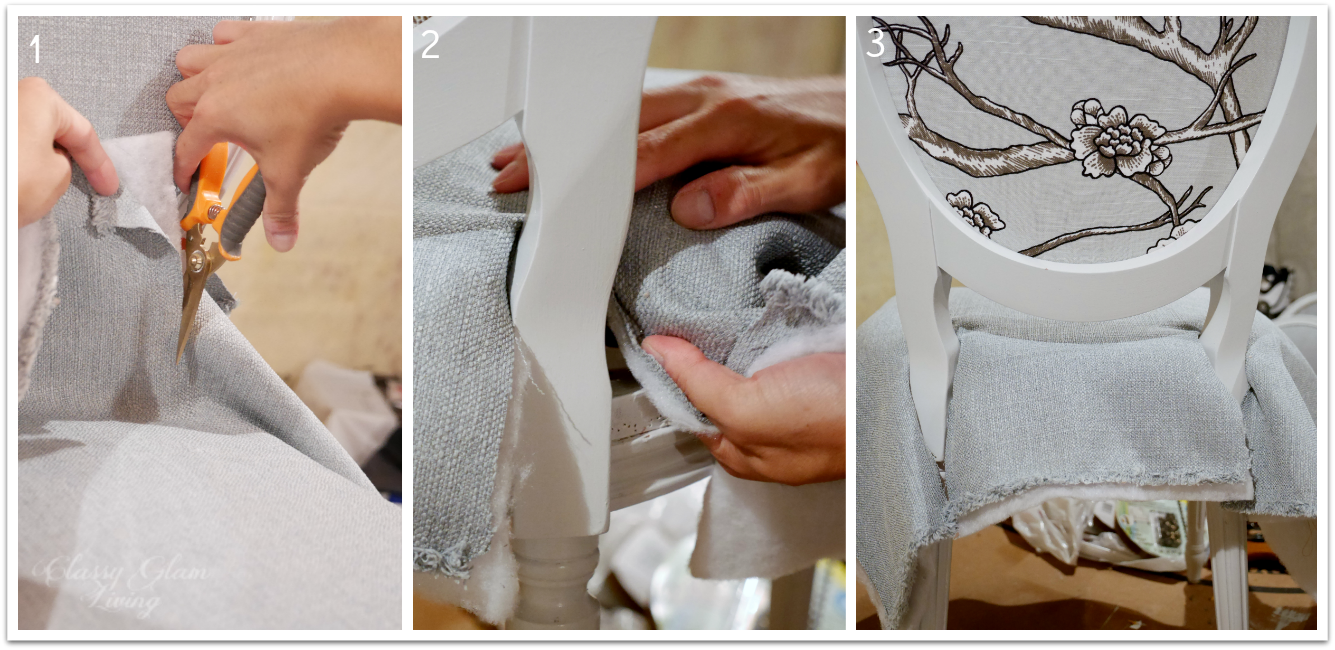
Using the fabric removed from the back of the chair, the Mr. created a template so that we can easily see and adjust the pattern that would be used. Make sure to note your pattern repeat dimensions. If your pattern is linear, lineup so that the lines are straight. For beginners, I think a pattern that's not linear would be more forgiving.

Apply template on fabric to determine best placement
After you have determined where it is best to place your template, either mark it with fabric marker, or take a photo of it. Cut enough fabric all around so that you have enough to grab onto when pulling it taut to staple.

Iron out any creases in the fabric.
The Mr. loved his new Ryobi Airstrike cordless nailgun for this upholstery project. I, on the other hand, loved not having to live through the noise of a compressor of corded nailguns... win/ win for both of us with his new toy.
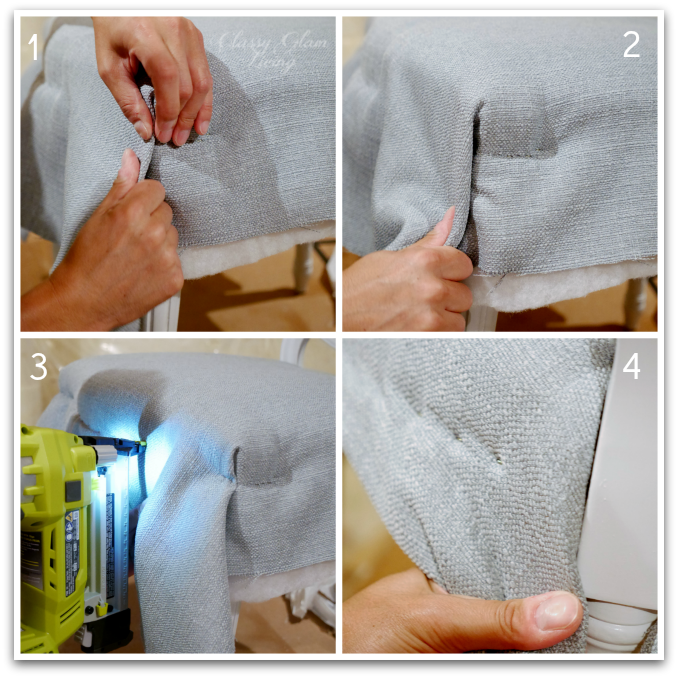
Check where your fabric should show in the back of the frame. Once you've determined the correct area, staple the fabric to the top middle frame.

Line up the pattern again and check at the back of the frame. Hold down on one side and staple along the frame, until the middle of the back.

Again, ensure pattern at the back is lined up, pulling taut on the other side and staple down to the middle of the frame.

Once the top half of the back is in place, staple the bottom middle while pulling the fabric taut.

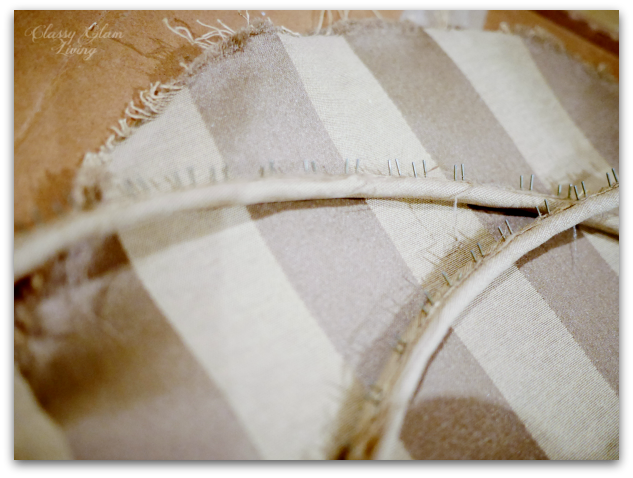
Continue along both sides, similar to the top half. The Mr. would staple the fabric around the frame at around 1/2" apart.
Trim excess fabric around the frame with fabric sheers.

Upholstered backs of chairs
Add webbing to back of chair
Tip: Always start webbing the back of the chair first. For the first chair, the Mr. webbed the seat first, and then realized how the webbing would get in his way as he worked on the back of the seat.
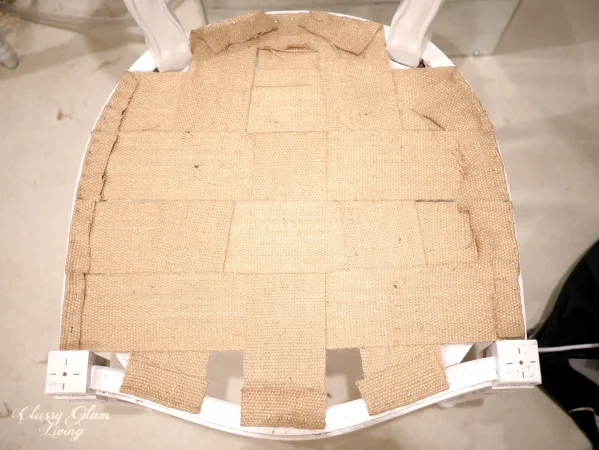
The original back of the chair had no webbing, with the only support as fabric and foam. We preferred the chair to have a tighter back and firm support, so the Mr. attached burlap to the back. Burlap should be readily available at fabric or craft stores.
1. Start from the middle of the back, staple burlap webbing onto the edge with 2 rows of staples.
2-6. Using the webbing stretcher, pull the webbing taut against the other end of the back. Hold the stretcher tool downward (which helps pull the webbing taut) and staple that end into place. Trim excess webbing burlap with sheers.
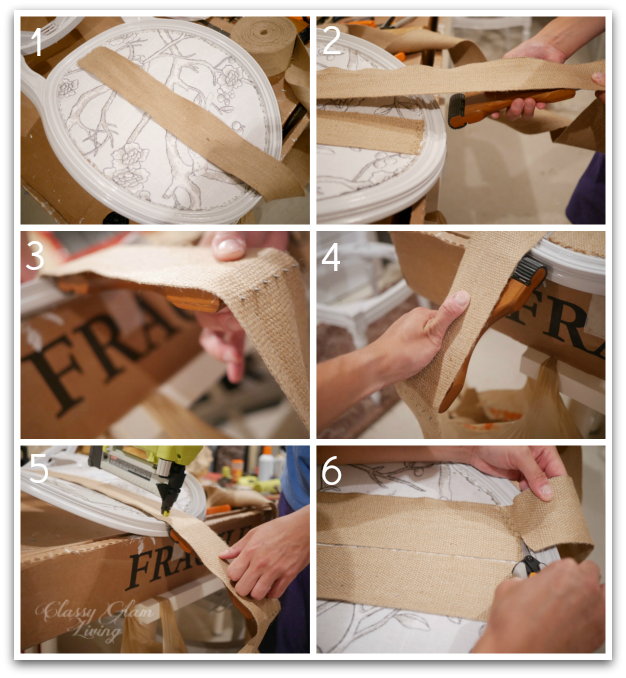
Repeat the above steps according to your preferred back support preference. The Mr. used 3 vertical pieces of webbing for a stronger back support.
TIP: The Mr. noticed the burlap is usually straight on one side, and ruffled on the other. (Could be due to how it was spooled?!) He found it easier to line up the subsequent piece of webbing against the stapled one using the straighter side.


Here is how we like ours with a tighter back support:

Add fabric and padding to back of chair
The Mr. found it easier to lie the top down on a flat surface. Starting from the middle...
Staple along one side and the other.
Once the fabric has been stapled in place about 3/4 of the way, pull the bottom fabric taut and staple in the middle.
Continue to staple around and close up the bottom.

Once the back is all stapled, remove excess fabric as close to the edge as possible with sheers.

4. Reupholstering seat of the chair
Similar to the back of the chair...
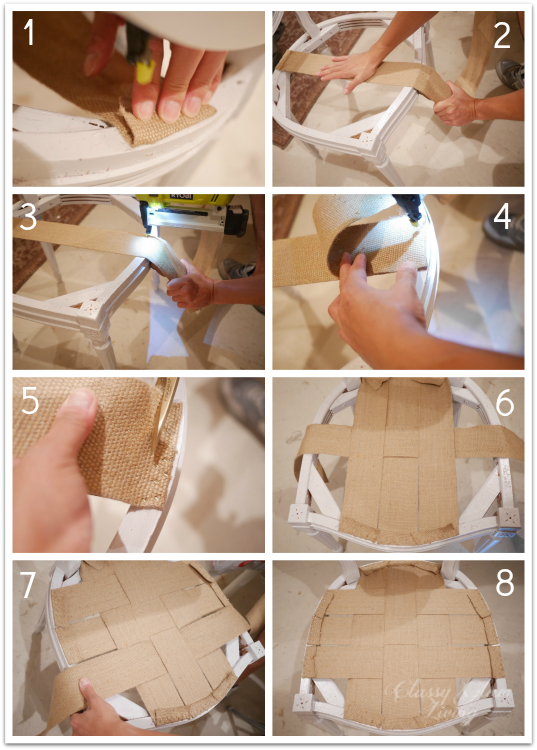
Add webbing to seat of chair
1-5. We start by attaching the webbing to the middle of the seat with 2 rows of staples. Double up the burlap for a more secure attachment.
6-8. The seat webbing is woven according to your personal preference. We went for a tight support by weaving the webbing right next to each other. The more space between the woven webbing, the softer the support.
Add fabric and padding to seat of chair
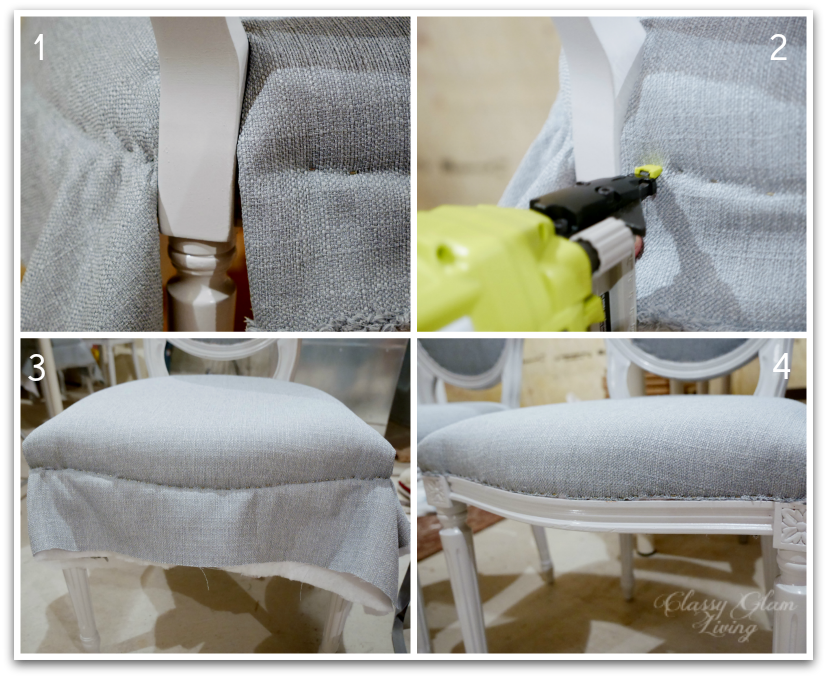
1-2. We reused the original foam on the chairs. Staple the bottom edge of the foam to the seat frame.
3-4. Lay fabric and padding on the foam and staple the middle to the frame.
Cut out the back corner with sheers. Tuck in the edges as such:
For the front corners, staple the fabric down on one side.
Fold a straight seam down the front.
Staple into place. Repeat for the other corner.
Continue to staple around to the back legs.
1. and 2. Staple and close up the back corners.
3. and 4. Trim excess fabric as close to the edge as possible with sheers.
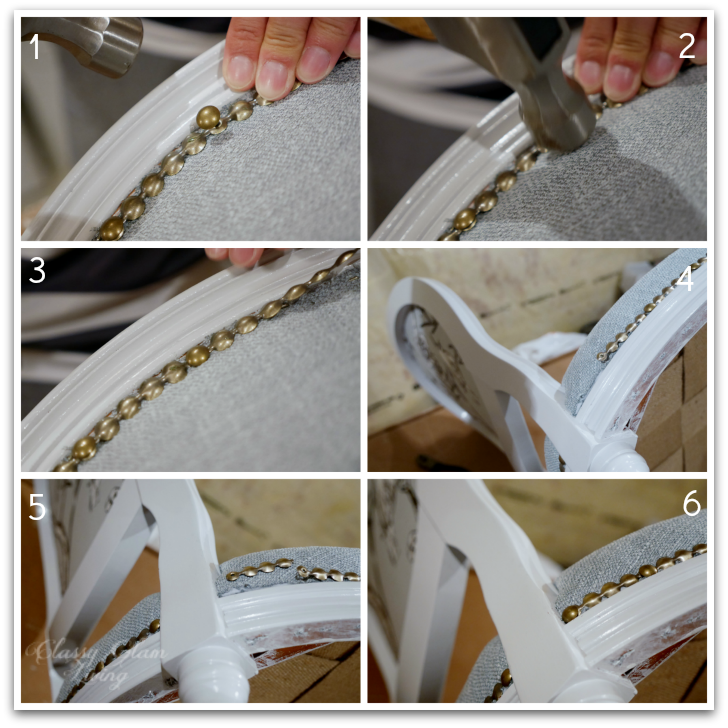
5. Add finishing trim
To cover up all those staples along the frame, some options include sewn welting/ piping, lace trims, or nail tacks. We decided to use the nailhead trim as the finishing touch on these chairs.
1-3. Hammer nails into the holes of the trim, covering as much fabric edge as possible.
4-6. Finish the edge by snipping off trim. Gauge how much to cut and finish off, so that the last tack is nailed in.
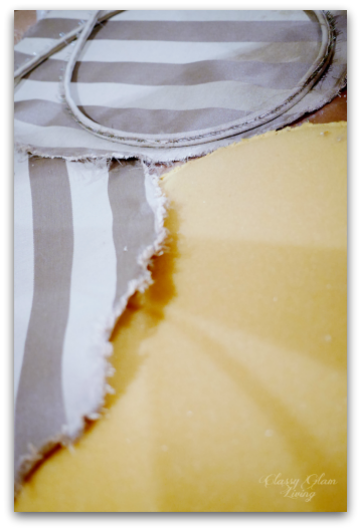
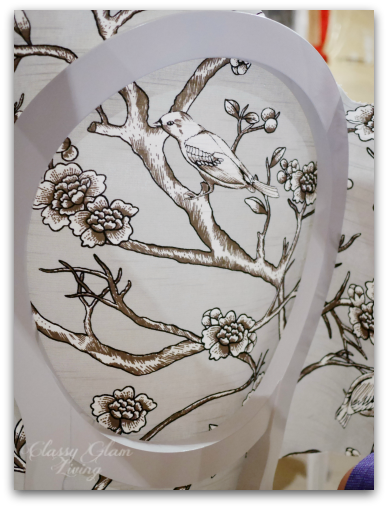
Here again was how I first laid eyes on these chairs...

I saw their potentials to become beauties. So glad the Mr. hopped on my crazy bandwagon and did his magic on them :-)
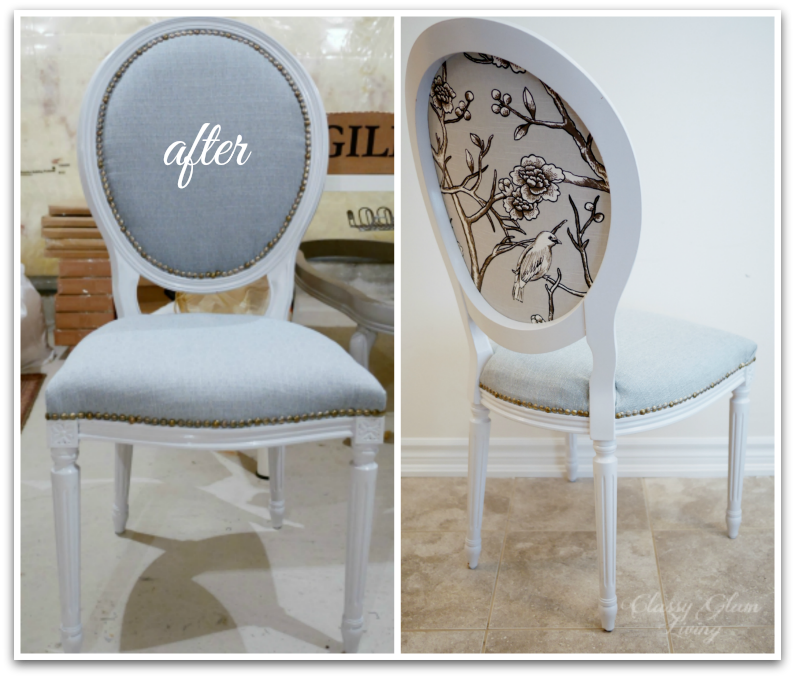
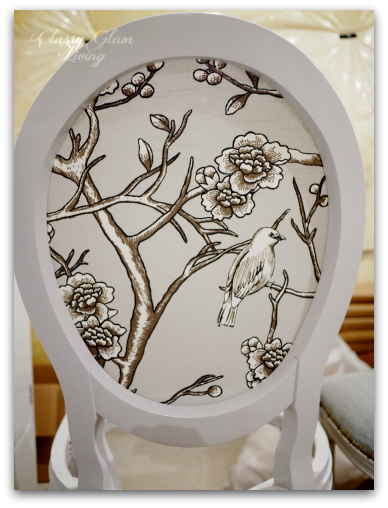
Not only did they turn out beautifully, but they're comfy on my tush and slouchy back. I'm glad we went with different front and back fabrics for that custom look. I love, love, love them!! And the Mr., of course!!!
There're still several things to be done before we can really call this project "complete". The paint needs to be touched up, then a coat of min wax to protect the paint from chipping. The Mr. still has to put on the dust cover fabric, which goes underside of the chair to hide the webbing. I would also like to spray a protective coat on the fabric as a precaution.
There's not enough time for all these right now, as we're gearing up for our upcoming move. Really looking forward to set up these chairs in the basement for our game/ snack/ craft table!
It's a lengthy post, I know. If you're still here, you're a champ! If you see a good deal on vintage chairs, grab them! I hope we've inspired you to take on a reupholstering project that you've been thinking about too!