Little Man's Big Boy Room Reveal

Neutral Big Boy Room Reveal | Boy's room | Kid's room | Classy Glam Living

Moving and unpacking are always stressful events.  Having a kid tag along for the ride is even more challenging.  This is our third move with little man and we always try to minimize any potential hiccups with him by setting up his room first.  This time around, he is older and has more belongings, but we had to start afresh since his new room didn't have any storage units.  It took us some time to get everything in place, which allowed us to take inventory of what kind of storage he needs.  

His room isn't as large as the one at the old house, but it feels bigger with 9-ft. ceiling and wall-to-wall windows (that Mommy loves).  Considering he also has the adjacent room as his playroom, I would say his bedroom is plenty enough.

I wrote about inspirations for his bedroom almost a year ago, and originally wanted colours inspired by a union jack rug (red, navy, and white) for his room.  Instead, I decided to use those colours for the playroom, and kept his bedroom serene with a palette of white and soft grey with touches of navy.

Neutral Big Boy Room Reveal | Boy's room | Kid's room | Classy Glam Living 1

He's had robin's egg blue walls in his nursery, so this time I left the wall colour a lot more neutral.  I was obsessed in searching for a soft grey that's not tinted red, blue, or green.  I finally found one that lots of decorators rave about - Benjamin Moore's Gray Owl.  To make it the soft gray that I was after, I had the Benjamin Moore rep lightened it by 50%.  It came out in exactly the soft gray I was looking for!

Neutral Big Boy Room Reveal | Boy's room | Kid's room | CB2 sleigh bed | Classy Glam Living

We took advantage of the tall ceiling and got little man a sleigh bed.  The high back makes for a comfy lounging spot where he would read (for a bit) on weekend mornings.

For his bedside table, I wanted something of a warmer colour to balance the cool tones of the room.  Something simple with a drawer would be perfect.  This one from Target fits my criteria and the chrome legs are a nice contrast to the rustic wooden top.  As an added bonus, it was on sale when I purchased it! 

Neutral Big Boy Room Reveal | Boy's room | Kid's room | Target Threshold bedside table | Classy Glam Living

To add a bit of contrast to the white and soft grey, we installed an industrial-feel metal wall shelf that also helps to balance the height of the room.  It has some great cubby space to display his treasures!

Neutral Big Boy Room Reveal | Boy's room | Kid's room | IKEA PS cabinet and CB2 metal wall shelf | Classy Glam Living

Thought I'd try to wrap the shelf with some mini lighted garland I hogged over Christmas.  Little man likes it turned on as his night light as he drifts off to sleep.

Neutral Big Boy Room Reveal | Boy's room | Kid's room | CB2 metal wall shelf with garland lights | Classy Glam Living

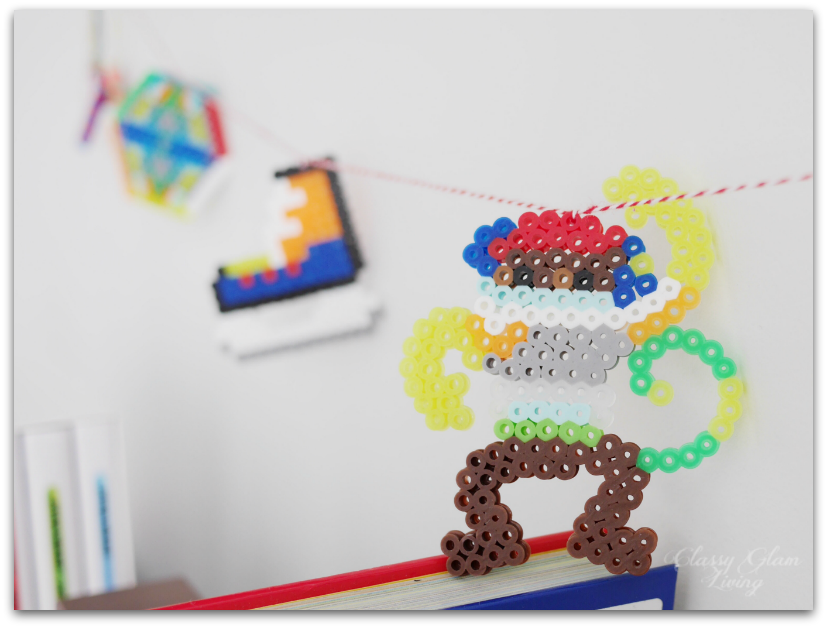
There was a time when little man would bring home these melted beads "artwork" from school.  What should I do when he couldn't part with them?  I tried to save them all, but these are all that I have left...  so I made a short garland out of them as a temporary display until he's sick of seeing them.

Neutral Big Boy Room Reveal | Boy's room | Kid's room | IKEA white PS cabinet | Classy Glam Living
Big Boy Room Reveal | Boy's room | Kid's room | Melted beads garland | Classy Glam Living

When little man helps with chores, eg. dusting, he gets a buck (or toonie $2) in his Darth Vader bank.  I think it's time he uses his allowance for his Star Wars mini library so I can free up some budget for my coffee table books!

Big Boy Room Reveal | Boy's room | Kid's room | Darth Vader piggy bank | Classy Glam Living

It's funny when I see little man trying to get creative with decorating his cabinet.  I guess it's every boy's dream to be a superhero (or sidekick), driving a red convertible?

Big Boy Room Reveal | Boy's room | Kid's room | Classy Glam Living

Baskets, you can never have too many of them.  Spiderman needs a spot to hangout when his job as sleeping buddy is done, and Mommy places the cushions that were stuffed in here to take pictures =)

Big Boy Room Reveal | Boy's room | Kid's room | Storage basket | Classy Glam Living

On the wall at the foot of his bed, I would eventually want to hang up his sports jerseys in some sort of shadow box frames.  But for now, this banner I had printed for his FC Barcelona birthday party would serve as wall art.  The photo was taken by our travel buddy when we visited FCB's stadium, Camp Nou.  My photo here doesn't do it justice.

Big Boy Room Reveal | Boy's room | Kid's room | FC Barcelona Banner | Classy Glam Living

In making this a big boy room, and keeping it theme-free, I hope it will last little man a long time as he grows into it.  There're enough cubby space in the wall shelf to change up his obsessions as he grows, and decent storage space in the IKEA cabinet for whatever secrets he may eventually want to lock up.  

Big Boy Room Reveal | Boy's room | Kid's room | Classy Glam Living

I'm glad I chose a neutral backdrop for his room, and I love how his belongings fill the room with personality and colours. When you enter a room, it should convey to you its owner's personality.   My VIP client here is easy going (sometimes) like the room's neutral white and grey palette, casual (track pants) lover like the relaxed industrial modern furnishings, a little bit edgy like the Sputnik light fixture, and definitely opinionated as to what he likes (a sports fan, Marvel know-it-all, and die hard little Star Wars fan). 

I think I've nailed it with this one.  Now if only I can get my client to make his bed with those cushions that are forever stuck in the standard goods basket.  Ya think?

source list

  1. Bed - West Elm

  2. Bedside table - Target (discontinued)

  3. White storage cabinet - IKEA

  4. Wall shelf - CB2 (discontinued, similar)

  5. Rug - Lowes - ECarpet Gallery Noto Beige

  6. Faux sheep skin - IKEA

  7. Light - One Kings Lane (similar - affiliated link)

  8. Basket - H&M Home

  9. Curtain panels - IKEA

DIY Custom Dressing Room - Progress Update

Time flies when you're having fun!  I just realized the other day that we've moved in for just over 4 months!  It's so nice to be in our own house again, and be able to just play house.  

The Mr. has been building our closet with the little spare time that he has in a day, some nights right after dinner or playing floor hockey with the little man.  Though I never rushed him (never did!), I'm sure he just wants to put this behind him.  It's a huge undertaking, and I don't blame him one bit.  

During this time while he was building the closet, I had my clothes at the seating area of our bedroom, while his were at the playroom's closet.  All of a sudden our seating area looks so spacious =)

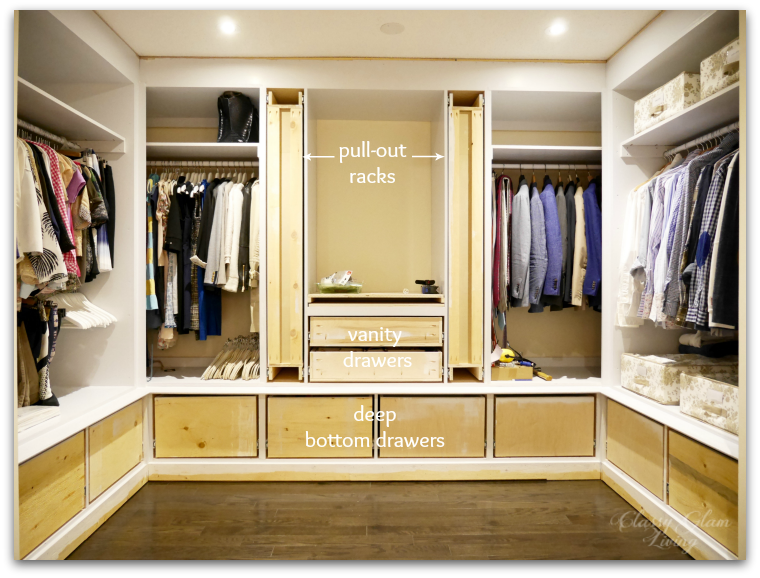
That's because the Mr. has completed our closet to a point where we can move in our clothes.  Woo hoo!!  

DIY Custom Closet Dressing Room Update | Glass Knobs | Classy Glam Living | Custom Closet with Drawers

Excuse the building material in the pic, they're just more handy for the Mr. while he was working in the closet.  The Mr. was afraid that I won't have enough hanging space for my side of the closet.  But after I've "KonMari"'d my clothes, I've purged bags of clothes and folded whatever I can KonMari-style.  All those bottom drawers sure came in handy with the folded pieces of clothing.  The vanity drawers are like our mini dresser for our intimates.  Last but not least are my dream-come-true pull-out racks!  The Mr. would use his side for ties and belts, and mine would be for scarves and belts.  It's great to have a spot for everything.

The Mr. has primed and painted the exterior frames and the closet interiors.  My colour inspiration was from this photo:

Natty by Design

Natty by Design

I love this bluish grey, not too dark nor too light.   Our dressing room doesn't get much natural light, so a dark colour would make the area a dark hole.  This shade will highlight  the cabinet's detailing just right.  A close match to this greyish blue is Benjamin Moore's Sidewalk Gray, which we chose in a glossy finish and tinted down to 50%.

Benjamin Moore Sidewalk Gray

Benjamin Moore Sidewalk Gray

This colour is a gentle backdrop for the gold hardware we chose for the closet.  I stuck with one out of my choices of gold hardware mentioned here -  a crystal knob for the vanity drawers that we'll also be using for our kitchen cabinets.  

This time around, we opted to have doors for our closet, so that our clothes aren't collecting dust while they're just sitting around.  (See the dressing room at our old house with open hanging space).  While I was shopping for gold-toned handles for the doors, I noticed the Bar Series handles from Lew's Hardware are a very popular choice amongst decorators:

They would've been an easy choice, but I think that something dressier and less contemporary would be more appropriate for the dressing nook.  The boxy bar seems to make everything else boxy in this boxy closet.  So I continued to search for something more rounded.  Rounded, I did not find, but looking around paid off...  I found this gem:

The beveled hexagon ends really give this glass handle a gem-like resemblance.  It has a good weight and it sparkles elegantly in person!  

With this splurge for the glass handles, I sure was glad when we found plate handles at just $3 a piece at Ginger's clearance section!  They would go on the bottom drawers, giving a balanced contrast to the sparkling hardware above them.

The 3 cabinet hardware look lovely together:

DIY Custom dressing room closet | Classy Glam Living | Cabinet hardware

Here is a hardware map for our dressing nook:

DIY Custom Closet Dressing Room Update | Classy Glam Living | Cabinet hardware

The Mr. is now working on the cosmetic fronts for the closet - trims, moldings, drawer fronts, and doors.  Over the weekend, he has put in the first trim around the top of the drawers.  I wanted a "lip" that extends just beyond the drawers to give the unit some details.  Similar to my original closet inspiration from Carrie's closet in Sex and the City 2:

CARRIE'S CLOSET IN SEX AND THE CITY 2, IMAGE VIA MARKS & FRANTZ

CARRIE'S CLOSET IN SEX AND THE CITY 2, IMAGE VIA MARKS & FRANTZ

DIY Custom Dressing Room Closet | Progress update | rope trim detail | Classy Glam Living

I thought the hardest part of building this closet was framing the structure and building the drawers, but he said the trim work and doors are just as much.  I guess my point was, if he could build this closet from scratch, the trimwork and doors must be easy peasy to him.  

And that's our little update on the Mr.'s DIY custom dressing room/ dressing nook/ closet.  No matter what we call it, it's truly one of a kind.  The Mr. is no carpenter; he's been learning as he went along, and I continue to be amazed by his skills...  and dedication to the project.

Just as the Mr. thought that he's safe to move along and close up the closet with trims and moldings, I added a special request for the closet.  Yup, the wifey requests never stop ;-) Can you guess what it is?

For the latest update, be sure to check my instagram feed!

5 Things to Consider for an "Effortless" Gallery Wall

5 THINGS TO CONSIDER FOR AN EFFORTLESS GALLERY WALL | CLASSY GLAM LIVING

Now that the Holidays are over, I'm still reluctant to pack away the sparkly decorations and Christmas lights that line our staircase.  Actually, call it a case of mild procrastination.  Afterall, it took quite some effort to lay out the decorations, they should stay out for a bit longer, don't you think?

I blame the delay of packing up our Christmas decorations on decorating the little man's headquarters - his bedroom and playroom.   Not that I'm doing any of the installations...  Anyway...  Little man's working corner in his playroom is finally in place, and I should really unpack some packages lying around that are for a gallery wall in the room.

A gallery wall is an eclectic display of art, giving the room a casual vibe.  For our house, there's no better place than the playroom to have some fun with it!  The. Mr is not a huge fan of gallery walls, but he has reluctantly played along with the idea for one in the playroom.  So to honour that, I promise to keep it small scaled with a somewhat neat demeanor.  My plan is to have it above a future toy storage unit, with a wall space of around 5-feet wide.

I want the gallery wall to look effortlessly casual, but it still takes some effort while taking these factors into consideration:

1. DETERMINE THE BOUNDARY

The width of most gallery walls are bounded by, or just beyond, the width of the furniture below it, if any.  For dramatic effect, you can even go wall to wall, similar to the sample image below.  As for a vertical boundary, a more comfortable grouping would see the bottom of the layout at 6"-8" above any piece of furniture, up to around 2-ft off the ceiling.  You know the general rule of hanging wall art at 60-62" from the ground?  In the case of a gallery wall, treat the whole layout as a group, so that the group's centre is at eye-level.  You don't want to be crunching your neck to look up to ALL your pieces!

2. SHAPE OF THE LAYOUT

Do you have a neat and structured personality, like my Mr.?  Then a square or rectangular shape gallery wall will most likely be your pick.  Or are you more coherently random, like me?

Structured shape via The Southern Thing

Structured shape via The Southern Thing

coherently random shape by Lay Baby Lay

coherently random shape by Lay Baby Lay

3. SHAPES, SIZES, AND COLOURS OF THE FRAMES

Using various shapes and sizes of frames for the gallery wall is one way to give it a dose of your personality.   For little man's playroom, I originally planned on using colourful frames.  I'm having second thoughts about that, and I think monochromatic frames would play a balancing role against the pops of colours around the room full of toys.  

4. SPACING AROUND THE PIECES 

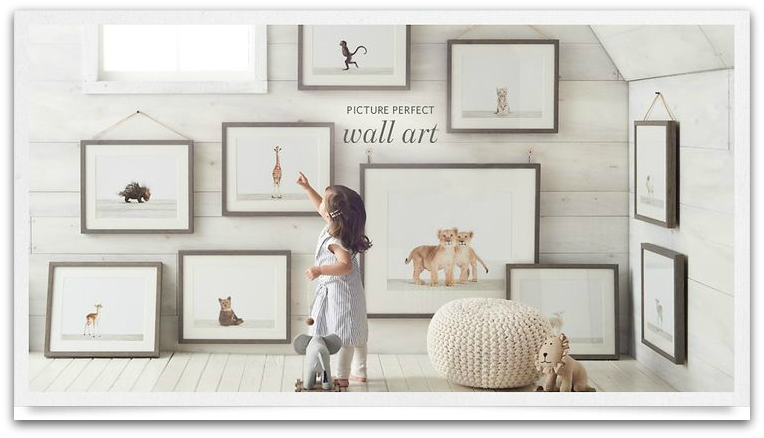
A visually appealing gallery wall should have just enough pieces that are grouped comfortably together.  The key is to avoid looking too messy.  Spaced too tight, it would look like too many pieces are crying for attention, and the frames would look crammed; spaced too far apart, then they look like individual art pieces sharing the wall.  

To be easy on the eyes, I find that the optimal distance between each piece should be around 2-3".  There're no hard and fast rules about it, and it all depends on the different sizes and shapes of the pieces.

via RH Teen

via RH Teen

5. INCLUDE WHIMSICAL ACCENTS

Gallery walls are never boring - display some loved and dearest pieces to let your personality shine through!  A touch of whimsical accessories bring these gallery walls to life!

The next time you see a casually and effortlessly chic gallery wall, you can count on the fact that the more casual it looks, the more effort it required!  A lot of planning goes into perfecting even a seemingly random placement of pieces.  But don't be boggled down by the planning; afterall, the point of a gallery wall is to have fun with it!  Once you have collected your pieces, it's definitely a fun exercise to hone your sense of design and use of space.  Let loose and have some fun!