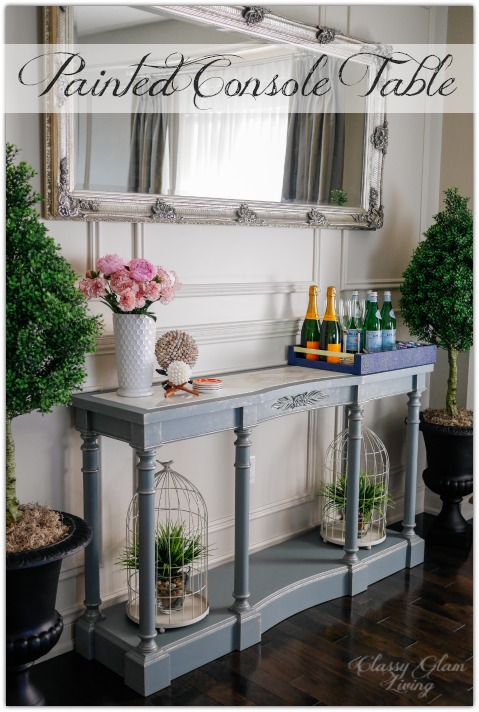
Painted French Blue Console Table

French Blue Painted Console Table | Classy Glam Living

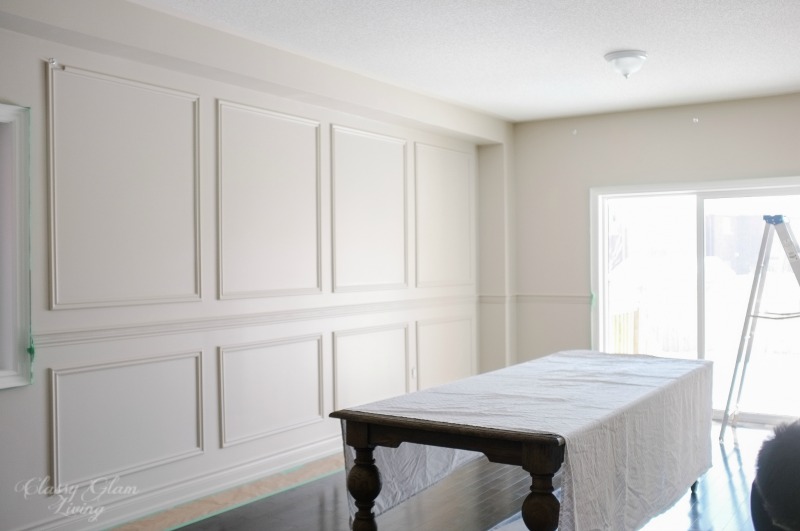
As the Mr. was finishing up the dining room wainscoting and chair rail project, I started looking for the perfect size console table.  How did we determine what's the perfect size for our dining room?  

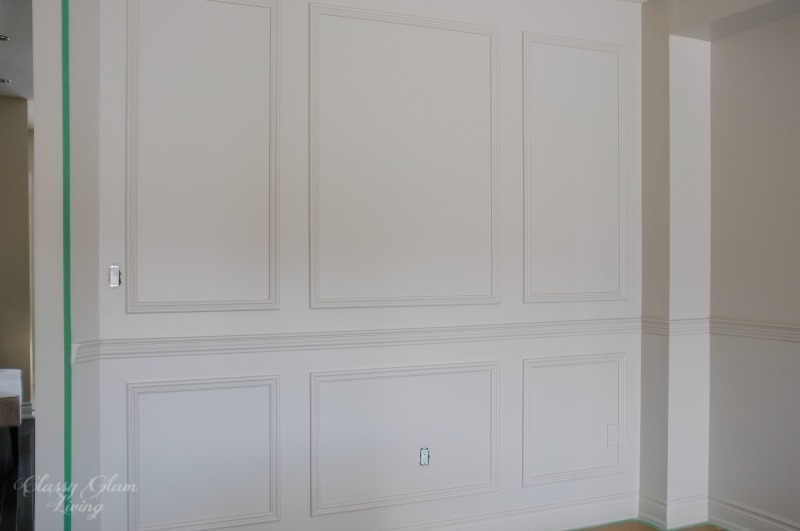
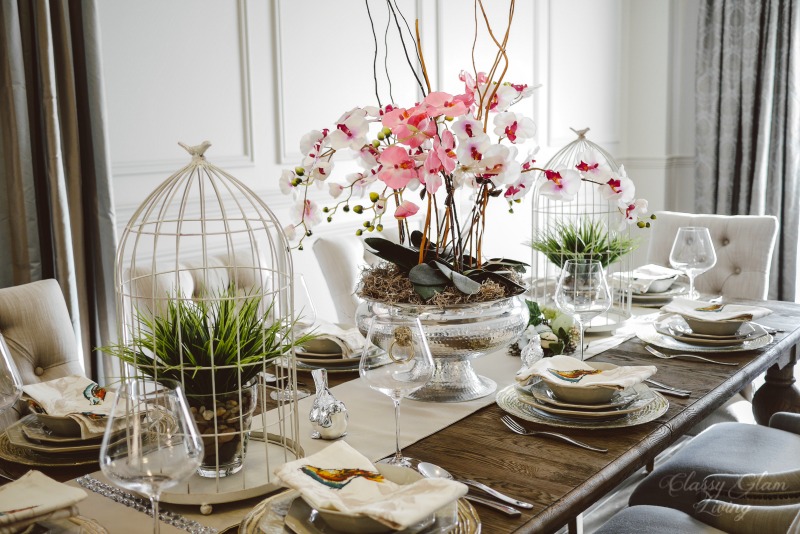
Our dining room is a shared large room with the living room, measuring 24-ft. in length.  We wanted THE piece to be at the short wall of the lengthy room, so that we can put a large mirror above it to reflect the light from the large patio doors. The dining table is 8-ft. in length.  We also wanted to ensure there would be enough room to walk behind a chair at each end of the table, let's say around 2.5-ft. or so including the back of the chair.  

Space between chair and console table.

Space between chair and console table.

Doing the math, that left us 24' (length of the room) - unextended dining table 8' - walk space 2.5-ft. x2 = 9-ft. to allot to the living room and a dining room console.  We don't usually leave the dining table extended, so we're fine with having the extended table eating a bit into the living room when need be.  However, I would want the living room to be at least 8-ft in length to fit in a decent sized settee.  That means, we need to find a piece that's only around 1-ft in depth.

All the math confirmed our suspicion - a chunky sideboard is out of the question, as most are at 20" or more in depth.  We loved this console table from Restoration Hardware - the zinc and cast iron would be a nice contrast to our rustic wooden dining table.  However, it comes in 20" deep, argh!  According to my math above, the ideal console table could only be around 12" deep.  The extra 8" would make or break a "just right" look.  

It proved to be a huge challenge to find such a shallow console, not to mention a style that we wanted.  Most consoles usually come in closer to 20" deep.  When we saw the style we liked, it was too deep.  When we saw the right depth, it was just...  BLEH...  You get the idea!

I usually don't look for antique/ used furniture, but I always loved checking out Châtelet Home's current inventory.  As I was casually browsing through their online photo inventory gallery, low and behold, I found the perfect piece!  I was so excited I called them right away to put a hold on the item! 

With it being a used item though, it doesn't come PERFECT.  I should've kept a before photo of the piece, it was in pastel granny's apple green with peachy pink highlights...  can it be more 80s than that?  Despite its Miami Vice colors, I couldn't pass on the gorgeous details, perfect size, and marble top!  It came at a lower price as is or a bit more than double the price for a finished piece.  Of course, I would go for the lower price option!  You know we (the Mr.) don't mind to put in some elbow grease to add our personal touch to it!

French Blue Painted Console Table | Classy Glam Living

We chose a French blue that the Mr. painted over the entire piece.  I then finished it off by dry brushing some Martha Stewart champagne gold acrylic paint around the details.  The final step was to add a coat of Min Wax on it.  Easy peasy, lemon squeezy, as the little man would put it.  Saved us some bucks by doing it ourselves...  and to our liking!

French Blue Painted Console Table | Classy Glam Living

We loved how the console table turned out.  Looking pass its original colors, it has great lines and is the perfect size for our dining room.  

French Blue Painted Console Table | Classy Glam Living

Incorporating our personal touches was a nice way to inject some colors into our neutral-colored dining room.  The Mr. also pointed out how he liked the details on the console table reflecting the baluster design on the dining table.  

French Blue Painted Console Table | Classy Glam Living

Now we have the perfect spot for everyday decor accessories and party essentials.

French Blue Painted Console Table | Classy Glam Living

I hope we have inspired you to look at used furniture in a new light, especially when you're stuck at finding the PERFECT pieces for your home.  I was never a vintage person, until I realized what magic some TLC can do.  

Good luck on your search for the perfect piece for your home!

French Blue Painted Console Table | Classy Glam Living

Restoration Hardware Inspired DIY Wainscoting & Chair Rail

Restoration Hardware Inspired DIY Wainscoting & Chair Rail Installation | Classy Glam Living

Once upon a time, our combined living and dining room was little man's bachelor pad.  It came equipped with a (toy) kitchen, a parking pad for his (toy sit-on) car,  and a sports court on the left side.  

Not a very clear photo, but you get the idea of the expanse of little man's territory!

Not a very clear photo, but you get the idea of the expanse of little man's territory!

His "bachelor pad" took over that side of OUR house, and the Mr. decided to kick the tenant out before he marked further territory.   Truth was, little man grew out of those (toy) amenities and decided he would take over part of the basement as his floor hockey arena instead.  Great timing on his part, for daddy and mommy landlords to purchase our dining table and chairs.

We loved the rustic style of our baluster dining table, and the tufted dining chairs.  However, the bare walls seemed to be too plain in comparison.  We figured adding some wainscoting and a chair rail would create some needed balance on the walls. So I embarked on the search of inspirations for the Mr. to try his carpentry skills on.  

via http://classy-inthecity.com

via http://classy-inthecity.com

via www.houzz.com

via www.houzz.com

via www.mhouseinc.com

via www.mhouseinc.com

We decided to use thick wood trims to create the frames of each panel to add some depth. Trims that are too thin would just disappear in the large room.  We also used a tall chair rail to balance the thick wainscoting frames.  The space between each frame is around 3", which seemed to be the optimal distance - just wide enough to look un-crowded, and close enough for a cohesive look.

Close-up of frame trims and chair rail details.

Close-up of frame trims and chair rail details.

After the Mr. marked out the dimensions of the frames with painter's tape, he was onto project "a frame a night".  He cut the wood trims to size of each panel, used carpenter glue to connect each corner and clamp down overnight.  The same routine went on each night until all frames were completed.  Unfortunately, I have no pictures of the making of the frames in progress =(

He first installed the chair rail around the room, levelling the rail as he nail-gunned into the studs. We installed the chair rail at the same height as the half wall for a continuous line, viewed from inside the room. 

The Mr. then began installing the frames starting at the short wall.  It was just easier to deal with the 3 frames across the wall and to learn from any mistakes from there.  On the short wall, we decided on a large middle section and two narrower frames on either side.  Our original plan was to install wall sconces on those two side panels, but of course, our design plan has changed from then!

Next was installing the upper and lower frames around the rest of the walls as marked. 

We like the unified look of using the same color on the walls, trims and baseboards, as in the inspiration photos above.  We think using the same colour throughout would make the walls a somewhat muted canvas, letting the furniture pieces speak for themselves as main focal points.

The chair rail and wainscoting warrant a dramatic color.  We narrowed down to 2 colors, as below:

DIY Wainscoting and Chair Rail Installation | Color Choice | Classy Glam Living

On the left is Benjamin Moore's Inukshuk, on the right BenMoore's Silver Fox.  We chose to go with the lighter of the two.  It's a light taupe that's more cream in daylight but still dark enough for dramatic ambiance at night. 

1. Our dining/ living room is open to the rest of the floor, so the Mr. carefully taped around the edge of the adjacent wall (we only wanted the chosen color for the dining/ living room); 2. Kraft paper was laid and taped to protect the hardwood flo…

1. Our dining/ living room is open to the rest of the floor, so the Mr. carefully taped around the edge of the adjacent wall (we only wanted the chosen color for the dining/ living room); 2. Kraft paper was laid and taped to protect the hardwood floor from paint drips, and made painting the baseboards a lot easier; 3. The Mr. removed all faceplates of electrical outlets, and... 4. marked them by corresponding numbers on the switches and outlets, so that reinstalling would be a breeze.

Here are some photos of the completed project. 

You can see how the Inukshuk color turns to a creamy taupe in sunlight...

DIY Wainscoting & Chair Rail Installation | Painted in Benjamin Moore Inukshuk | Classy Glam Living

... and in the photo below in darker light, the color turns to a darker taupe.  It gives the panel frames more definition.

DIY Wainscoting & Chair Rail Installation | Painted in Benjamin Moore Inukshuk | Classy Glam Living

I was so delighted that the Mr. completed our Restoration Hardware inspired dining room.  It's personal touches like these that transform a plain builder's room to one that reflects the homeowners' style.  

DIY Wainscoting & Chair Rail Installation | Painted in Benjamin Moore Inukshuk | Classy Glam Living

Now our dining table no longer feels lonely in a room of blank canvas.  The wall detailing enhances the look and feel of our dining room furniture.  

DIY Wainscoting & Chair Rail Installation | Painted in Benjamin Moore Inukshuk | Classy Glam Living

Have you recently been inspired by your furniture to make enhancements to your rooms?

DIY Built-in Office Cabinet

DIY Office Built-in Cabinet | Classy Glam Living

After we've moved into our current house for more than 2 years, the room that we had destined to be our home office was anything but!  

Before DIY Cabinet | Classy Glam Living

The Mr. was complaining about all the mail and junk that were piled on our kitchen island and the IKEA desk in the office, but where else can I store anything?  The closet of the "office" room was already filled up to the top with STUFF.  Not to mention, we still have tons of office-destined stuff still in boxes in the basement! 

And so I bombarded the Mr. with pins from my Pinterest office board.  Once he sees something inspiring, he would get to work =)  

I wanted the layout to have a storage unit similar to this at the long wall, with a desk in front. This is the layout I came up with for our office:  

Office Layout | Classy Glam Living

The storage unit measured about 8-feet, leaving enough room for the closet door on the adjacent wall to swing out fully.  The Mr. removed the baseboards at the built-in area, so that they can be re-used on the unit.  

DIY Built-in Office Cabinet Bottom Instructions | Classy Glam Living

1. This picture was of the Mr.'s original plan with 2-sectioned bottom cabinets.  But I fought for having 3 sections instead.  For one, the swing out doors would be smaller, which means we wouldn't need as much space between the desk chair and front of the unit.  Yes, several inches would make a huge difference in this room!   

2. He used plywood for the countertop and floor-bottom of the cabinet.  The cabinet's frames were made of 2"x4" at 20" deep.  We wanted the top of the counter to sit just below window trim at the far wall, so the Mr. made the bottom frames just high enough to account for the thickness of the plywood countertop (3/4") and the 2"x4" laid across the length of the cabinet frames to support the top.  

3. and 4. Next up, he screwed in 0.5" thick MDF boards on the sides of each section, and the front plates of each section frame.

5. He added the ornate trims on the front plates, and enough space on the sides for the doors to swing out fully.  The trims were only the same height as the doors, because he added an MDF board that would go across the bottom where he would attach the baseboard to.

DIY Built-in Office Cabinet Bottom Instructions | Classy Glam Living

6. The cabinet frame and countertop were painted, and the top screwed in... 

7. and chair rail trim added around the countertop.  The baseboards can finally be added back on!

8. The cabinet doors were made of MDF.  The Mr. added a decorative trim in the front to match the ornate design of the section trims.  He left around 1/8" of spacing between the doors to ensure they don't brush against each other when open-and-closing.  

DIY Built-in Office Cabinet Upper Shelves | Classy Glam Living

1. We wanted the shelves to come out to just beside the window trim at the far wall, which was 15" deep.  The Mr. took the easy way and got pre-drilled laminate boards as the shelf supports, and they were just shy of 15".  He painted them first before they were attached to the wall by 1"x4".  The shelf supports were also connected to each other by 1"x2" at the top for added sturdiness.

2. After the shelf supports were up, The Mr. nailed in 0.5"x1.5" plywood trim to hide the seam front of the shelf supports.  He also nailed in an MDF board across the top of the frame to add boldness to the crown moulding. 

3. And then, his favourite part ever - filling in the nail holes with wood fillers and sanded them down.

4. This is my favourite part, we added a contrasting backing to the upper shelves.  This creates more visual impact.  Even though we chose a blue, the colour is still neutral enough as a background.  See colour source below. 

5. For the height of the cabinet, the shelves would look more proportional with 4 tiers.  As you can see in the photo, one of the boxes of office items was already waiting to be unpacked after being in the box for 2+ years since we moved!

6. The shelves were finished with a tiny chair rail trim, glued and nailed to the front of each shelf. 

7.  All was not done until a coat of minwax was applied all over the surface of the unit.  We definitely didn't want to leave a tacky feeling on the painted shelves and countertop!

Grey and Blue combination | DIY Built-in Office Cabinet | Classy Glam Living

We love this colour contrast of the cabinet unit and the shelf backing.  The grey and blue combination takes on different depths as the natural light changes throughout the day from our window wall.

Again, here's our layout and outcome. 

Office Layout | DIY Built-in Office Cabinet | Classy Glam Living
Completed Office | DIY Built-in Office Cabinet | Classy Glam Living
Complete Side View | DIY Built-in Office Cabinet | Classy Glam Living
Front View | DIY Built-in Office Cabinet | Classy Glam Living
Side View | DIY Built-in Office Cabinet | Classy Glam Living
Front View | DIY Built-in Office Cabinet | Classy Glam Living

The Mr. really built this unit to last.  He was even showing me he could stand on the counter and it wouldn't even move an inch.  Uh, please get off before the little man sees you!  

The big kid had once again outdone himself.  I would say this was more labour intensive than our kitchen island and dressing room projects.  We finally have a functional office space, with a storage unit large enough for our office essentials  (and more importantly, to hide my mess behind those closed doors)!  

side view | DIY Built-in Office Cabinet | Classy Glam Living

Paint colours:

  • Grey colour of unit - Behr 730F-5 Nature Retreat
  • Blue backing of shelves - Para Paint P5201-52 Coastal Views
Completed View | DIY Built-in Office Cabinet | Classy Glam Living

How do you like the colour contrast of the cabinet?  Or would you prefer a traditional white built-in?