The Many Wall Treatment Options for the Powder Room

While taking photos of our powder room for the Spring decor post, I found this little space awkwardly plain and incomplete.  So I took a photo with a weird angle:

Spring decor in powder room | Classy Glam Living

Ya, weird, isn't it?  You can barely tell it's our powder room.  Like I mentioned in the post, it's not fully decorated.  Even though we've changed out the builder's boob light and plain white pedestal sink to a beautiful vanity the first week we moved in...

Powder room update | Mirrored vanity cabinet | Classy Glam Living

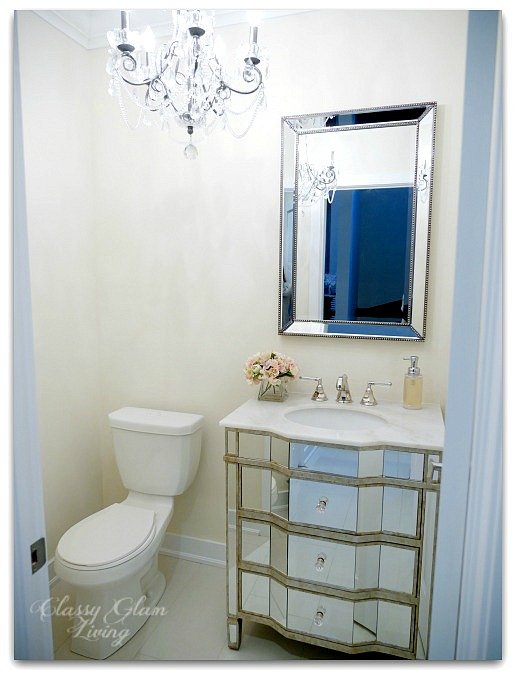
Something's still missing...  some art work maybe?  But more notably, some kind of wall treatment.

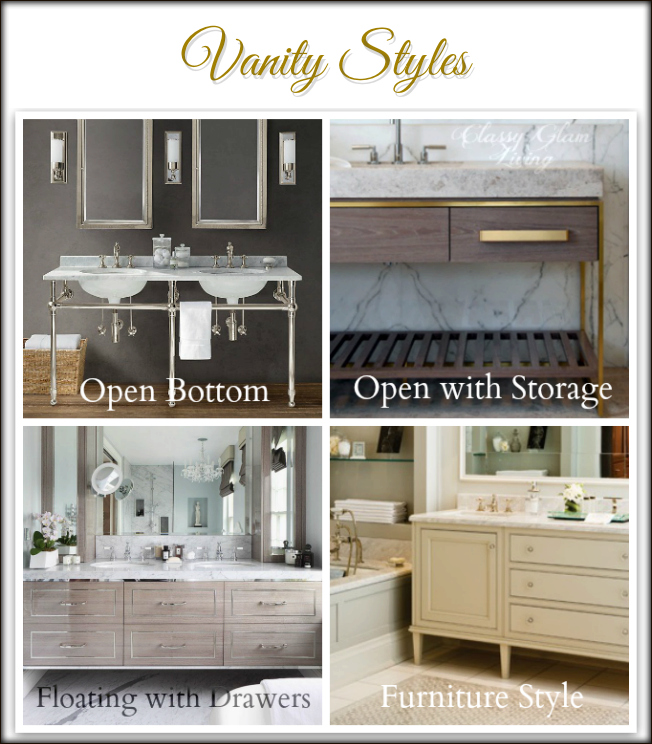
We already have plans for the walls of our powder room, but just need the time, much like any other projects around the house.  In case you're looking for wall treatment options for your powder room, here are the different combinations to choose from:

Change of paint colour:

Paint + wainscoting:

Paint + bottom tiling:

Wallpaper + wainscoting:
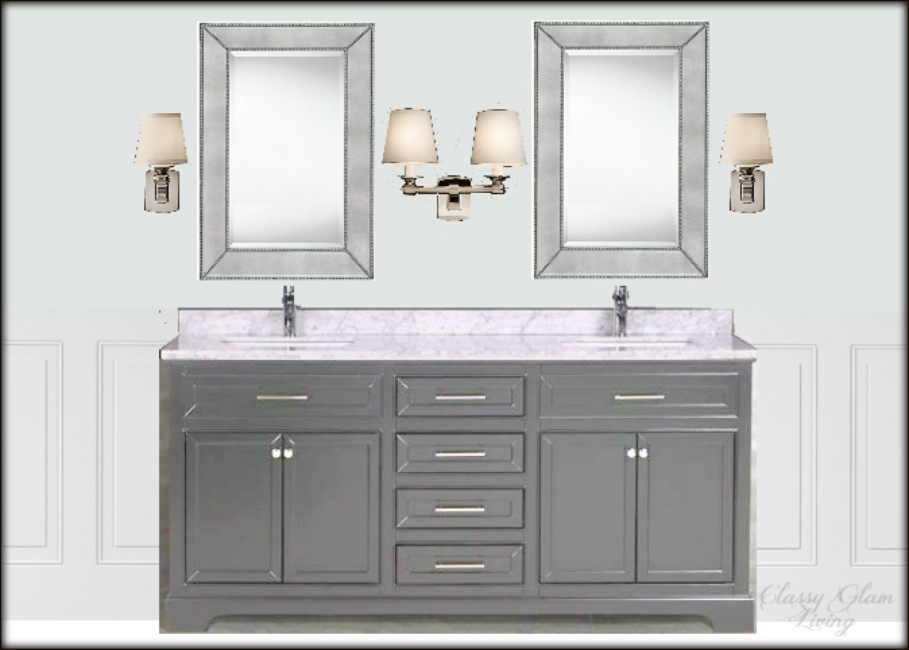
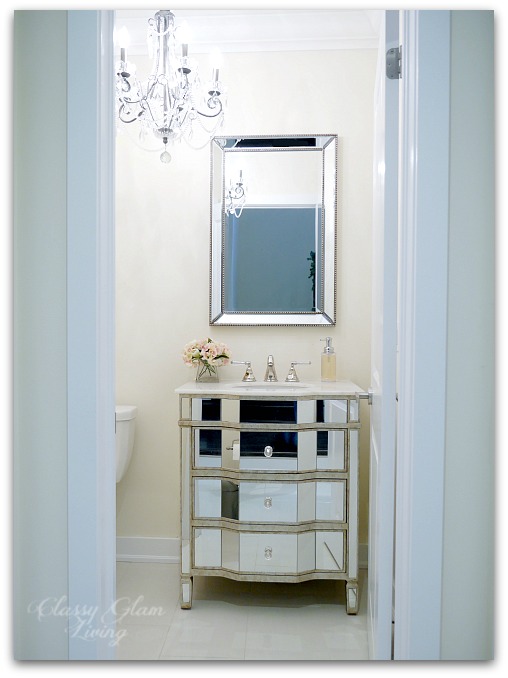
 Mirrors in panels:

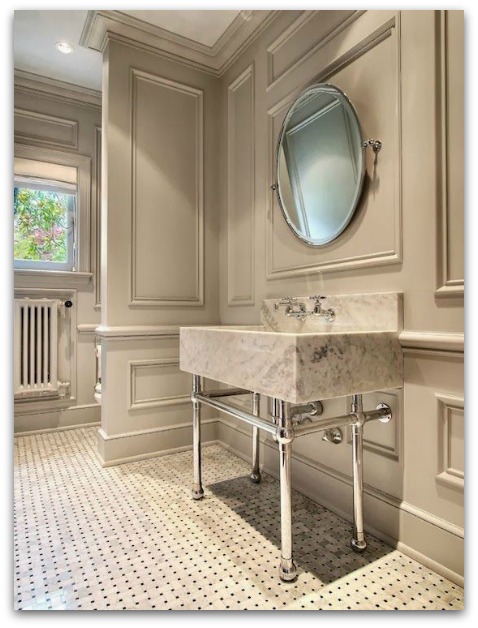
Whole wall panelling:
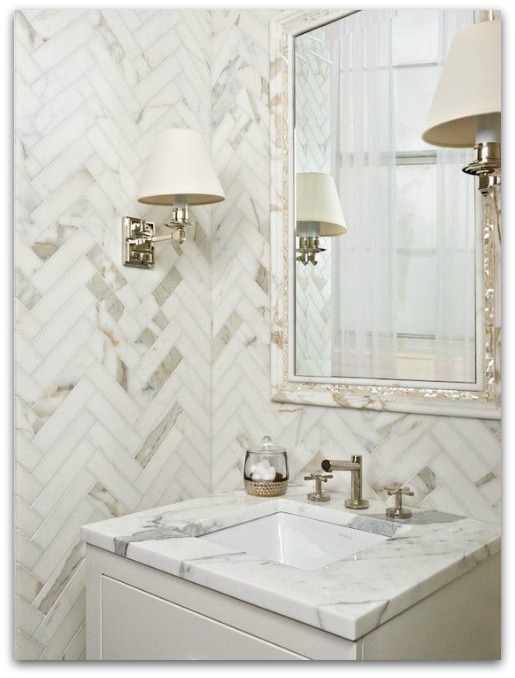
Whole wall tiling:

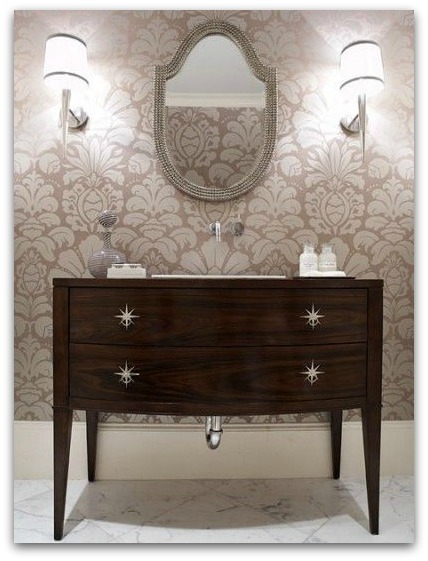
Whole wall of wallpaper:

The Perfect Bath

The Perfect Bath

The possibilities and combinations are endless, and can be as unique as one wants.  Do you see a commonality in the examples above?  They're all in soft tones, much like the rest of our house.  My vision for this small powder room is to incorporate a soft and classic look; one that matches the ambiance set by the mirrored vanity.

Well, if you know the Mr., you'd know that he loves his trims and mouldings (see our Completed Projects from the old house and you'll see what I mean).  In fact, the first thing he had arranged before we moved in was to have the whole house outfitted in crown mouldings.  If he can have his way, the whole powder room would be trimmed and panelled, like the whole wall panelling sample photo above, which HE pinned!

Not that I don't love the architectural detailing, but I think we can do something a little unexpected in this small break-away space, especially when we plan to add wainscoting to the ground floor...  eventually.  

Recently, DIY Mommy posted a beautiful wallpaper for her powder room on her Instagram account.

Please pin from original source.

It prompted me to look at wallpaper choices again!  Seeing how beautiful her powder room turned out, it also gave us confidence in our choice of wall treatment for the powder room - wallpaper with wainscoting.

Choosing a wallpaper pattern can be even more daunting than choosing a paint colour.  Have you seen a wallpaper album?  No biggie, I've narrowed down the options to a manageable size.

Given the decor around our house, a classic pattern like damask or lattice would be a safe go-to design.  However, I want to push the envelope a bit and go with something that's outside of our "comfort zone", yet still classic and timeless.

For a small space like a powder room, a large repeating pattern works better than smaller geometric pattern, which could be dizzying.  I'm loving these large-scaled patterns, inspired by nature:
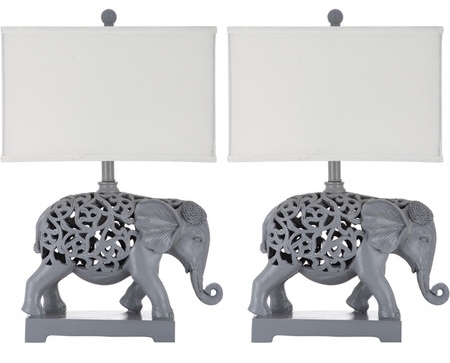
Animal print:

Structured fern:

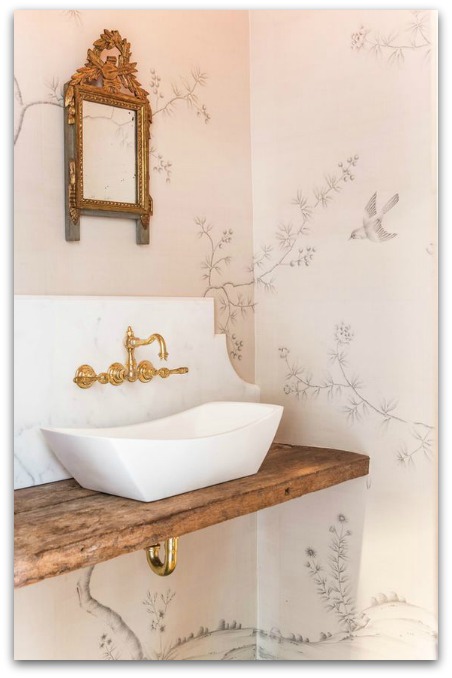
Branches and swallows:
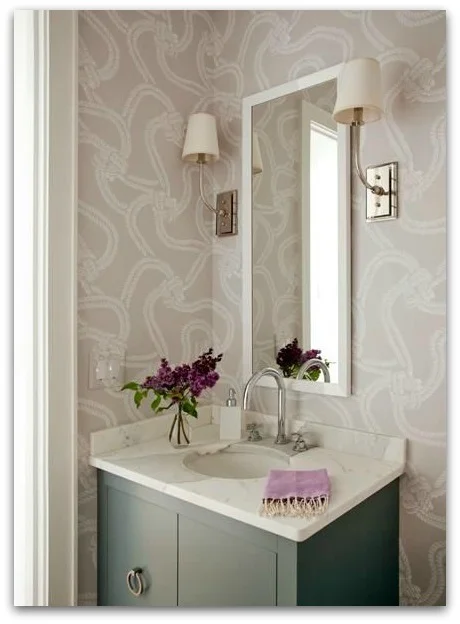
Nautical knots:

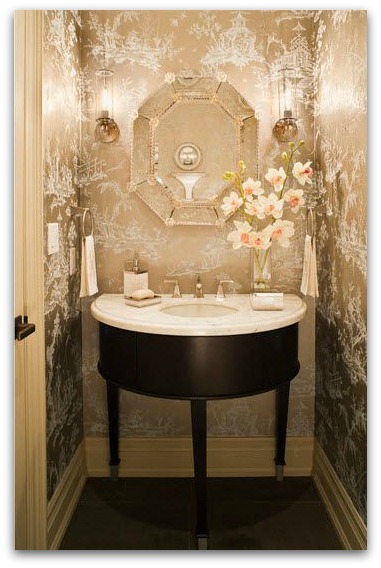
Shimmery chinoiserie:

While I love the tone-on-tone patterns, I also love florals that give the otherwise monochromatic powder room some colours.
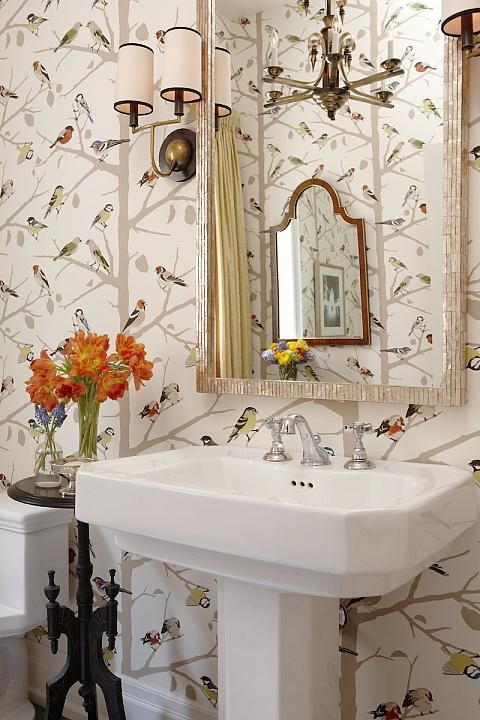
Florals and birds:

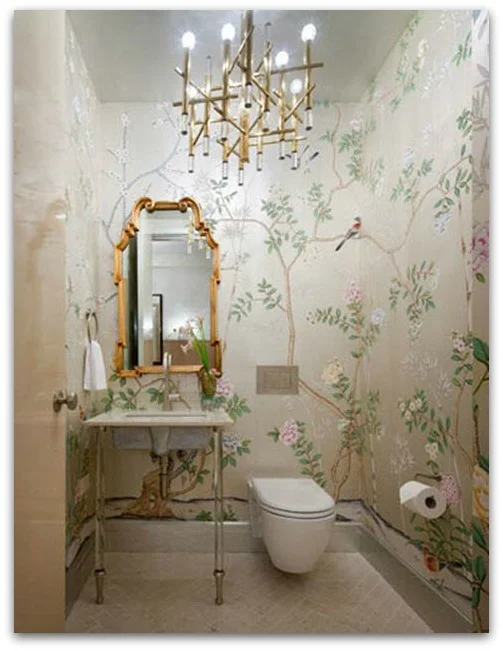
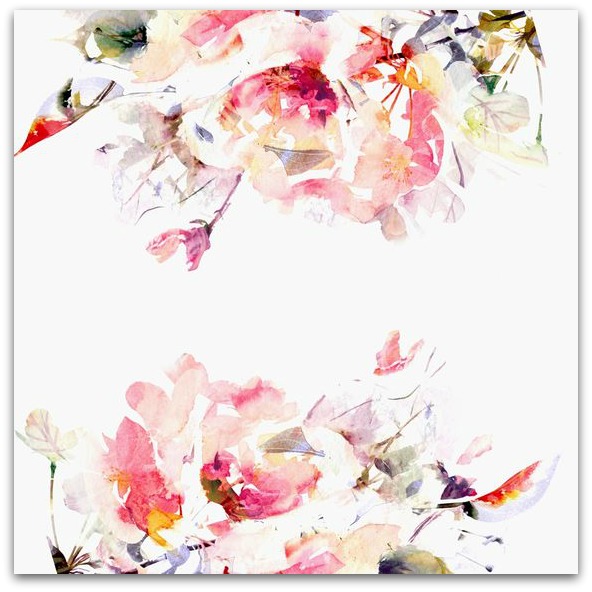
Floral mural wallpaper:

I'm totally in love with the colours of this large floral mural, but sizing may be a problem unless we have it customized to our walls with wainscoting ($$$$).

Once again, the choices are limitless even when we narrow down the wallpaper style and options.  With a small space such as the powder room, we don't need as much wallpaper and that gives us some flexibility with the budget.   

Now the question is, do we want to tackle this ourselves, or hire professional help?  What was your experience with wallpaper?

Master Suite Series - Master Ensuite

I've come to realize that getting ready in the mornings with the Mr. is a luxury that I miss from our old house.  We were spoiled with double sinks in our previous master ensuite, making it a breeze to share the bathroom in the mornings.  Our current bathroom situation at the rental?  The master ensuite is a utilitarian space, with a single sink and vanity... do your business, in and out, not a place to linger.  The Mr. is letting me have the ensuite to myself, while he preps for his day at the main bathroom, before little man gets up.

The one space I'm lookng forward to most at our new house is, you guessed it, the master ensuite. The new house's master ensuite has a practical layout with features that I love.  

As mentioned before in the first master suite post, an alley separates the closet to the right and ensuite to the left.  That makes the ensuite a long rectangular room, and a bit longer than the closet.

I was actually able to find photos on Pinterest that look similar to our ensuite's layout and size.   The entrance to the ensuite faces the double vanity, which is flanked by a stand-alone tub on the right side, with a window facing the tub as such:

And a full length shower to the left end of the ensuite, with a window above the toilet.

Amazing what you can find on Pinterest!

Modern day master ensuite is not only a room for "personal business", but more so a relaxing spa-like space to enjoy.  That is my goal to turn this builder ensuite into our sanctuary at a reasonable budget. 

The one main change we did for the ensuite was replacing the double swing-in bathroom doors with a pair of pocket doors.  I struggled with this change for a while, because I have always envisioned changing out the pair of original solid doors to a pair of beautiful french doors.  The brass handles on this pair are simply divine:

Source unknown

Source unknown

But our house has an "open door policy", such that no doors should be left at less than wide opened, for fear of monsters hiding behind the door... (and let me tell you, it wasn't my request nor the little man's).  If I've to leave our ensuite doors open flat at all times, then I wouldn't be able to put anything at the walls behind them, losing out on valuable space.  After looking at the layout of the ensuite for the millionth time, I checked with the Mr. if he would be open to a set of pocket doors instead.

And he was!  Here's a photo of our ensuite taken from the closet across.  You can see the framed slots for the pocket doors on either side of the entrance.

POCKET DOORS FRAMING | NEW HOUSE MASTER ENSUITE | CLASSY GLAM LIVING

With the pocket doors in place, now I can turn the left nook behind the pocket door into a stylish usable space.  I can decorate the space with an etagere, or install a train rack on the wall and pair it with a stool.

With the vanity facing the entrance of the ensuite, I wanted it to be a beautiful piece.  Here are some of my favourite vanities of different styles:

Vanity Styles | Classy Glam Living | clockwise from top right:  Belle Vivir, Brian Gluckstein Design; home adore, Restoration Hardware.

Vanity Styles | Classy Glam Living | clockwise from top right:  Belle Vivir, Brian Gluckstein Design; home adoreRestoration Hardware.

As much as we love the open bottom style, we'll have to go with a vanity with storage, since we've made another change to the floor plan to delete the only linen closet in the house.  The Mr. doesn't quite like the floating style, so my compromise would be the furniture look.  It provides the storage we need, with a slightly open bottom on furniture legs to make the bathroom appear more spacious.

We're installing white glossy floor tiles, so we would go with a grey vanity for some contrast.  We asked the builder to install 3 light boxes for our sconces.  In place of the builder's large wall mirror, we'll have two individual beaded vanity mirrors.  I love a light crisp colour on the walls of the bathroom to add some contrast against all the whites and greys.  Last but not least, I think the Mr. would LOVE to add some wainscoting to our bathroom!

New House Master ensuite design board | vanity view | Classy Glam Living | Sources: Vanity Muti; mirror Home Depot; Single and Double Scounces Restoration Hardware; wall colour Benjamin Moore Marilyn's dress; crop of wainscoting Lowes

New House Master ensuite design board | vanity view | Classy Glam Living | Sources: Vanity Muti; mirror Home Depot; Single and Double Scounces Restoration Hardware; wall colour Benjamin Moore Marilyn's dress; crop of wainscoting Lowes

Another design feature in our master ensuite is the wall by the free-standing tub.  It's like a blank canvas that spans the length of the tub.  We can either take the modern route, with bookmatched marble wall as such...

Or a more classic approach, with a marble ledge that is supported by corbels, going across the length of the wall. 

New House Master Ensuite | Tub Feature Wall Design | Classy Glam Living | Marble ledge image (VIA); Tub Home Depot; Chandelier feiss; side table Joss & Main; Corbels home depot.

New House Master Ensuite | Tub Feature Wall Design | Classy Glam Living | Marble ledge image (VIA); Tub Home Depot; Chandelier feiss; side table Joss & Main; Corbels home depot.

The wainscoting that the Mr. will install would continue to the wall behind the tub as well.  A small side table for a drink to enjoy in the soaker tub, dimmed light from the mini crystal chandelier above the tub, would be the perfect ambiance at the end of a day.

I can't wait to plunge into the deep soaker tub in our new master ensuite, and I won't get up even after my skin turns wrinkly like a prune.  Afterall, I've waited long enough to enjoy this bathroom! While the Mr. hangs out at his workshop for the numerous projects at the new house, I'll be...  right here.

New House Living Room - Design Board

*** CHECK OUT OUR LIVING ROOM REVEALED HERE! ***

I just love hanging out at the mall these days!  All the stores are looking so festive with their Holiday decorations, that sometimes I'm not sure if I'm looking at the products or checking out how they decked the stores.  I love decorating for the holidays, but I guess I'll have to skip it this year and save the hassle of going through boxes to find the Holiday accessories.

For now, I'll just have to satisfy my craving to decorate for the Holidays by putting together some design boards for our new house.  Earlier this week, I shared some inspirations on our living room's furniture placement.  We've done some virtual shopping to come up with a design board for it.

Remember how my Mr. LOVES trims and mouldings projects at our previous house?  One of the first projects that the Mr. is longing to start is the wainscoting for our ground floor.  This project will be different from our previous dining room trims, as he'll be building out on the wall instead of just adding trims.  We'll also ditch the chair rail and have a single pane from floor to ceiling, similar to this but without the gap midway:

image via panellingireland.com

image via panellingireland.com

The wainscoting will create depth along the walls of the living and dining areas, and the single pane will help to emphasize the height of the space.  I will make sure I take more in-progress photos this time around!  

I mentioned in the previous inspiration post that we want the living area to be an elegant, yet somewhat casual sitting area where we can plop down on the couch.  PLOP DOWN is the key, so I went in search for a couch with nice lines that looks comfy enough to sleep in!  I kept coming back to this one...

DUMONT LINEN SOFA | ONE KINGS LANE

DUMONT LINEN SOFA | ONE KINGS LANE

It looks very ordinary, but the indented curve at the arms makes this casual-looking couch more refined.  I love a couch with a single seat cushion - it takes the ordinary out of a couch, and nobody has to sit on a crack between seats.  The grey piping is also a nice pickup of our grey kitchen cabinet (whichever grey that may happen to be) from just across the living room.  Tell me this couch doesn't look comfy enough to nap in!

For our narrow living area, adding a pair of armchairs on either side of the couch will provide more seating when we have guests over.  The tufting on this chair exudes a sophisticated air that enhances the elegance of the couch above, and the open arms make it oh-so-welcoming!  The grey brings out the grey piping of the cream couch and gives the room some contrasting colours.

Cardiff Tufted Upholstered Armchair | POTTERY BARN

Cardiff Tufted Upholstered Armchair | POTTERY BARN

With the living area right off of the pathway next to the kitchen, we decided to go with a coffee table with an open bottom.  The wiry legs of this coffee table helps to give an illusion of a wider pathway.  The bronze metal colour provides a nice contrast against the cream couch and grey armchair, while the mirror top adds the sparkly element to this otherwise rustic looking piece.

Bliss Studio Arbolo Cocktail Table | LAYLA GRACE

Bliss Studio Arbolo Cocktail Table | LAYLA GRACE

To complete the look of symmetry, we would have a pair of side tables on each side of the couch.  It would be a great spot for some knick-knacks and a pair of table lamps for ambiance lighting.  A pair of round side tables would lessen the stiffness of the straight edges of the coffee table,  We also prefer a more airy piece to balance the chunky armchairs, and this side table below fits the bill..  The deep antiqued gold frame of this side table works well with the dark iron frame of the coffee table.

Clairemont Side Table | CRATE & BARREL

Clairemont Side Table | CRATE & BARREL

If we have enough space in the living area, these stools would be some nice-to-have extra seating...  you know, in case we throw a huge party.  The wooden legs add some warm tones to the coolness of cream and grey seating, and are a nice contrast to the metal legs of the tables.  The carved detailing on the legs also adds an elegant feel to complete the living area.

Karline Ottoman | JOSS AND MAIN

Karline Ottoman | JOSS AND MAIN

Here's is a glimpse of the basic pieces mentioned above put together in our living room to-be, in perfect symmetry.

New House Living Room Basic Pieces | Classy Glam Living

You didn't think I would leave it at this, did you?  Well, it's the holiday season, I can't leave the room bare!  Let's shop for some accessories!

The floor looks like it can use an area rug.  A light coloured rug would liven up this living area against our dark floors..  I especially love this rug, with its silvery blue zebra pattern.  It's my subtle take on a daring pattern =)

WILDERNESS RUG | ONE KINGS LANE

WILDERNESS RUG | ONE KINGS LANE

Let's continue filling up some empty spots.  Artwork on the wall would be a great addition of some much needed patterns.  The architectural photographs of Lisa Russo have a neutral hue that works as a nice backdrop for the living area.  The stone detailing on this print will accentuate the panelling and mouldings of the space.

We can't miss ambiance lighting to enhance all the details of the living area.  This pair of elephant lamps add a bit of whimsy, while playing on the bluish-grey tones found throughout.

Hathi Table Lamp | JOSS AND MAIN

Hathi Table Lamp | JOSS AND MAIN

And there, we've covered a set of basic accessories to dress up our bare living room.  Now we can take that up a notch by winterizing the accessories, and jazzing up the space with some simple Holiday decor.

title pic.jpg

Sources:  water colour cushion - Craftberrybush; all other cushions - Indigo; fur throw - Restoration Hardware; faux Holiday arrangement - One Kings Lane; antique brass reindeers - Etsy.

This is the look we hope to achieve for our living area - an inviting tranquil space that will be an elegant focal point through the entryway.  By pulling the kitchen cabinet colour to add contrast in the living room, it creates a nice transition between the two spaces that are just across from each other (see layout in previous post).  The Mr. said he can be see himself being a happy Chef Honey looking into this space from the kitchen.

For me, I'll just be on the couch, taking a little nap while he's enjoying his new kitchen.  Just call me over to do the dishes after you're done cooking up a feast, dear.